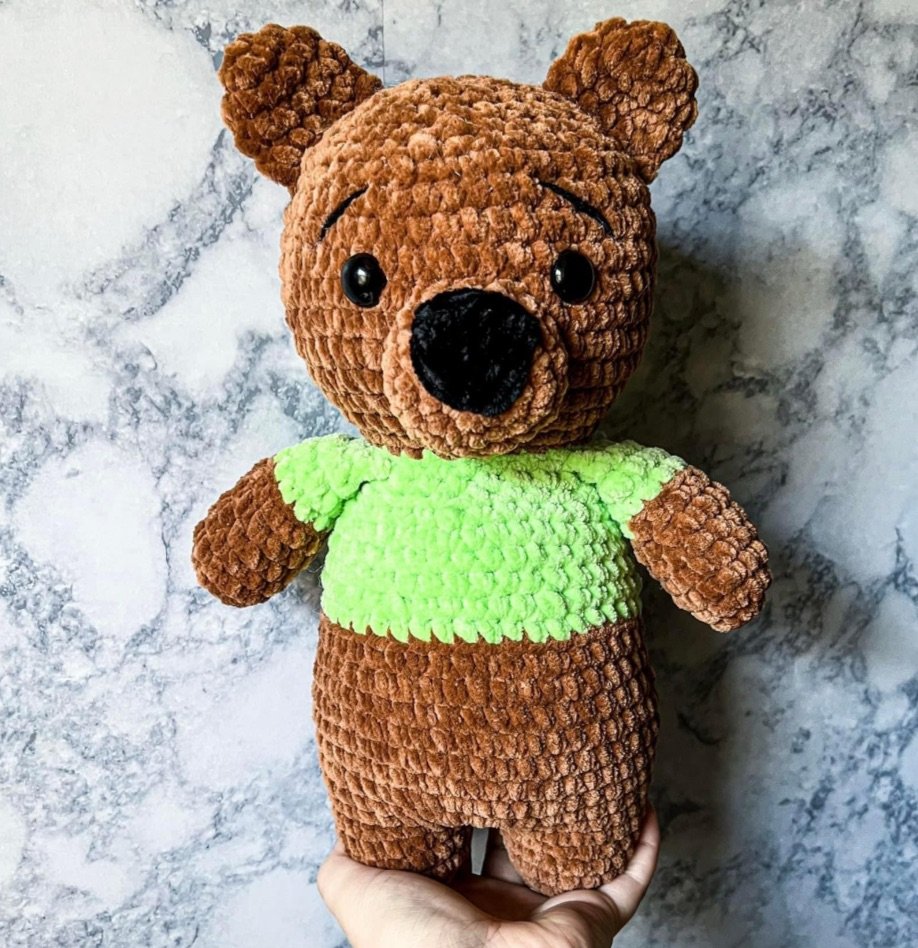
free-crochet-belly-bear-pattern-9-2.png

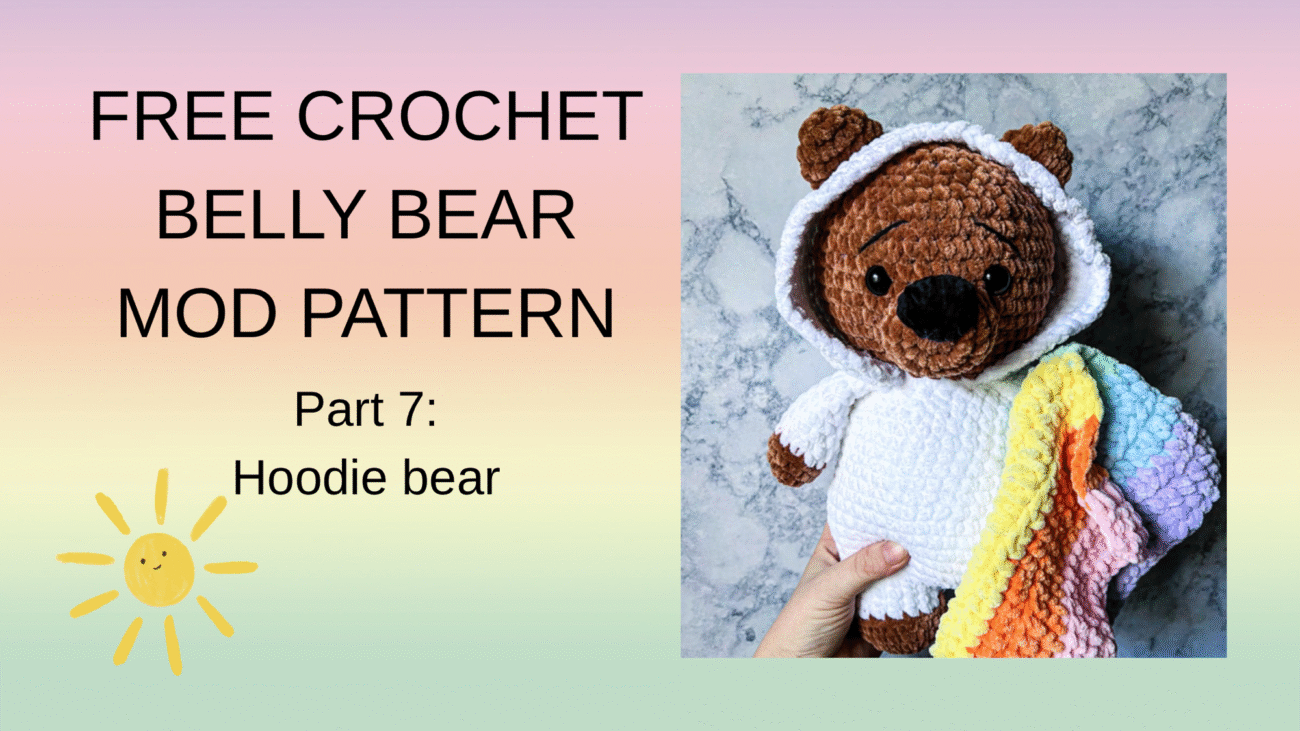
Belly bear 7-in-1- PART SEVEN HOODIE BEAR plush free modification crochet pattern

part seven of the 7-in-1 belly bear crochet pattern: Hoodie bear 🐻 THIS IS JUST A MOD TO MY EXISTING 7-in-1 BEAR PATTERN THAT YOU’LL FIND HERE.

You will be following the base pattern as normal for the most part BUT I have included what needs to be changed to create the hoodie bear.

If you enjoy this pattern, please give me a follow on social media and let me know what other free patterns you would love to see! Also, don’t forget to tag me in your creations on instagram. Happy crocheting!! 🧶

You can also purchase the formatted instant download PDF version of this pattern and all the mods together in one pdf on my archive etsy for $1.50. Now- let’s get to it!

MATERIALS & TOOLS

premier yarns parfait chunky in the colors:

white, teddy, cotton candy, tangerine, yellow, mint, baby blue, and lilac

-3.5 mm crochet hook

-Polyfil

-16, 18 or 20 mm safety/felt eyes (for parfait chunky)

-darning needle

-scissors

-4 weight yarn for embroidering eyebrows

ABBREVIATIONS

• CH – chain

• SC – single crochet

• INC – single crochet increase (2 SC in each stitch)

• DEC – decrease (I use the invisible decrease in all of my creations)

• SLST – slip stitch

• MC- Magic circle

• BLO- back loops only

This pattern is worked in continuous rounds. Do not slip stitch unless stated to do so. The pattern is written is US terminology. I am right handed and used the yarn under technique.

• DO NOT publish or sell this pattern in any form, if you’re sharing a pattern with a friend please share my blog with them

• You may sell creations made from this pattern

• I love seeing my patterns created by others!
Please tag me in your creations 🫶🏻

• My finished bear measures around 12″ tall

BELLY BEAR HOODIE MOD PATTERN
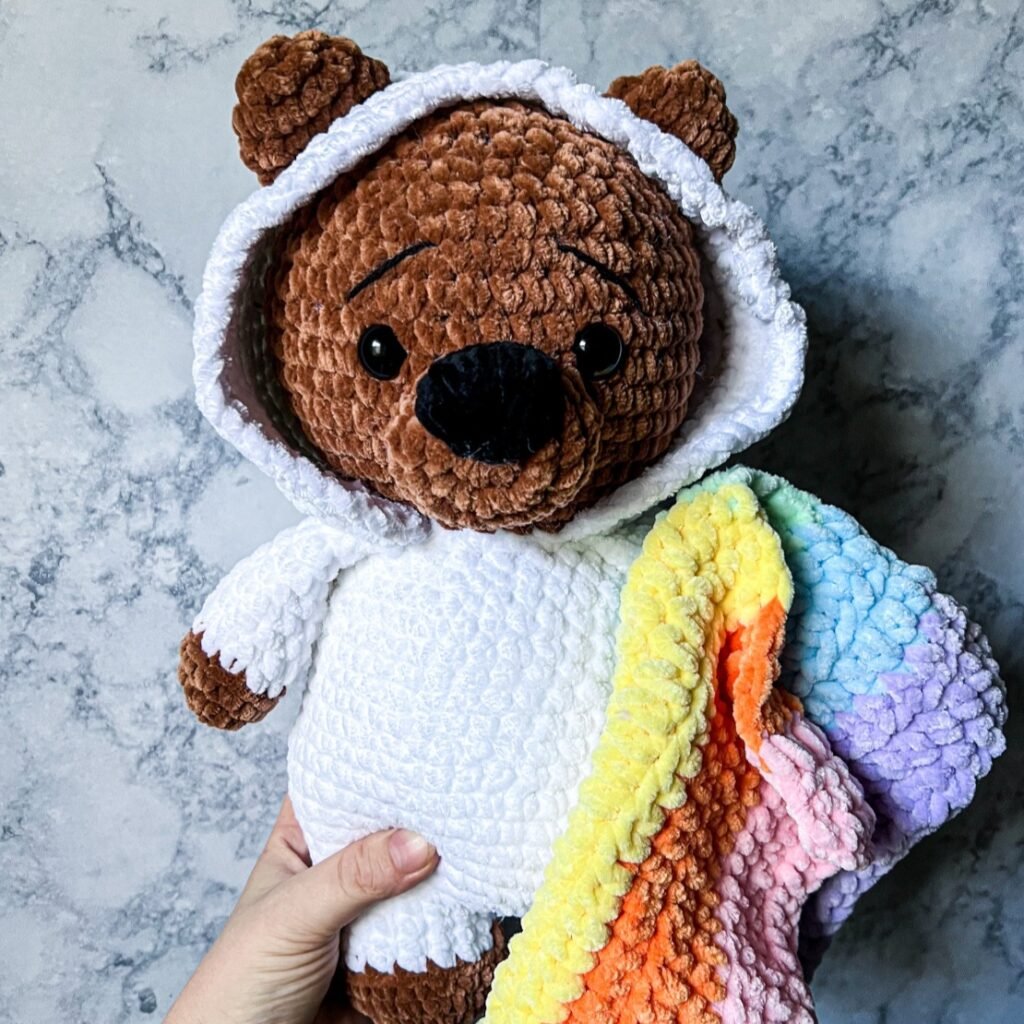
Again this is a MOD, please follow the base pattern and change only what is stated below:

Arms (make two)

Fur color

1. 6 sc into magic circle (6)

2. Inc x6 (12)

3. 12 sc around (12)

Color change to jumpsuit color

4. 12 sc in BLO (12)

5-11. 12 sc around- 7 rounds

Lightly stuff the arms. Sc 6 to close. fasten off, you don’t need to leave a long yarn tail for sewing. You will be crocheting the arms onto the body later on.

Legs (make two)

In fur color

1. 6 sc into magic circle (6)

2. Inc x6 (12)

3. 1 sc, inc x6 (18)

4. 18 sc around (18)

Color change to jump suit color

5. 18 sc in BLO (18)

6-7. 18 sc around- 2 rounds

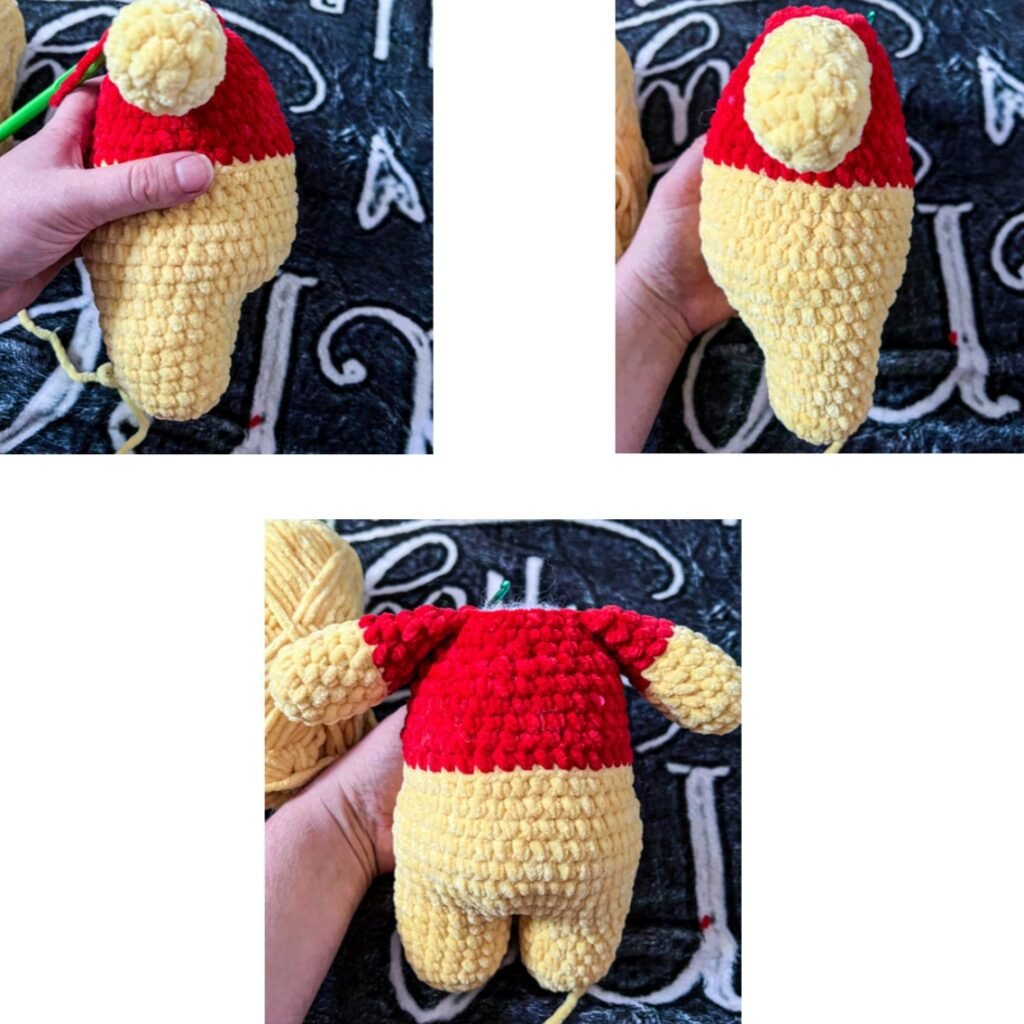
Continue the body in the jumpsuit color for the rest of the pattern and color change to fur color like normal on round 22. When you get to round 13; don’t sc in the BLO. Just sc as normal since there is no shirt color you’re changing to.

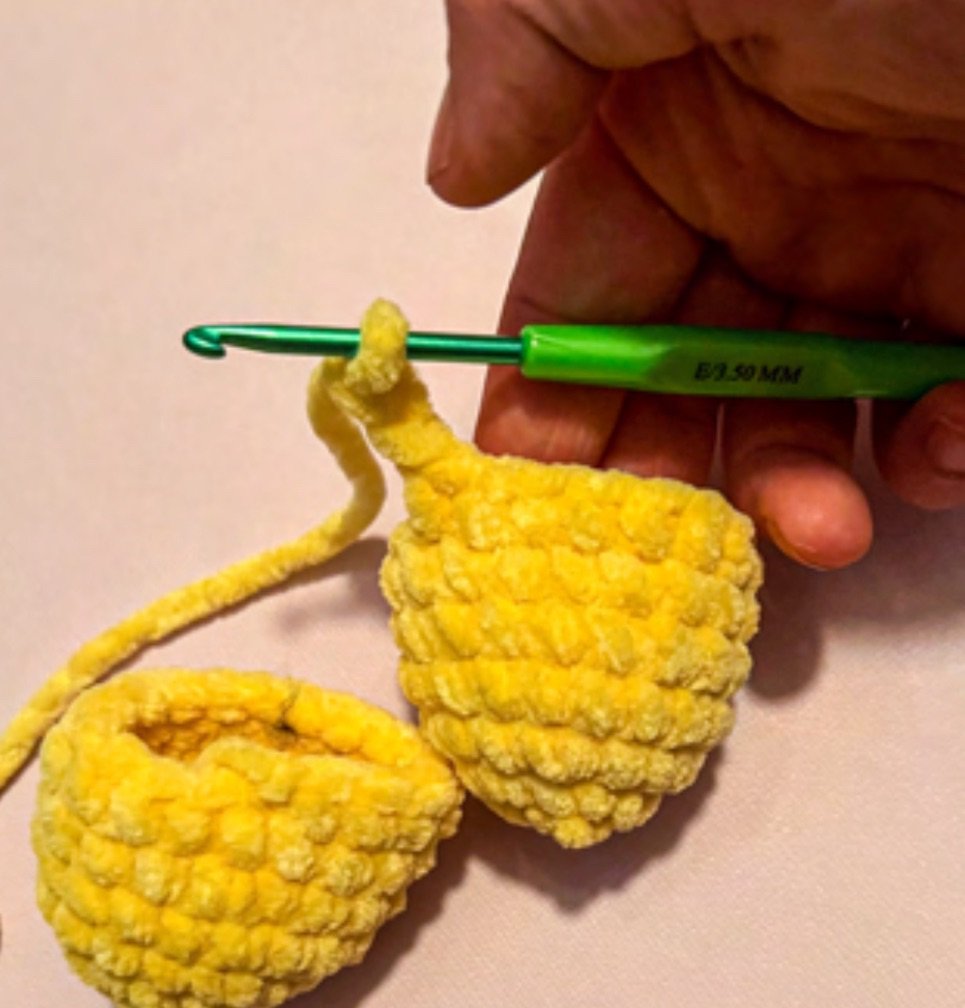
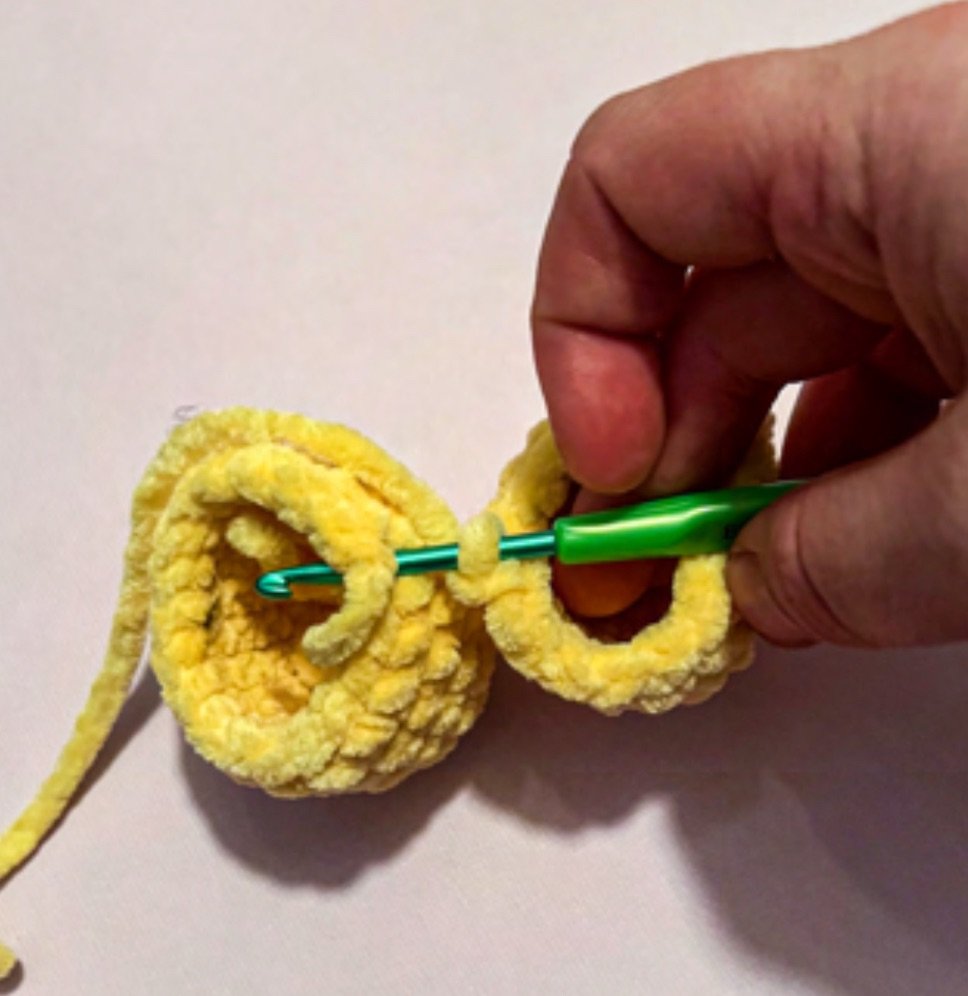
Hoodie: IT IS EASIER TO MAKE THE HOODIE FIRST AND SEW IT ON BEFORE PLACING YOUR EARS ON THE BEAR!

1. 6 sc into magic circle (6)

2. inc x6 (12)

3. 1 sc, inc x6 (18)

4. 2 sc, inc x6 (24)

5. 3 sc, inc x6 (30)

6. 4 sc, inc x6 (36)

7. 5 sc, inc x6 (42)

8. 6 sc, inc x 6 (48)

9. 7 sc, inc x6 (54)

10. 8 sc, inc x6 (60)

-after this part you will ch 1 and turn your work- not working in the round anymore.

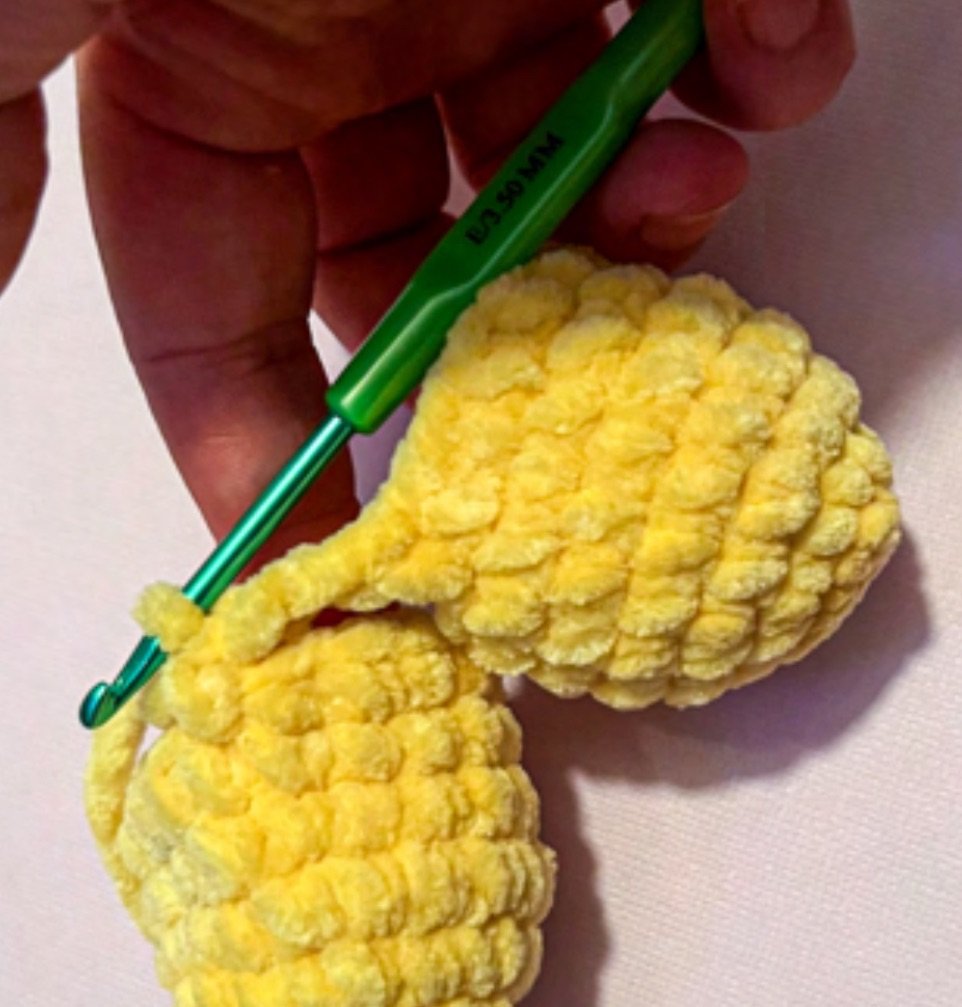
11-15. ch 1, 50 sc, ch 1 and turn. (You’re going to do this step 4 more times)

16. 16 sc, ch 6 and skip 6 stitches, 6 sc, ch 6 and skip 6 stitches, 16 sc, ch 1 and turn (50)

17. 16 sc, 6 sc chain where stitches were skipped. (You can just single crochet over that chain. You don’t need to put your single crochets actually into the chain. Just crochet over it so that chain is hidden) 6 sc, 6 sc where the chain is again, 16 sc ch 1 and turn (50)

18-19. 50 sc around (50) – 2 times.

Knot off & leave a long yarn tail for sewing the hood onto the bear. Sew the hood on.

Blanket- to do color changes, always change color on the last sc. I have included steps to remind you to do this.

starting with cotton candy color:

1. Ch 21

2. Sc in 2nd chain from hook, continue single crocheting down, ch1 and turn (20)

3. 20 sc *color change to tangerine on the last sc* ch 1 and turn (20)

4-5. 20 sc, ch 1 and turn *color change to yellow on the last sc of row 5 and then ch 1 and turn* – 2 rows

6-8. 20 sc, ch 1 and turn *color change to mint on the last sc of row 8 and then ch 1 and turn* -3 rows

9-11. 20 sc, ch 1 and turn *color change to baby blue on the last sc of row 11 and then ch 1 and turn* -3 rows

12-14. 20 sc, ch 1 and turn. *color change to lilac on the last sc of row 14 and then ch 1 and turn* -3 rows

15-17. 20 sc, ch 1 and turn – 3 rows

Knot off and weave in all of your ends.

to create the look of the bear holding the blanket you’ll be taking any color piece of yarn and weaving it in and out through the middle of the blanket. Sew it to the bears hand. Tada! He’s holding his blankie now!
CONGRATULATIONS! YOU FINISHED BELLY HOODIE CHRISTMAS MOD PATTERN 🐻

I hope you enjoyed this pattern and found it easy to follow. I will be posting the other modifications to this pattern to my blog as well!

free-crochet-belly-bear-pattern-5-2.png

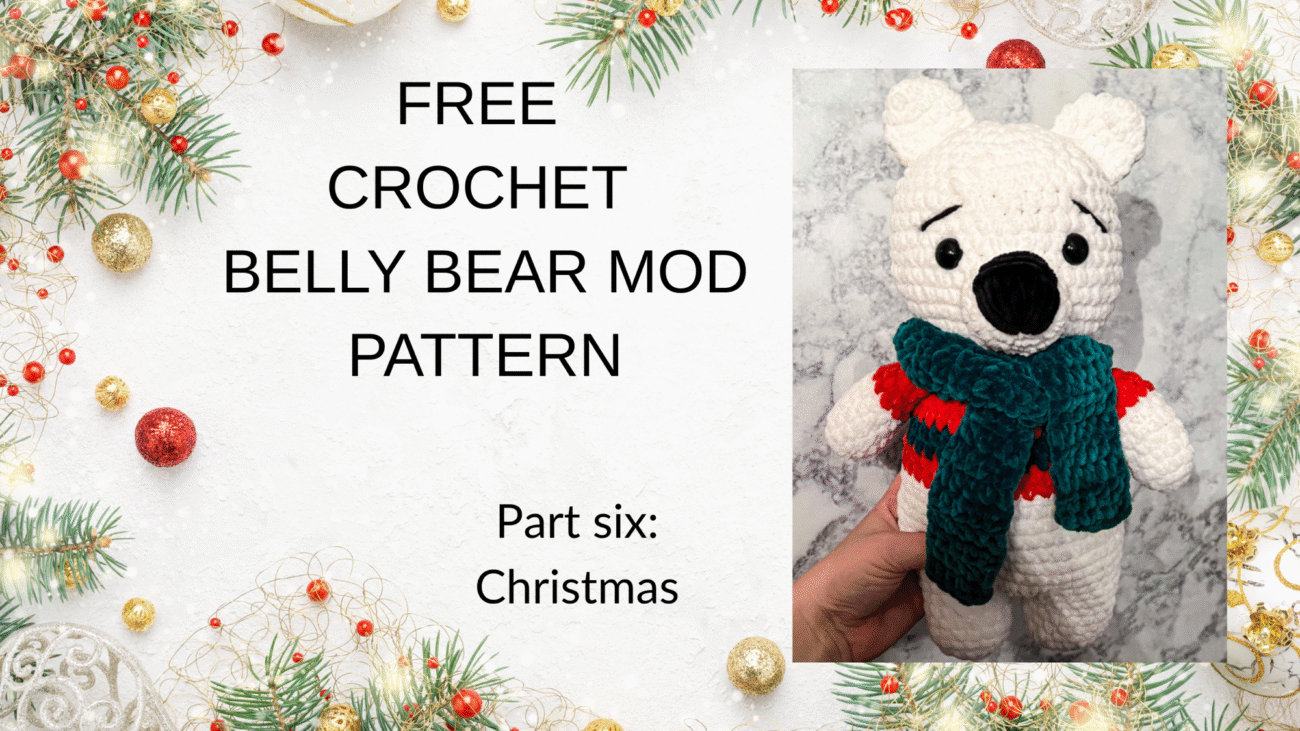
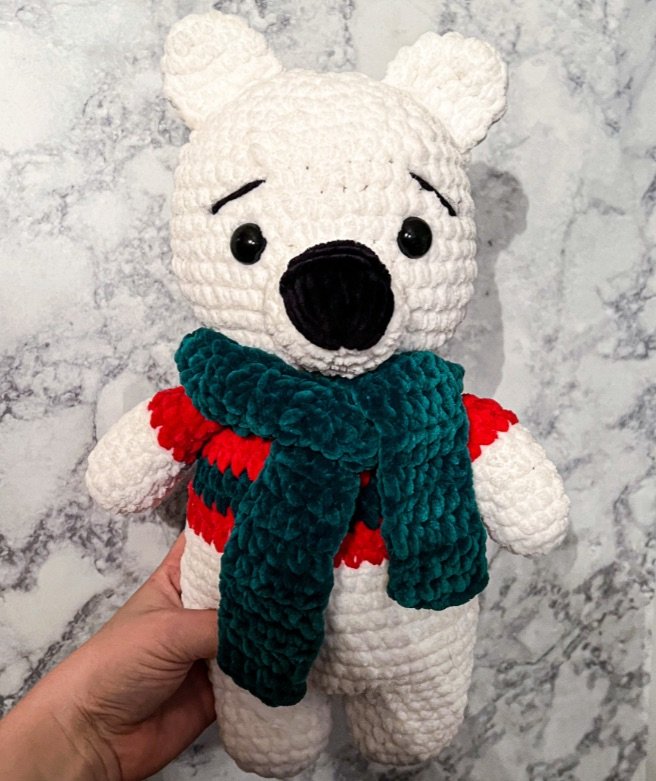
Belly bear 7-in-1- PART SIX CHRISTMAS BEAR plush free modification crochet pattern

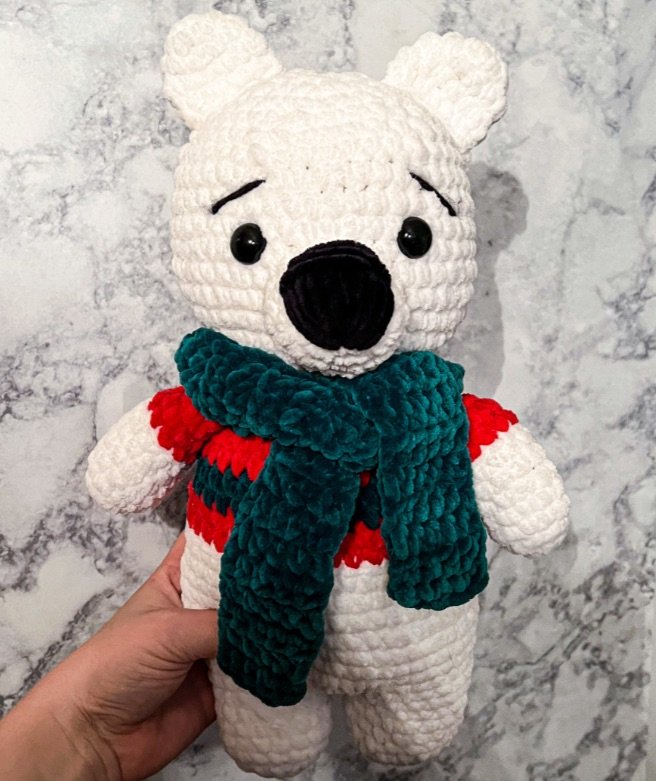
part six of the 7-in-1 belly bear crochet pattern: Christmas bear 🐻 THIS IS JUST A MOD TO MY EXISTING 7-in-1 BEAR PATTERN THAT YOU’LL FIND HERE

You will be following the base pattern as normal for the most part BUT I have included what needs to be changed to create the christmas bear.

If you enjoy this pattern, please give me a follow on social media and let me know what other free patterns you would love to see! Also, don’t forget to tag me in your creations on instagram. Happy crocheting!! 🧶

You can also purchase ad-free, formatted,  instant download PDF version of this pattern and all the mods on my archive etsy for $1.50. Now- let’s get to it!

MATERIALS & TOOLS

premier yarns parfait chunky in the colors:

white, poppy and emerald

-3.5 mm crochet hook

-Polyfil

-16, 18 or 20 mm safety/felt eyes (for parfait chunky)

-darning needle

-scissors

-4 weight yarn for embroidering eyelashes

ABBREVIATIONS

• CH – chain

• SC – single crochet

• INC – single crochet increase (2 SC in each stitch)

• DEC – decrease (I use the invisible decrease in all of my creations)

• SLST – slip stitch

• MC- Magic circle

• BLO- back loops only

This pattern is worked in continuous rounds. Do not slip stitch unless stated to do so. The pattern is written is US terminology. I am right handed and used the yarn under technique.

• DO NOT publish or sell this pattern in any form, if you’re sharing a pattern with a friend please share my blog with them

• You may sell creations made from this pattern

• I love seeing my patterns created by others!
Please tag me in your creations 🫶🏻

• My finished bear measures around 12″ tall

BELLY BEAR CHRISTMAS MOD PATTERN

Again this is a MOD, please follow the base pattern and change only what is stated below:

Arms (make two)

in white color

1. 6 sc into mc (6)

2. Inc x6 (12)

3-7. 12 sc around (12)

8. color change to poppy: BLO 12 sc (12)

9-11. 12sc around- 3 rounds

Lightly stuff the arms. Fold in half sc closed with 6 sc. Knot off and cut the yarn. You don’t need to leave a long yarn tail because you will be crocheting the arms onto the body later on.

Shirt

starting at round 13 on the body: color change to poppy: BLO 42 sc

round 14: poppy

round 15: emerald

round 16: emerald

round 17:poppy

round 18: poppy

round 19: emerald

round 20: emerald

round 21: poppy

-CONTINUE THE BASE PATTERN AS NORMAL-

Scarf

1. ch 6, place hook in the 2nd chain from the hook and 5 hdc down the chain.

2. Ch 1 and turn, 5 hdc- you will repeat this sequence for 50 rows.

CONGRATULATIONS! YOU FINISHED BELLY BEAR CHRISTMAS MOD PATTERN 🐻

I hope you enjoyed this pattern and found it easy to follow. I will be posting the other modifications to this pattern to my blog as well!
free-crochet-belly-bear-pattern-5-1.png

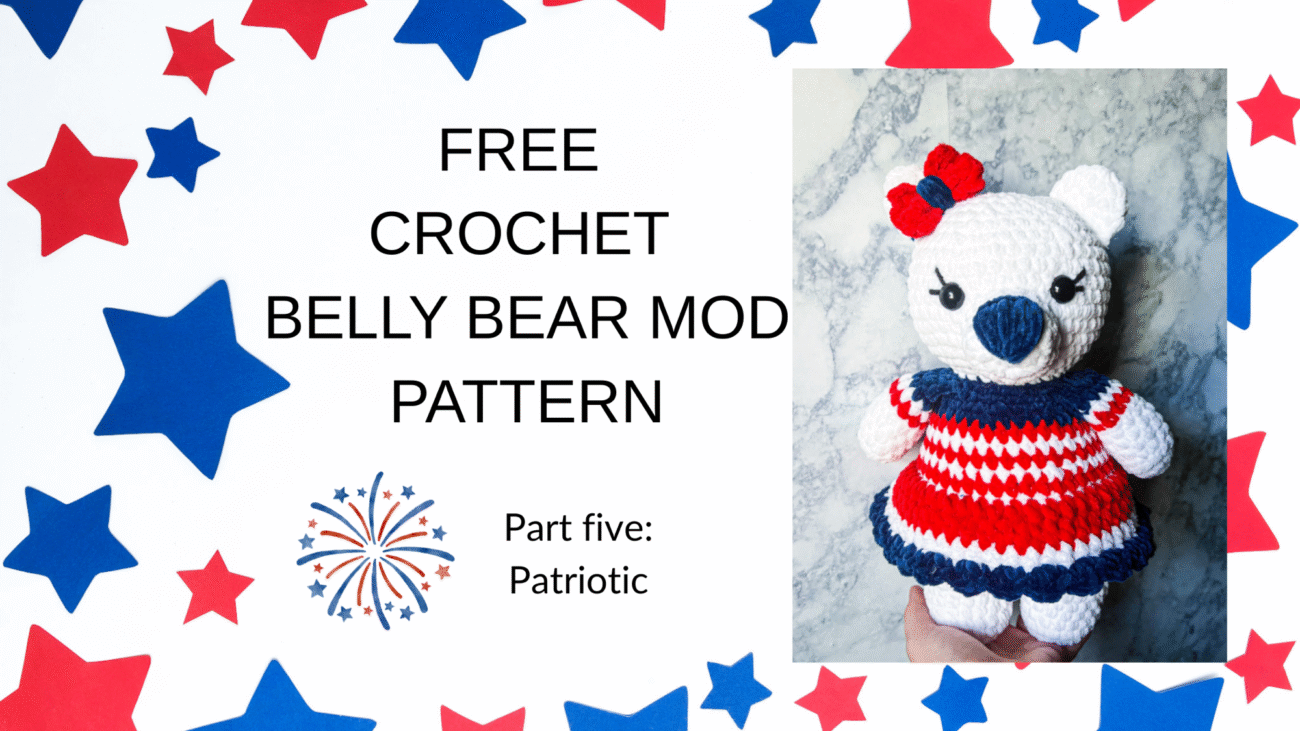
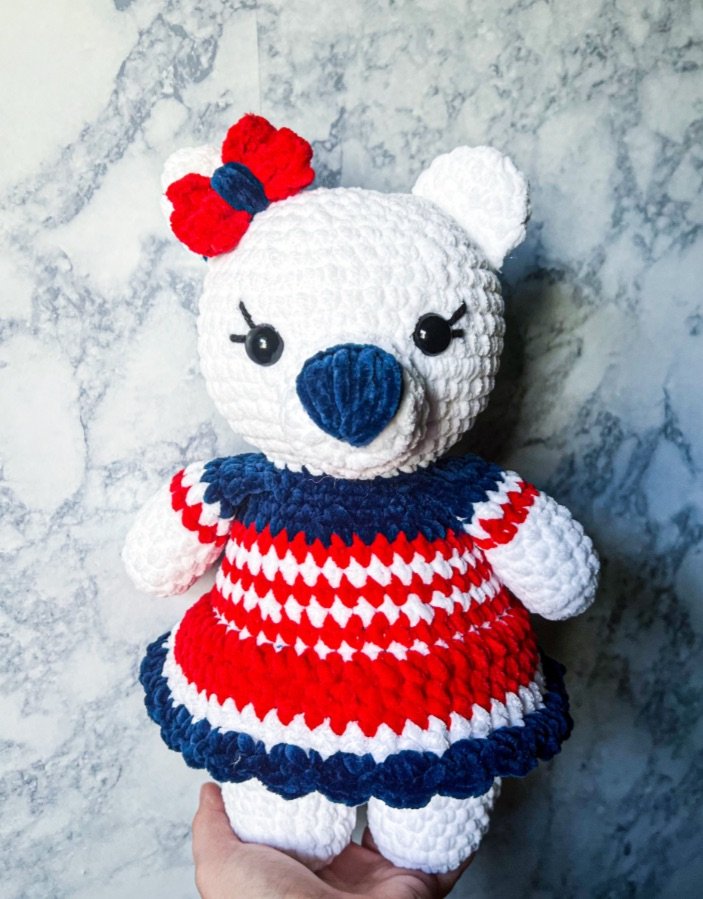
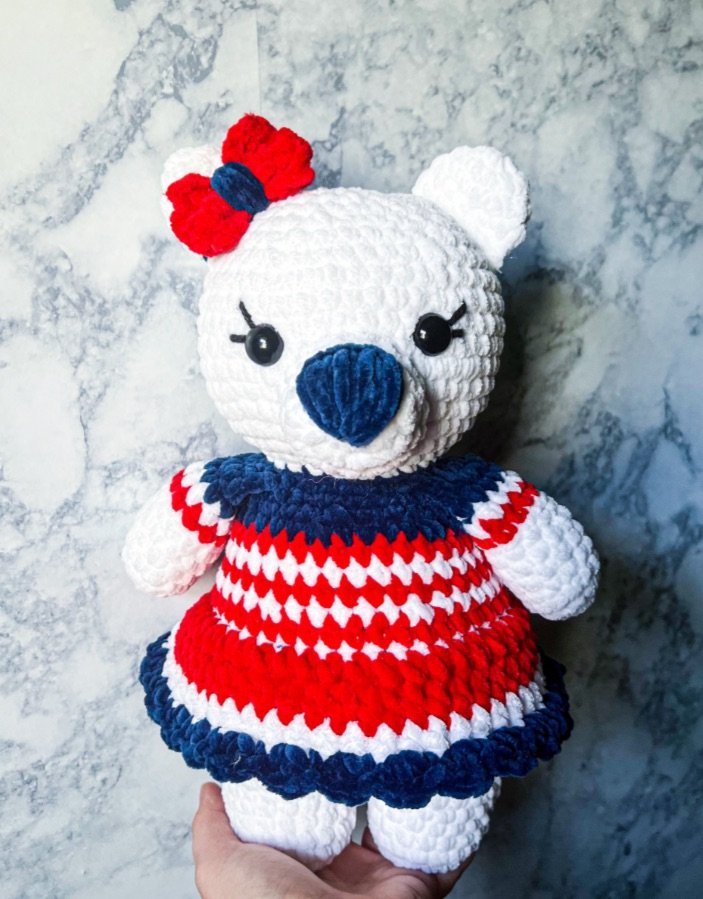
Belly bear 7-in-1- PART FIVE PATRIOTIC BEAR plush free modification crochet pattern

part five of the 7-in-1 belly bear crochet pattern: Patriotic bear 🐻 THIS IS JUST A MOD TO MY EXISTING 7-in-1 BEAR PATTERN THAT YOU’LL FIND HERE.

You will be following the base pattern as normal for the most part BUT I have included what needs to be changed to create the patriotic bear.

If you enjoy this pattern, please give me a follow on social media and let me know what other free patterns you would love to see! Also, don’t forget to tag me in your creations on instagram. Happy crocheting!! 🧶

You can also purchase the formatted instant download PDF version of this pattern and all the mods together in one pdf on my archive etsy for $1.50. Now- let’s get to it!

MATERIALS & TOOLS

premier yarns parfait chunky in the colors:

white, poppy and navy

-3.5 mm crochet hook

-Polyfil

-16, 18 or 20 mm safety/felt eyes (for parfait chunky)

-darning needle

-scissors

-4 weight yarn for embroidering eyelashes

ABBREVIATIONS

• CH – chain

• SC – single crochet

• INC – single crochet increase (2 SC in each stitch)

• DEC – decrease (I use the invisible decrease in all of my creations)

• SLST – slip stitch

• MC- Magic circle

• BLO- back loops only

This pattern is worked in continuous rounds. Do not slip stitch unless stated to do so. The pattern is written is US terminology. I am right handed and used the yarn under technique.

• DO NOT publish or sell this pattern in any form, if you’re sharing a pattern with a friend please share my blog with them

• You may sell creations made from this pattern

• I love seeing my patterns created by others!
Please tag me in your creations 🫶🏻

• My finished bear measures around 12″ tall

BELLY BEAR PATRIOTIC MOD PATTERN

Again this is a MOD, please follow the base pattern and change only what is stated below:

Arms (make two)

in white color

1. 6 sc into mc (6)

2. Inc x6 (12)

3-7. 12 sc around (12)

8. color change to poppy: BLO 12 sc (12)

9. Color change to white: 12 sc around (12)

10-11. color change to navy: 12 sc around – 2 rounds

Lightly stuff the arms. Fold in half sc closed with 6 sc. Knot off and cut the yarn. You don’t need to leave a long yarn tail because you will be crocheting the arms onto the body later on.

Shirt & Dress

starting at round 13 on the body: color change to poppy: blo 42 sc

round 14: white

round 15: poppy

round 16: white

round 17:poppy

round 18-21: navy

-CONTINUE THE BASE PATTERN AS NORMAL-

Starting the dress

In the color poppy

ch 1 does not count as a stitch.

1. Attach to the front loops of the section we single crocheted into the blo between switching the fur color and shirt color. (This is round 13 of the body) Attach onto the back of the bear where the color change started. slip stitch to attach, ch 1 and hdc into the same stitch. hdc around (42 hdc)

2. Join to 1st hdc with a slip stitch. Ch1, 6 hdc, inc x6 into each stitch (48) color change to white on the last hdc

3. Join to 1st hdc with a slip stitch. Ch1, 48 hdc around (48) color change to navy on the last hdc

4. Join to 1st hdc with a slip stitch, ch 1. Place 1 hdc, 1 sc, 1 hdc into 1 stitch then slip stitch into the next stitch. Repeat this sequence around.

Join to 1st hdc with a sl st. Tie off and weave in ends.

Bow

In poppy color

1. Ch 7

2-6. 6 sc down the chain, ch 1 and turn

Knot off and hide yarn tails.

Take a long piece of navy colored yarn and wrap it around the bow. Secure it with a few knots. I tie the bow onto the bear ears and cut off the excess yarn.

CONGRATULATIONS! YOU FINISHED BELLY BEAR PATRIOTIC MOD PATTERN 🐻

I hope you enjoyed this pattern and found it easy to follow. I will be posting the other modifications to this pattern to my blog as well!
free-crochet-belly-bear-pattern-4-1.png

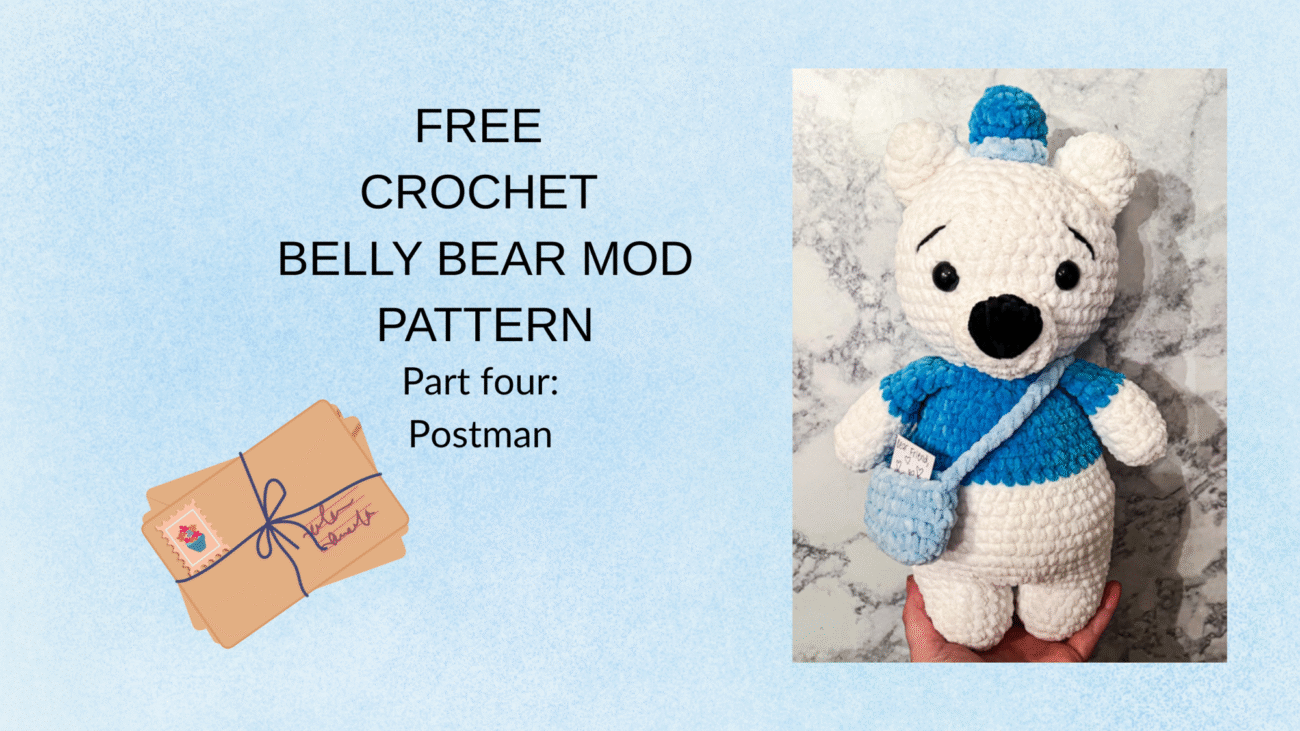
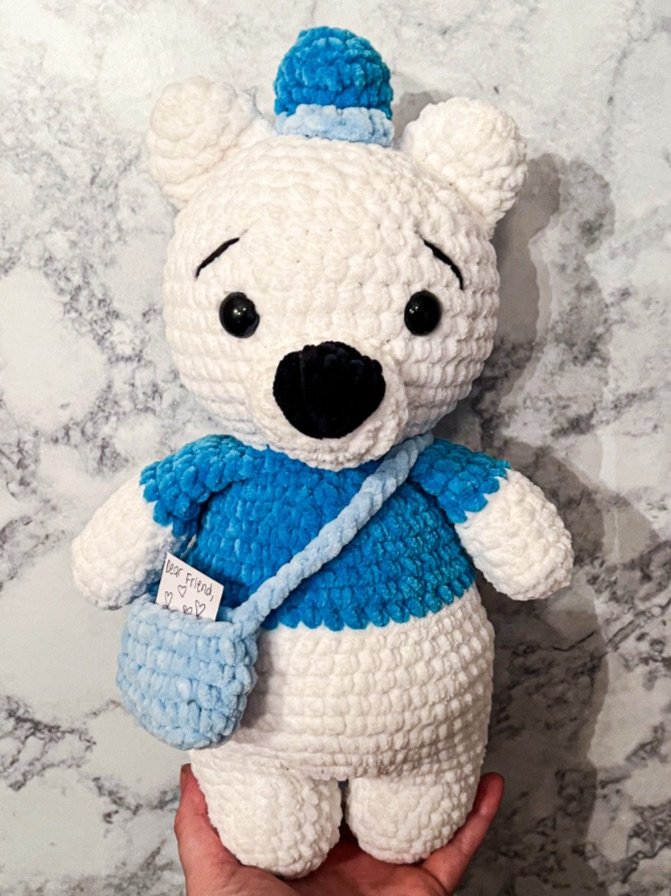
Belly bear 7-in-1- PART FOUR POSTMAN BEAR plush free modification crochet pattern

part four of the 7-in-1 belly bear crochet pattern: Postman bear 🐻 THIS IS JUST A MOD TO MY EXISTING 7-in-1 BEAR PATTERN THAT YOU’LL FIND HERE.

You will be following the base pattern as normal for the most part BUT I have included what needs to be changed to create the postman bear.

If you enjoy this pattern, please give me a follow on social media and let me know what other free patterns you would love to see! Also, don’t forget to tag me in your creations on instagram. Happy crocheting!! 🧶

You can also purchase ad-free, formatted,  instant download PDF version of this pattern and all the mods on my archive etsy for $1.50. Now- let’s get to it!

MATERIALS & TOOLS

premier yarns parfait chunky in the colors:

white, light blue, azure & black.

-3.5 mm crochet hook

-Polyfil

-16, 18 or 20 mm safety/felt eyes (for parfait chunky)

-darning needle

-scissors

-4 weight yarn for embroidering eyebrows

ABBREVIATIONS

• CH – chain

• SC – single crochet

• INC – single crochet increase (2 SC in each stitch)

• DEC – decrease (I use the invisible decrease in all of my creations)

• SLST – slip stitch

• MC- Magic circle

• BLO- back loops only

This pattern is worked in continuous rounds. Do not slip stitch unless stated to do so. The pattern is written is US terminology. I am right handed and used the yarn under technique.

• DO NOT publish or sell this pattern in any form, if you’re sharing a pattern with a friend please share my blog with them

• You may sell creations made from this pattern

• I love seeing my patterns created by others!
Please tag me in your creations 🫶🏻

• My finished bear measures around 12″ tall

BELLY BEAR POSTMAN MOD PATTERN

Again this is a MOD, please follow the base pattern and change only what is stated below:

Arms (make two)

in white color

1. 6 sc into mc (6)

2. Inc x6 (12)

3-7. 12 sc around- 5 rounds

8. Color change to azure color: BLO 12 sc (12)

9-11. 12 sc around- 3 rounds

Lightly stuff the arms. Fold in half sc closed with 6 sc. Knot off and cut the yarn.

You don’t need to leave a long yarn tail.

-CONTINUE THE BASE PATTERN AS NORMAL BUT CROCHETING IN THE COLOR WHITE.. WHEN YOU GET TO STEP 13 IN THE BASE PATTERN, COLOR CHANGE TO AZURE COLOR FOR THE SHIRT AND CONTINUE THE PATTERN AS NORMAL-

Messenger Bag

In light blue color

1. Ch 11

2. Single crochet in the 2nd ch from hook, 8 sc down the ch, place 2 sc in the last ch (11)

3. Working on the bottom side of the chain; 9 sc down the ch and place 2 sc in the last ch (11)

4. BLO 22 sc

5-7. 22 sc around- 3 rounds

start chaining the strap to your desired length. Once you reach desired length, knot off and sew the strap to the side of the bag that doesn’t have a strap yet. It’s easier to place the messenger bag on the bear first before sewing the strap.

you can even give him a piece of mail! I use a small piece of paper to do this and cut it to fit in the bag, I write “dear friend” on it with hearts

Postman hat

in azure color

1. 6 sc into mc (6)

2. Inc x 6 (12)

3. 12 sc BLO (12)

4-5. 12 sc around (12) -2 rounds

6. 4 sc, color change to light blue: 1 sc and 2 hdc into 1 stitch; 2 hdc into next stitch; 2 hdc and 1 sc into next stitch- color change to azure; 5 sc (17)

fasten off and leave a long yarn tail for sewing to the head, in between the ears.

CONGRATULATIONS! YOU FINISHED BELLY BEAR SCARECROW MOD PATTERN 🐻

I hope you enjoyed this pattern and found it easy to follow. I will be posting the other modifications to this pattern to my blog as well!
free-crochet-belly-bear-pattern-3-1.png

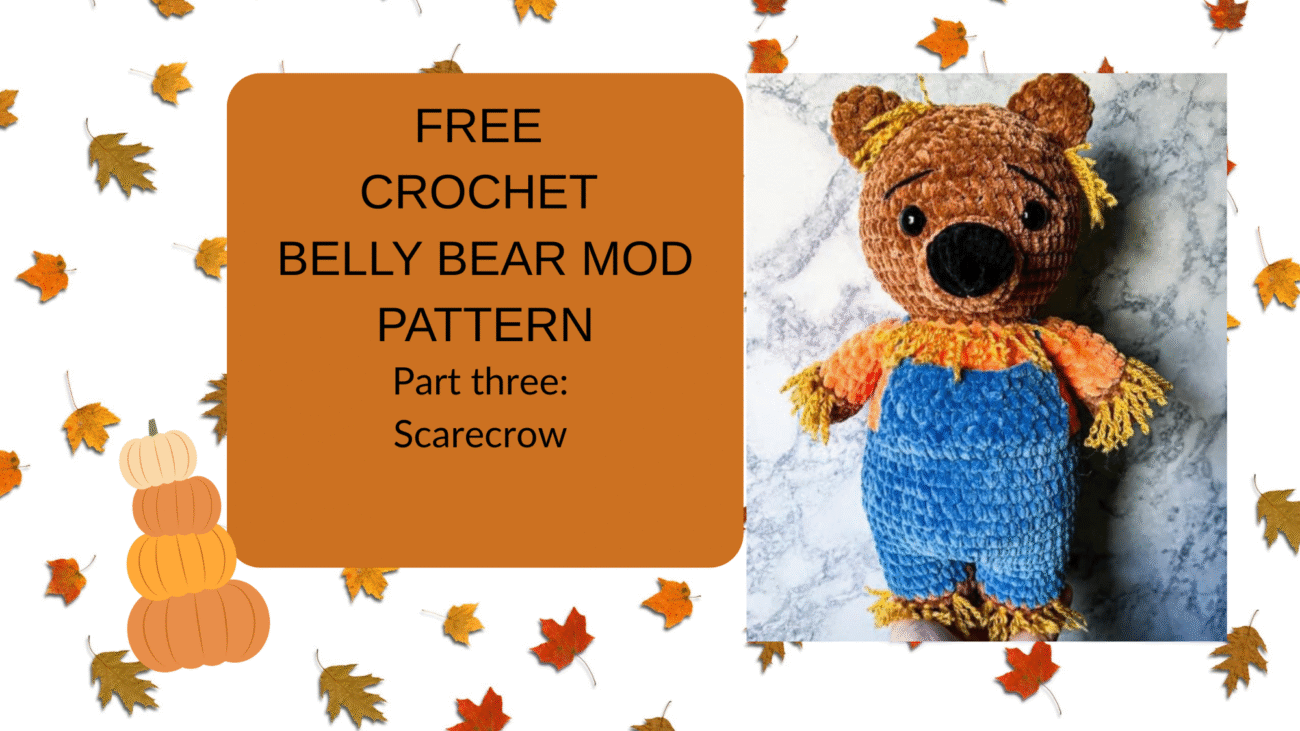
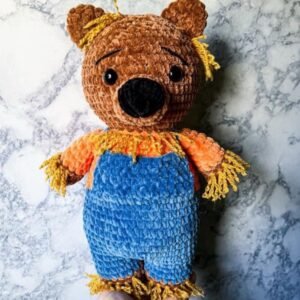
Belly bear 7-in-1- PART THREE SCARECROW BEAR plush free modification crochet pattern

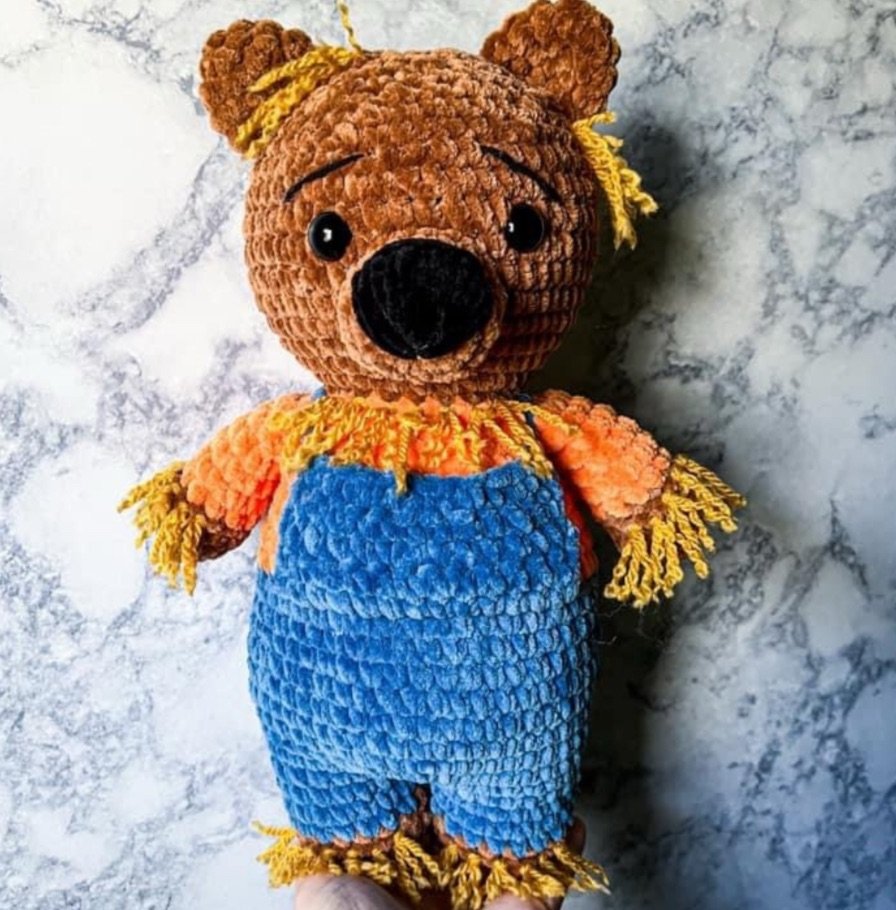
part three of the 7-in-1 belly bear crochet pattern: Scarecrow bear 🐻 THIS IS JUST A MOD TO MY EXISTING 7-in-1 BEAR PATTERN THAT YOU’LL FIND HERE.

You will be following the base pattern as normal for the most part BUT I have included what needs to be changed to create the scarecrow bear.

If you enjoy this pattern, please give me a follow on social media and let me know what other free patterns you would love to see! Also, don’t forget to tag me in your creations on instagram. Happy crocheting!! 🧶

You can also purchase the formatted instant download PDF version of this pattern and all the mods together in one pdf on my archive etsy for $1.50. Now- let’s get to it!

MATERIALS & TOOLS

premier yarns parfait chunky in the colors:

Teddy, tangerine, cornflower & black.

-3.5 mm crochet hook

-Polyfil

-16, 18 or 20 mm safety/felt eyes (for parfait chunky)

-darning needle

-scissors

-4 weight yarn for embroidering eyebrows and the straw look

ABBREVIATIONS

  • CH – chain
  • SC – single crochet
  • INC – single crochet increase (2 SC in each stitch)
  • DEC – decrease (I use the invisible decrease in all of my creations)
  • SLST – slip stitch
  • MC- Magic circle
  • BLO- back loops only

This pattern is worked in continuous rounds. Do not slip stitch unless stated to do so. The pattern is written is US terminology. I am right handed and used the yarn under technique.

  • DO NOT publish or sell this pattern in any form, if you’re sharing a pattern with a friend please share my blog with them
  • You may sell creations made from this pattern
  • I love seeing my patterns created by others! Please tag me in your creations 🫶🏻
  • My finished bear measures around 12” tall

BELLY BEAR SCARECROW MOD PATTERN

Again this is a MOD, please follow the base pattern and change only what is stated below:

Arms (make two)

in teddy color

1. 6 sc into mc (6)

2. Inc x6 (12)

3-4. 12 sc around- 2 rounds

color change to tangerine color:

5. BLO 12 sc (12)

6-11. 12 sc around -6 rounds

Lightly stuff the arms. Fold in half sc closed with 6 sc. Knot off and cut the yarn. You don’t need to leave a long yarn tail.

Legs & Pants

fasten off the first leg but not the second

in teddy color

1. 6 sc into mc (6)

2. Inc x6 (12)

3. 1 sc, inc x6 (18)

4-5. 18 sc around- 2 rounds

-color change to cornflower color-

6. BLO 18 sc

7. 18 sc around- 1 round

-CONTINUE THE BASE PATTERN AS NORMAL BUT CROCHETING IN THE CORNFLOWER COLOR YOU USED FOR THE PANTS. WHEN YOU GET TO STEP 13 IN THE BASE PATTERN, COLOR CHANGE TO THE TANGERINE SHIRT COLOR AND CONTINUE THE PATTERN AS NORMAL-

Adding straw

with a 4 weight yellow yarn; add straw in the front loops of the sections we crocheted into the back loops of- his legs, arms, neck, and add a few pieces of yarn to his head as well near his ears if you’d like.

instructions continued

this one may be a little more difficult to understand in writing so I also included a video from start to finish if that extra help is needed.

top part of overalls

(ch 1 does not count as a stitch)

1. Turn the bear over and find your color change. Count over 18 sc and attach your yarn into that 18th stitch with a slip stitch. Ch 1 and make 1 sc into that same stitch.

2. place 1 sc into each of the next 12 front loop stitches. Ch 1 and turn.

3-6. 13 sc across, ch 1 and turn -4 rows

7. on the last row you will knot off your yarn and leave a long yarn tail for creating the straps. You will take your yarn and go to the back of the bear and attach it by going through one of the front loops in the middle of the bear. Pull the yarn tail back up towards the overalls And attach it into the corner of the overalls.

Knot it off and then weave in your yarn tail.

The video helps better explain this part if you need extra help:

• overalls video help

• creating the straw effect

• straw effect on the head

CONGRATULATIONS! YOU FINISHED BELLY BEAR SCARECROW MOD PATTERN 🐻

I hope you enjoyed this pattern and found it easy to follow. I will be posting the other modifications to this pattern to my blog as well!
free-crochet-belly-bear-pattern-2-1.png

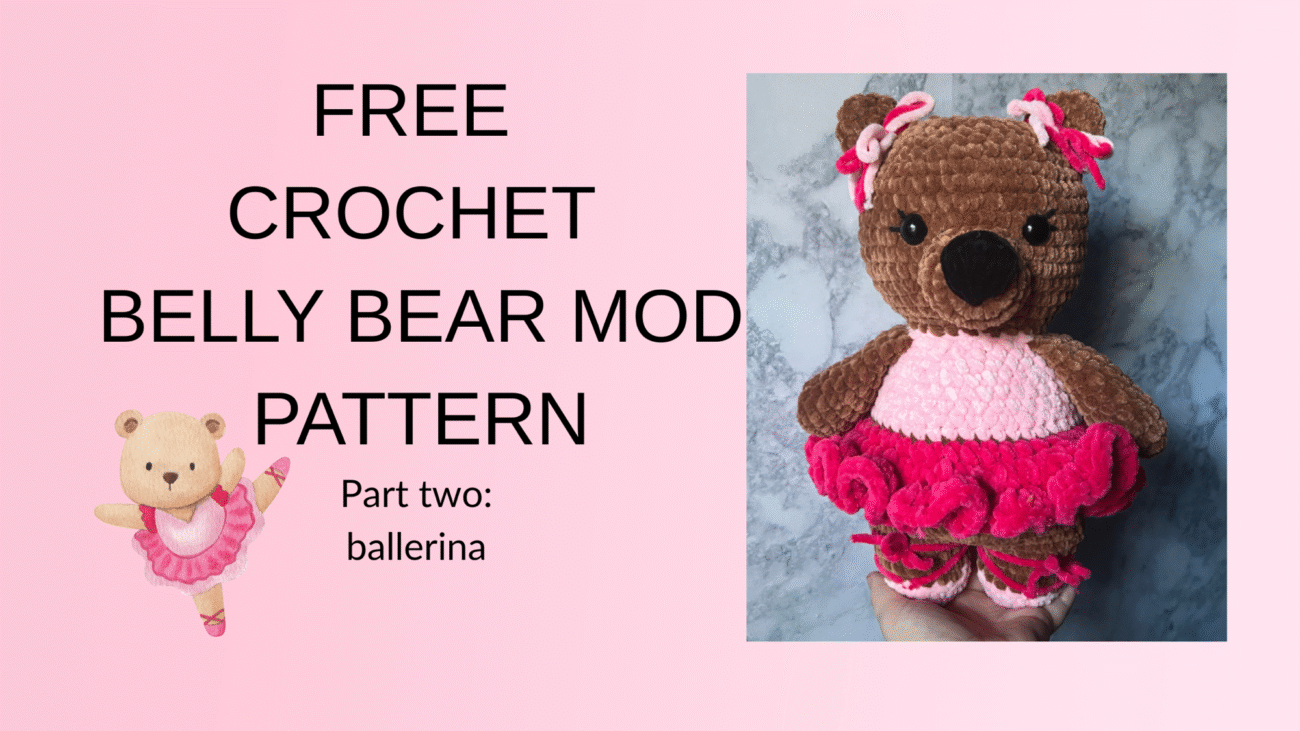
Belly bear 7-in-1- PART TWO BALLERINA BEAR plush free modification crochet pattern

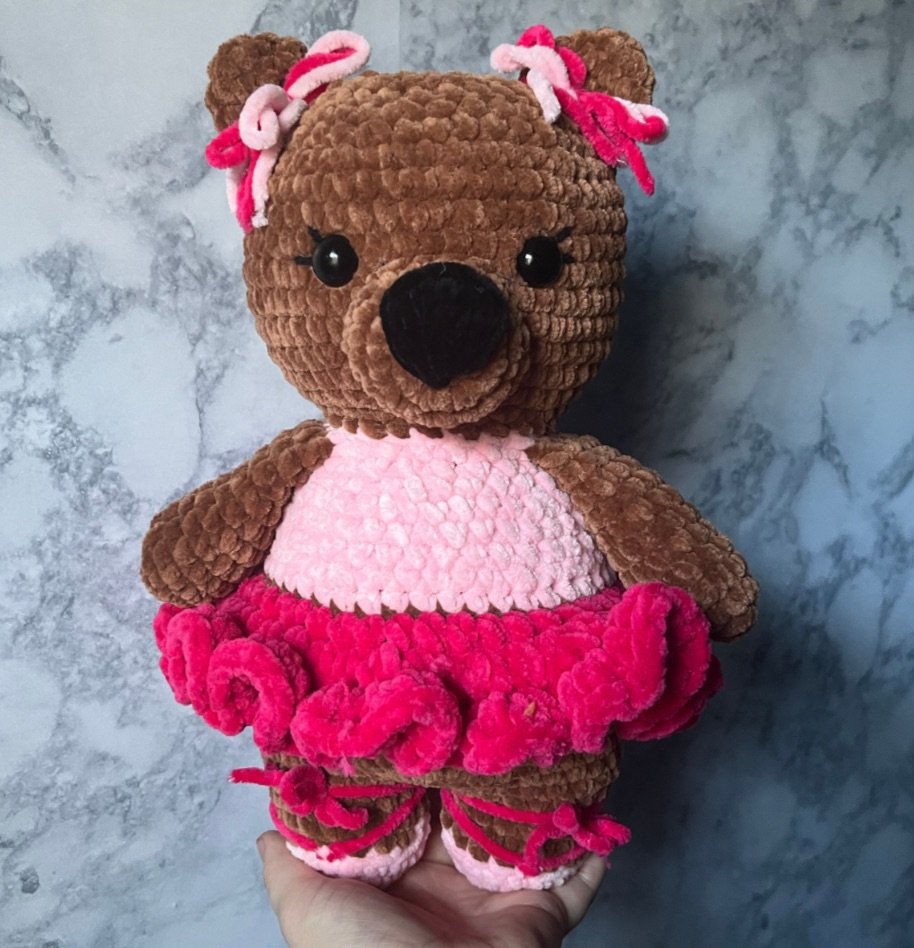
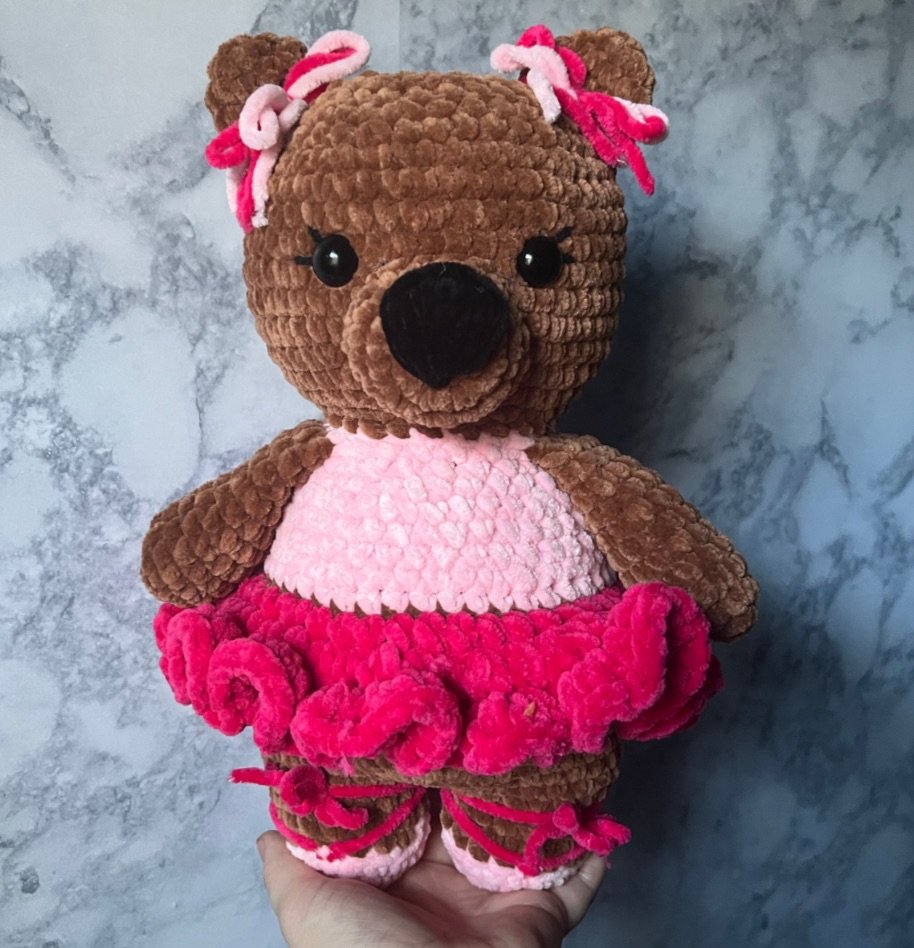
part two of the 7-in-1 belly bear crochet pattern: Ballerina bear 🩰🐻 THIS IS JUST A MOD TO MY EXISTING 7-in-1 BEAR PATTERN THAT YOU’LL FIND HERE.

You will be following the base pattern as normal for the most part BUT I have included what needs to be changed to create the ballerina bear.

If you enjoy this pattern, please give me a follow on social media and let me know what other free patterns you would love to see! Also, don’t forget to tag me in your creations on instagram. Happy crocheting!! 🧶

You can also purchase the formatted instant download PDF version of this pattern and all the mods together in one pdf on my archive etsy for $1.50. Now- let’s get to it!

MATERIALS & TOOLS

premier yarns parfait chunky in the colors:

Teddy, ballet pink, hot pink & black.

-3.5 mm crochet hook

-Polyfil

-16, 18 or 20 mm safety/felt eyes (for parfait chunky)

-darning needle

-scissors

-4 weight yarn for

embroidering eyelashes

ABBREVIATIONS

  • CH – chain
  • SC – single crochet
  • INC – single crochet increase (2 SC in each stitch)
  • DEC – decrease (I use the invisible decrease in all of my creations)
  • SLST – slip stitch
  • MC- Magic circle
  • BLO- back loops only

This pattern is worked in continuous rounds. Do not slip stitch unless stated to do so. The pattern is written is US terminology. I am right handed and used the yarn under technique.

  • DO NOT publish or sell this pattern in any form, if you’re sharing a pattern with a friend please share my blog with them
  • You may sell creations made from this pattern
  • I love seeing my patterns created by others! Please tag me in your creations 🫶🏻
  • My finished bear measures around 12” tall

BELLY BEAR BALLERINA MOD PATTERN

Again this is a MOD, please follow the base pattern and change only what is stated below:

Arms (make two)

in teddy color

1. 6 sc into mc (6)

2. Inc x6 (12)

3-11. 12 sc around (12) -9 rounds

Lightly stuff the arms. Fold in half sc closed with 6 sc. Knot off and cut the yarn. You don’t need to leave a long yarn tail, you’ll be crocheting the arms onto the body later on.

Ear bows

cut off two long pieces of yarn in the colors you used for the tutu and shirt and tie a bow around the bears ears after they’re sewed onto the head. Cut off excess yarn.

Shoes & Legs (make two)

fasten off the first leg but not the second

in ballet pink

1. 6 sc into mc (6)

2. Inc x6 (12)

3. 1 sc, inc x6 (18)

4. 18 sc around (18)

-color change to teddy color-

5. BLO 18 sc

6-7. 18 sc around- 2 rounds

-now follow the BASE pattern as normal starting at round 1 on the body, when you get to round 13 color change to ballet pink-

To create the ties on the shoes:

with the same color you use for the tutu. Cut off a long piece of yarn. Find the middle of the shoe and attach your yarn into the front loop. Wrap both pieces of yarn around in an “x” to create the ballet slippers. Tie a bow and cut off the remaining amount of yarn to make them even.

Tutu modification

ch 1 does not count as a stitch

in the color bright pink

1. Attach to the front loops of the section we single crocheted into the BLO between switching the fur color and shirt color. (This is round 13 of the body)

Attach onto the back of the bear where the color change started. slip stitch to attach, ch 1 and hdc into the same stitch. hdc around (42 hdc)

2. Join to 1st hdc with a slip stitch. Ch 1, place 2 hdc into each stitch (84 hdc)

3. Join to 1st hdc with a slip stitch. Ch 1, place 3 hdc into each stitch (252 hdc)

Join to 1st hdc with a sl st. Tie off and weave in ends.

CONGRATULATIONS! YOU FINISHED BELLY BEAR BALLERINA MOD PATTERN 🐻

I hope you enjoyed this pattern and found it easy to follow. I will be posting the other modifications to this pattern to my blog as well!
free-crochet-belly-bear-pattern-1.png

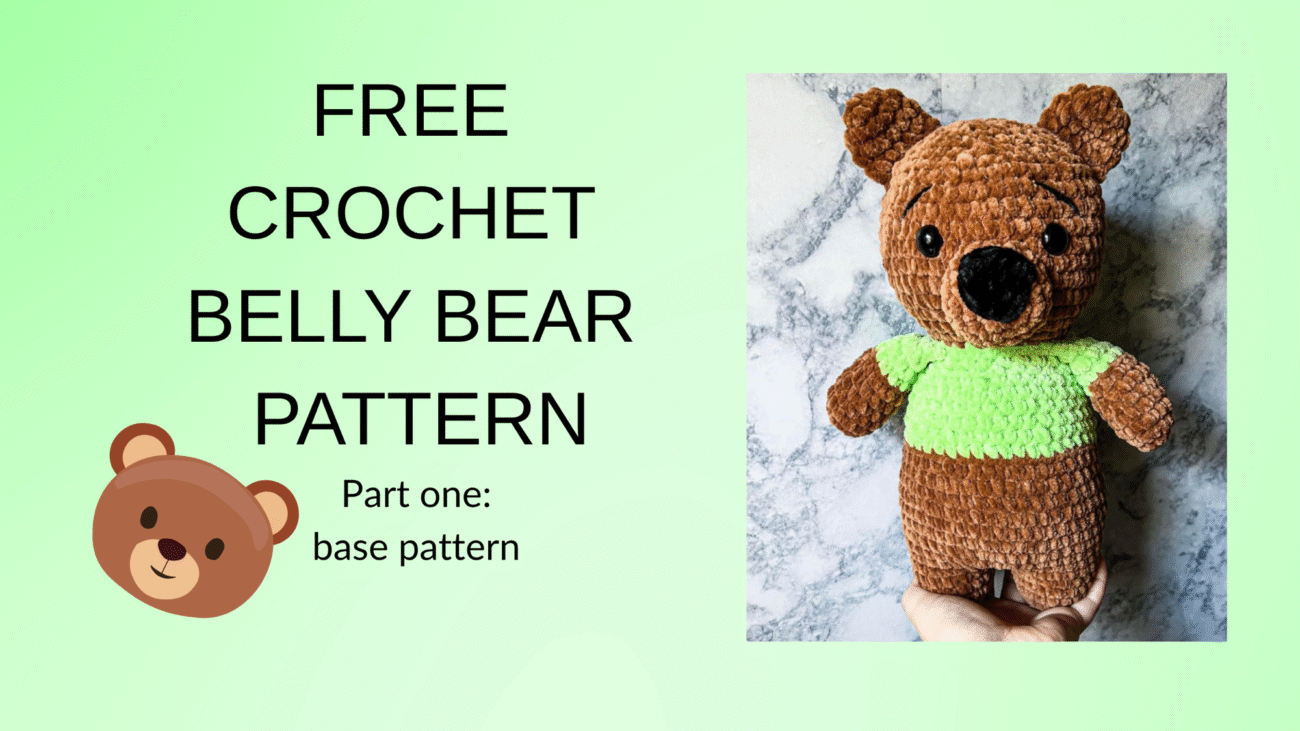
Belly bear 7-in-1- PART ONE BASE BEAR plush free crochet pattern

I can’t believe this is really happening!!! My own blog, and my very first blog post!!! 🥹 To start this blog off, I felt it was fitting to post the very first pattern that really “started it all” for me- 7-in-1 belly bear 🐻

If you enjoy this pattern, please give me a follow on social media and let me know what other free patterns you would love to see! Also, don’t forget to tag me in your creations on instagram. Happy crocheting!! 🧶

You can also purchase the formatted instant download PDF version of this pattern and all the mods together in one pdf on my archive etsy for $1.50. Now- let’s get to it!

MATERIALS & TOOLS

premier yarns parfait chunky in the colors:

Teddy, key lime & black

-3.5 mm crochet hook

-Polyfil

-16, 18 or 20 mm safety eyes/felt eyes

-darning needle

-scissors

-4 weight yarn for embroidering eyebrows

ABBREVIATIONS

  • CH – chain
  • SC – single crochet
  • INC – single crochet increase (2 SC in each stitch)
  • DEC – decrease (I use the invisible decrease in all of my creations)
  • SLST – slip stitch
  • MC- Magic circle
  • BLO- back loops only
This pattern is worked in continuous rounds. Do not slip stitch unless stated to do so. The pattern is written is US terminology. I am right handed and used the yarn under technique.
  • DO NOT publish or sell this pattern in any form, if you’re sharing a pattern with a friend please share my blog with them
  • You may sell creations made from this pattern
  • I love seeing my patterns created by others! Please tag me in your creations 🫶🏻
  • My finished bear measures around 12” tall

BELLY BEAR BASE PATTERN

please follow the pattern instructions IN ORDER

Arms (make two)

in main color

1. 6 sc into mc (6)

2. inc x6 (12)

3-7. 12 sc around- 5 rounds

8. Color change to shirt color: BLO 12 sc (12)

9-11. 12 sc around- 3 rounds

Laste step. Lightly stuff the arms. Fold in half sc closed with 6 sc.

Fasten off and leave a short yarn tail. You don’t need to leave a long yarn tail because you’ll be crocheting on the arms later in the pattern.

Ears (make two)

in main color

1. 6 sc into mc (6)

2. inc x 6 (12)

3-4. 12 sc around- 2 rounds

Last step. Fold the ear in half and sc closed with 6 sc.

Fasten off and leave a long yarn tail for sewing onto the head. Do not stuff the ears.

Muzzle (make one)

in main color

1. 6 sc into mc (6)

2. inc x6 (12)

3. 1 sc, inc x6 (18)

4-5. 18 sc around- 2 rounds

fasten off & leave a long yarn tail for sewing. The muzzle does get stuffed!

Legs (make two)

note: Fasten off the first leg but NOT the 2nd leg. You will be connecting the 2nd leg to the 1st leg.

1. 6 sc into mc (6)

2. inc x6 (12)

3. 1 sc, inc x6 (18)

4-7. 18 sc around- 4 rounds

Continuing onto the body

1. with the first leg still on your hook ch 2 and connect to leg 1 with a sc

2. 17 sc, place 1 sc in each chain, 18 sc + 1 sc in each chain again (40)

3. 40 sc around (40)

4. 19 sc, inc x2, 19 sc (42)

5. 19 sc, inc x4, 19 sc (46)

6-9. 46 sc around (46) – 4 rounds start stuffing and shaping his belly and continue to stuff and shape as you go

10. 11 sc, dec x2, 19 sc, dec x2, 8 sc (42)

11-12. 42 sc around (42) – 2 rounds don’t forget to keep stuffing and shaping!

13. color change to shirt color– BLO 42 sc (42)

14. 5 sc, dec x6 (36)

15-17. 36 sc around (36) – 3 rounds keep on stuffing & shaping!

18. 4 sc, dec x6 (30)

19. 3 sc, dec x6 (24)

20. 24 sc around (24) keep stuffing if you haven’t been

21. 8 sc, crochet in an arm with 6 sc, 5 sc, crochet in an arm with 5 sc (24)

if you need to adjust where your arms are at you can totally do so!

+3 sc in shirt color; then color change to main color.

22. BLO 24 sc. there is a shift in this round. Your new rounds starts where the color change started! (24) add some more stuffing!

Continuing onto head

23. 3 sc, inc x6 (30)

24. 4 sc, inc x6 (36)

25. 5 sc, inc x6 (42)

26. 6 sc, inc x6 (48)

27-32. 48 sc around (48) – 6 rounds

– eyes are 6 sts apart between rounds 30 & 29.

33. 6 sc, dec x6 (42)

34. 5 sc, dec x6 (36) I start stuffing & shaping at this round. You want his head to be a very round circle! Keep stuffing & shaping as you go!!

35. 4 sc, dec x6 (30)

36. 30 sc around (30) keep stuffing & shaping!!

37. 3 sc, dec x6 (24)

38. 2 sc, dec x6 (18) keep on stuffing & shaping his head. Remember nice and round!

39. 1 sc, dec x6 (12)

40. Dec x6 (6) close the circle.

Assembly video link here

-nose is sewn on between the eyes. Covering 5-6 rounds down.

-Ears are sewn on about 4-5 rounds from the top of the head

-nose is embroidered on with black yarn

-add eye brows. Starting 3- 4 rounds above the eyes and going down at an angle across 2-3 rounds.

CONGRATULATIONS! YOU FINISHED BELLY BEAR BASE PATTERN 🐻

I hope you enjoyed this pattern and found it easy to follow. I will be posting the other modifications to this pattern to my blog as well!