
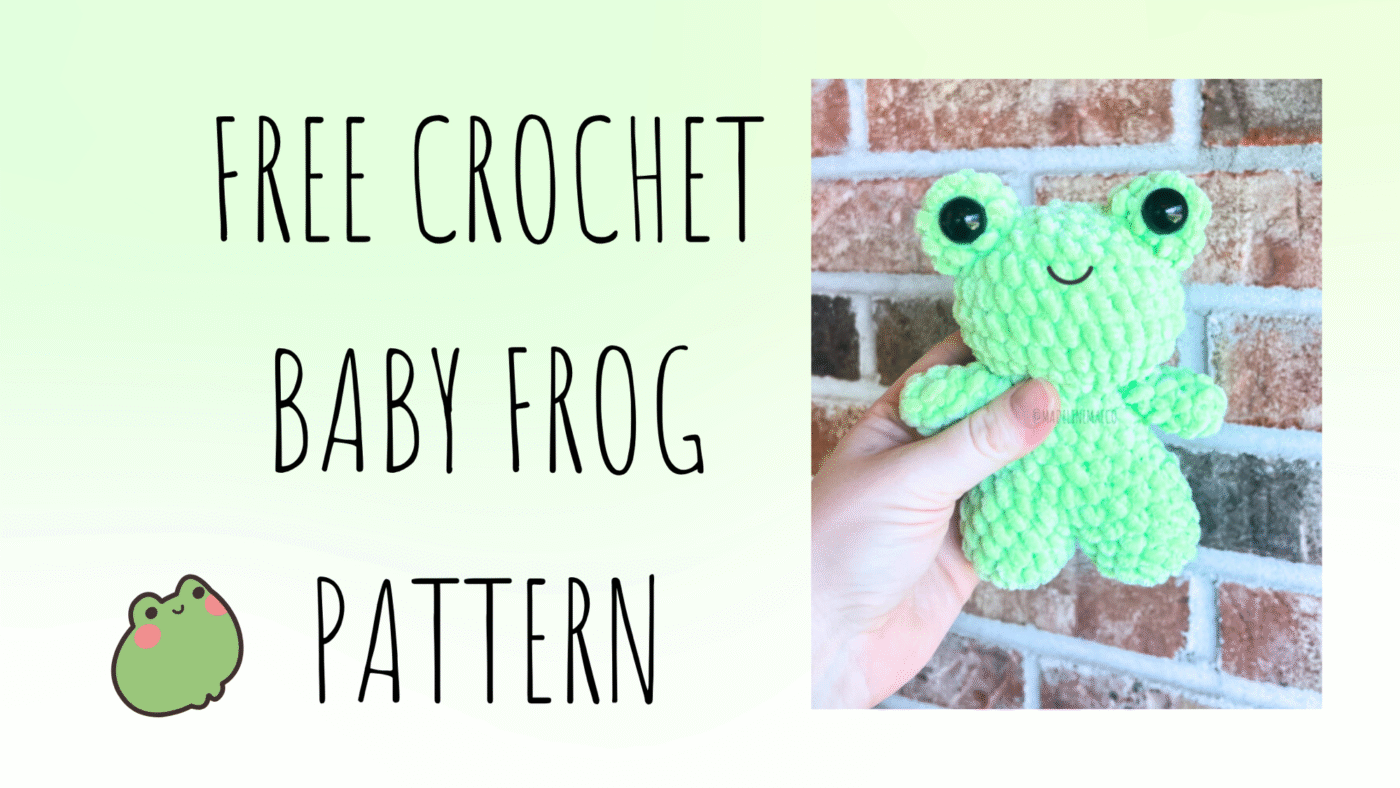
I don’t know about you but I think frogs are just so cute! Make it a crochet frog and it’s instantly even cuter!
Baby frog is apart of my baby collection, which you can find all of my baby patterns on my Etsy! You can purchase the instant download PDF version of this pattern & other patterns in the baby body style collection.
If you enjoy this pattern, please give me a follow on social media and let me know what other free patterns you would love to see! Also, don’t forget to tag me in your creations! 🧶
NOTES
•Pattern is written in US terms.
•The pattern is worked in continuous rounds, do not slip stitch after each round.
• If desired, use a stitch marker to indicate the beginning of your round.
•Asterisks (* *) indicate repeats.
• The designer is right handed and uses the yarn under technique.
MATERIALS
HOOK
3.5 mm
YARN
Premier Yarns Parfait Chunky
Weight 6. Color: Key Lime
NOTIONS
Scissors
Stitch marker
Darning needle
16 mm safety eyes
OTHER
Polyfil
ABBREVIATIONS
mc- magic circle
dec- decrease (I use the invisible decrease method)
inc- increase
* *- repeate
sc- single crochet
( )- stitch count
F/O- fasten off
- DO NOT publish or sell this pattern in any form, if you’re sharing a pattern with a friend please share my blog with them
- You may sell creations made from this pattern
- I love seeing my patterns created by others!
Please tag me in your creations
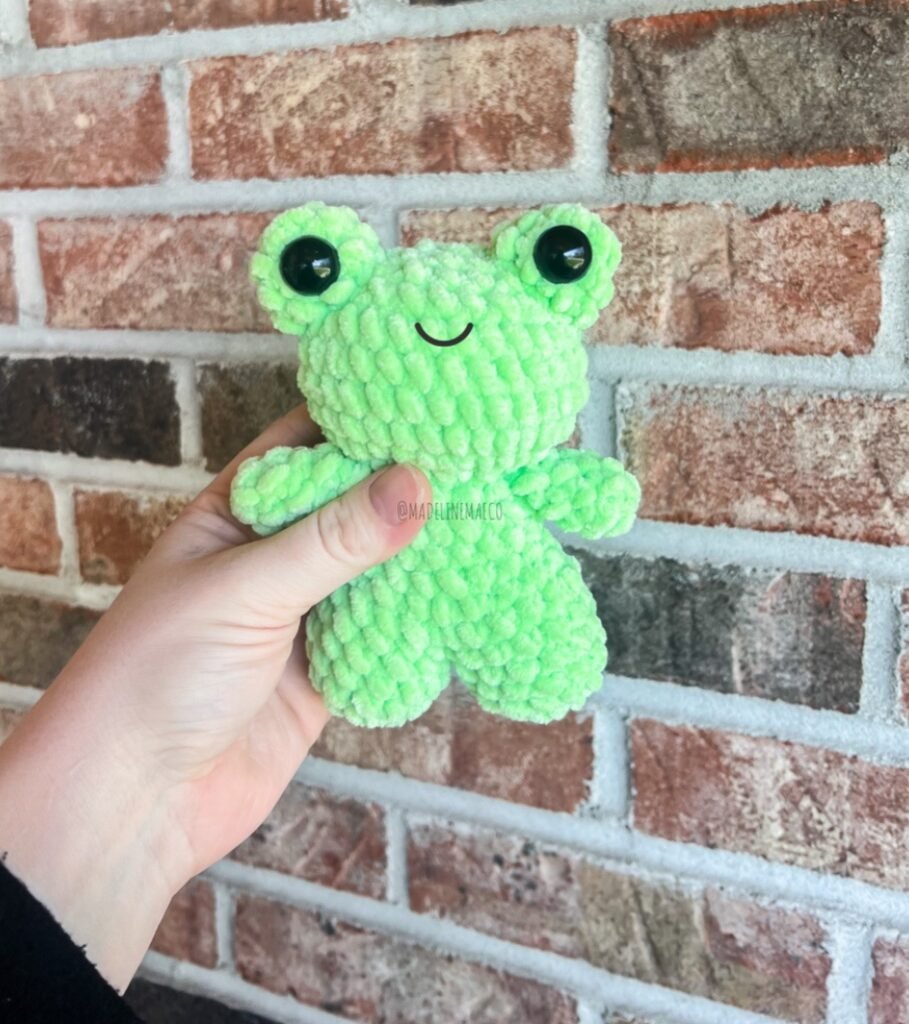
BABY FROG FREE CROCHET PATTERN
ARMS
make two
In key lime
Round 1. 6 sc into mc (6)
Rounds 2-5. 4 rounds of 6 sc
Do not stuff
Round 6. Fold the arm in half at the top, like a sandwich, and close with: 3 sc (3)
F/O. Leave a short yarn tail. You’ll be crocheting the arms into the body later on.
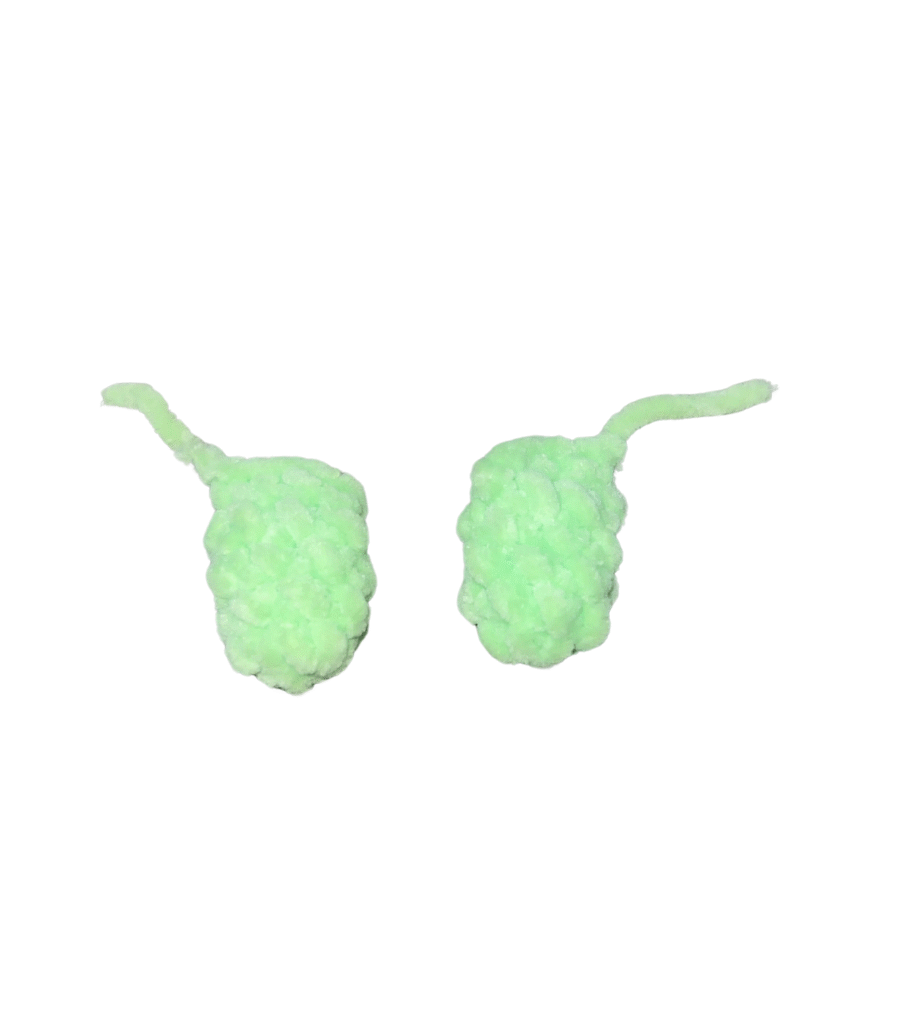
EYE PIECES
make two
in key lime
Round 1. 5 sc into mc (5)
Round 2. *inc* x5 (10)
Rounds 3-4. 2 rounds of 10 sc
F/O leaving a long yarn tail, you will sew the eyes to the head later on. The safety eyes & stuffing will be done during assembly.
.
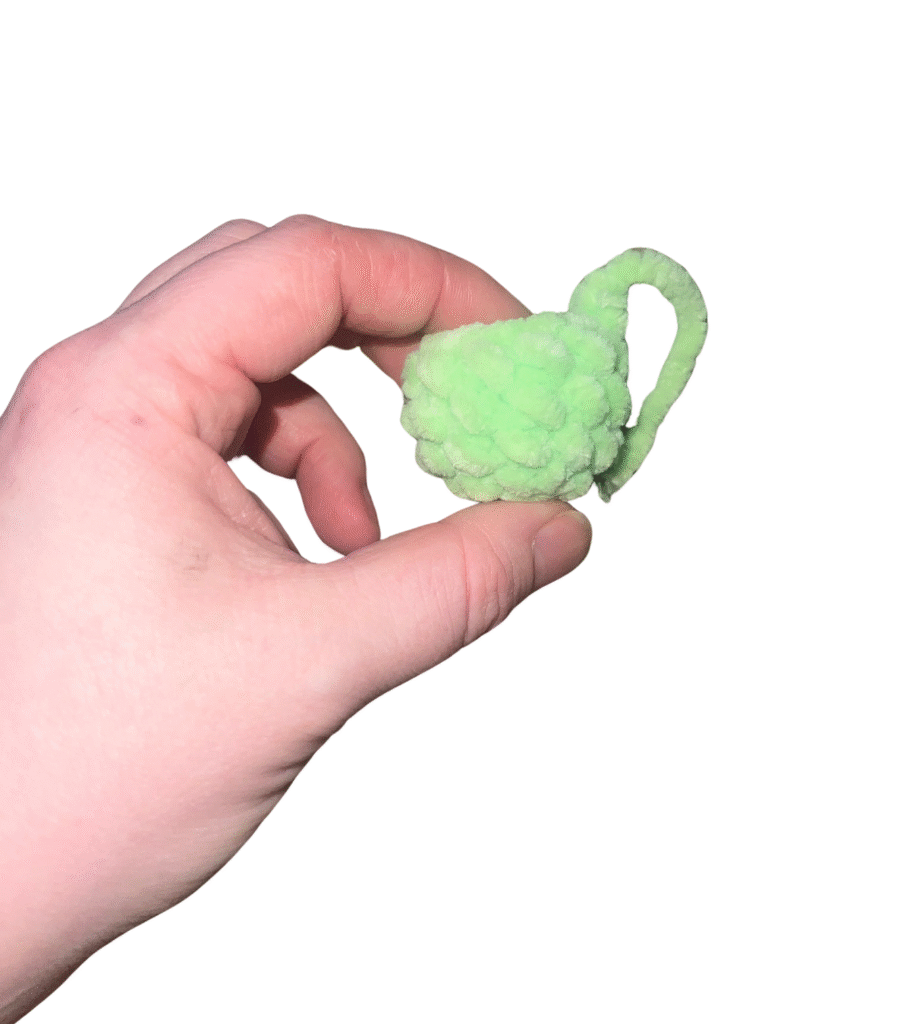
LEGS
make two
in key lime
Round 1. 6 sc into mc (6)
Round 2. *inc* x6 (12)
Round 3-5. 3 rounds of 12 sc
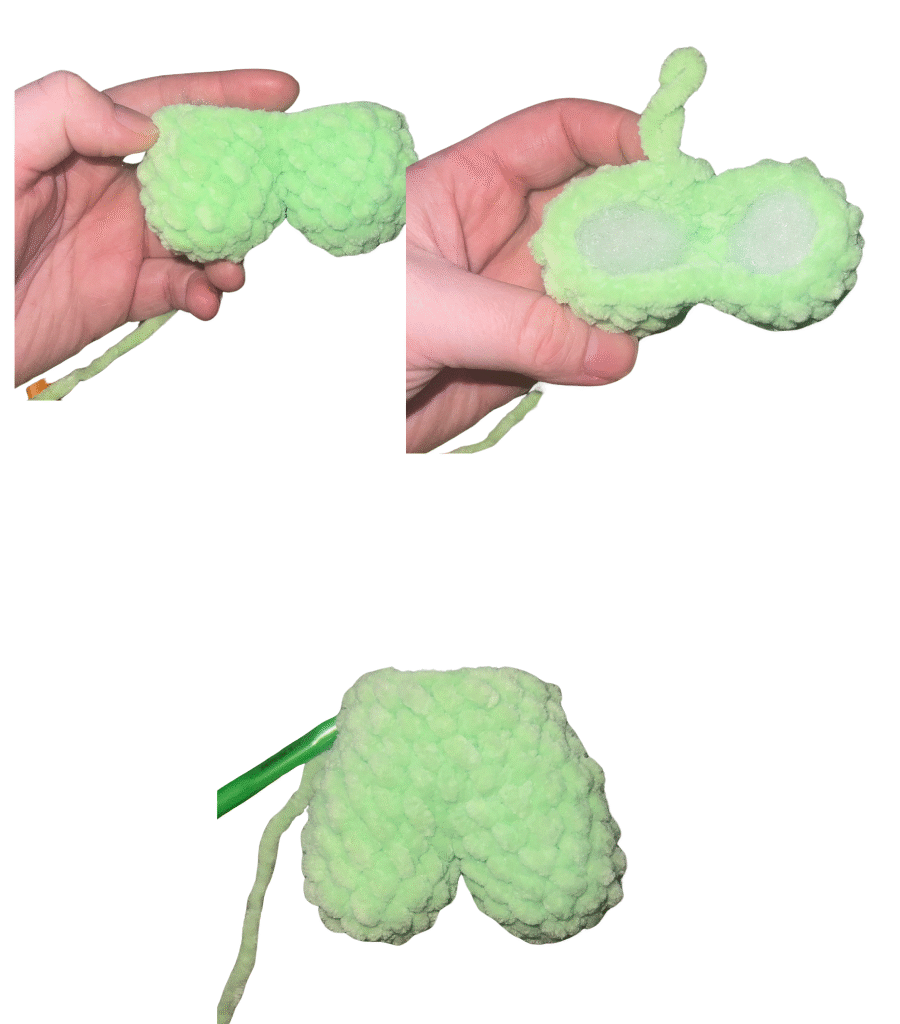
F/O the FIRST LEG WITH A SLIP STITCH AFTER COMPLETING THE SC (do not slip stitch into the next stitch) and leave a short yarn tail (there will be step by step photos on how to not have a gap in between the legs when connecting them) if you’re not comfortable doing it this way, leave a long yarn tail to sew the gap between the legs closed later on.
DO NOT fasten off the second leg. Before completing the last sc of the second leg move onto connecting the legs.
CONNECTING THE LEGS
Round 6
Step 1. before completing your last sc on the second leg join into round 4 of the first leg where you fastened off at
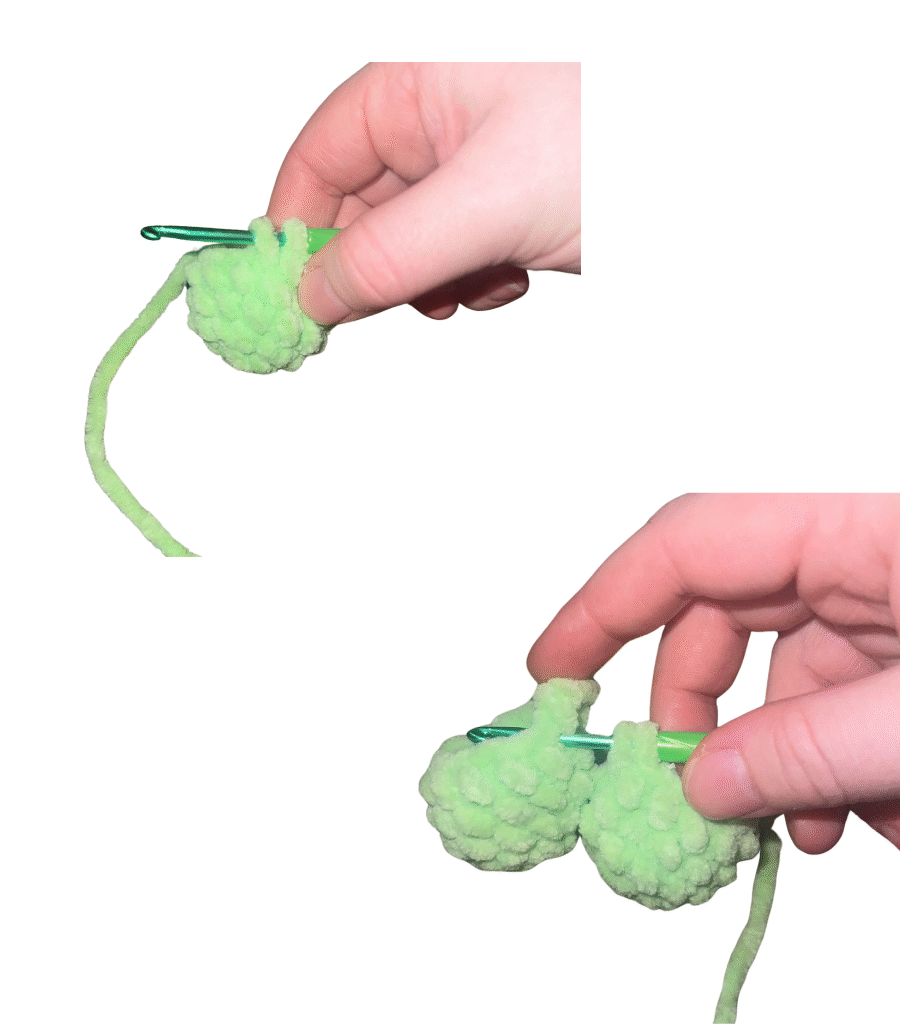
Step 2. pull up a loop and create a decrease, this will be the last stitch of your second leg
Step 3. 12 sc around the first leg BUT before completing your 12th single crochet, connect to the second leg the SAME way as in steps 1 & 2- by doing a decrease
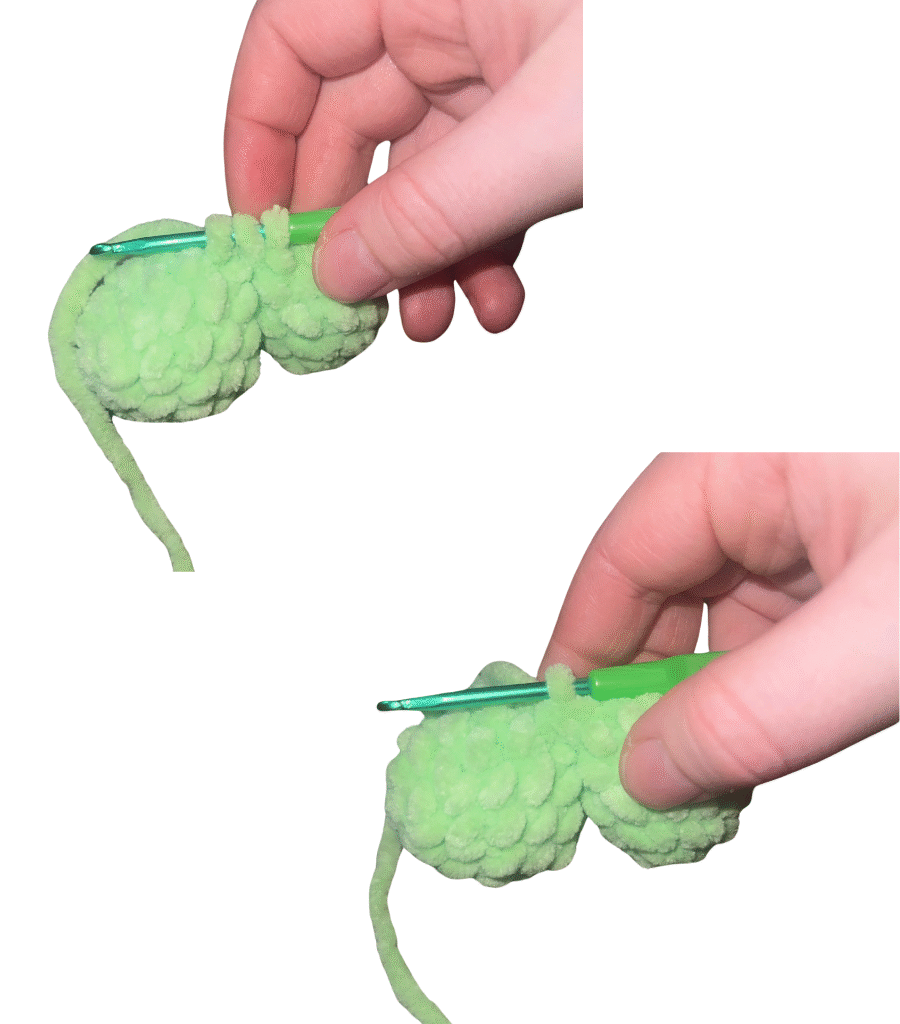
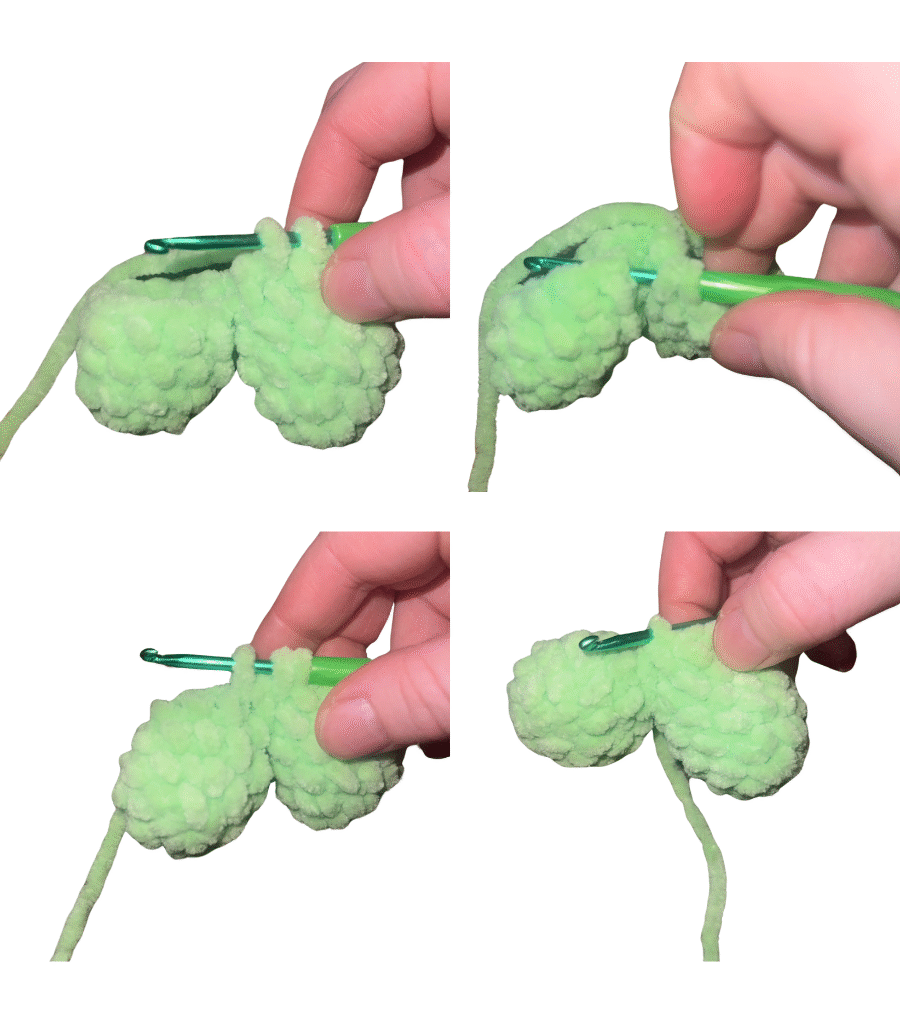
Step 4. 12 sc around the second leg
Total stitches: 24 sc
IF NOT USING THIS METHOD: just connect the legs by single crocheting around each leg and then close up the gap later on (24 stitches)
BODY
Round 7. 1 round of 24 sc
stuff the legs now
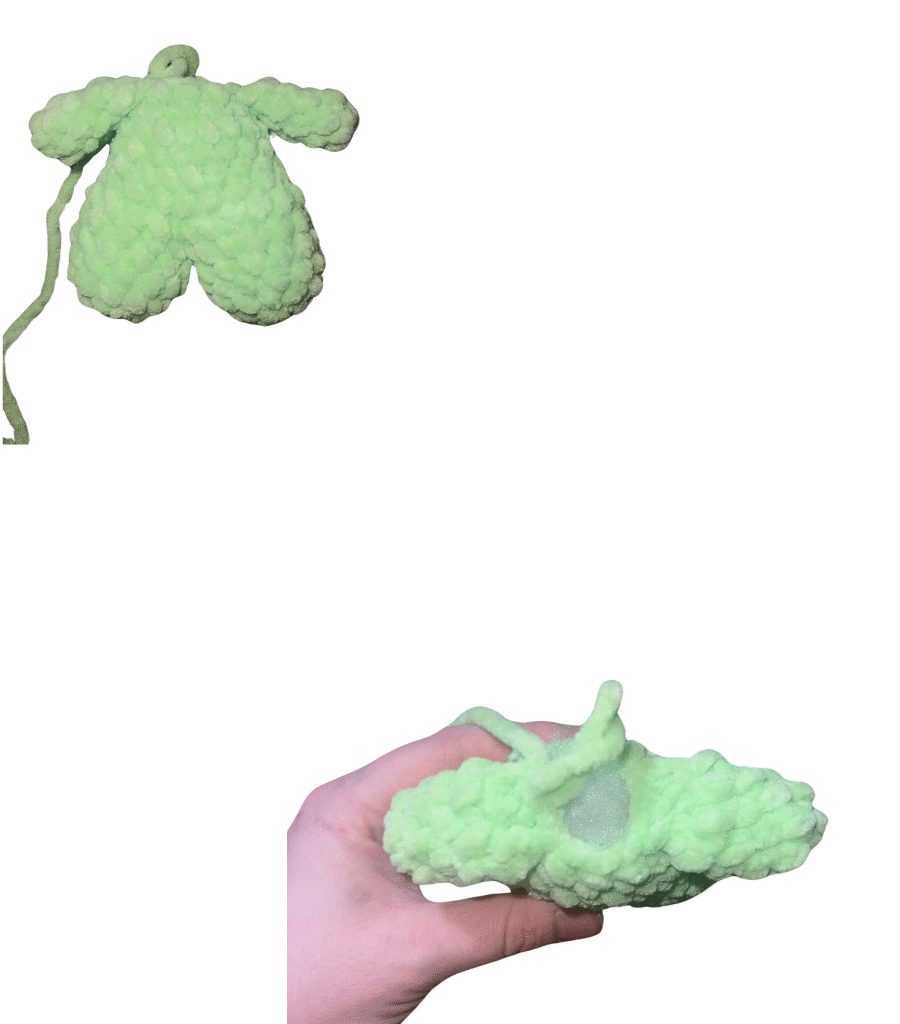
Round 8. *2 sc, dec* x6 (18)
stuff again after decreasing and continue to stuff and shape the body after every 1-2 rounds
Rounds 9-11. 3 rounds of 18 sc
It’s important to stuff and shape well so you get the desired body shape
Round 12. *1 sc, dec* x6 (12)
stuff and shape
you will be crocheting the arms into the next round
Round 13. 3 sc on body, 3 sc while attaching the arm, 3 sc on body, 3 sc while attaching the arm (12)
stuff
NOTE: you may have to adjust your arm placement depending on how your work spirals
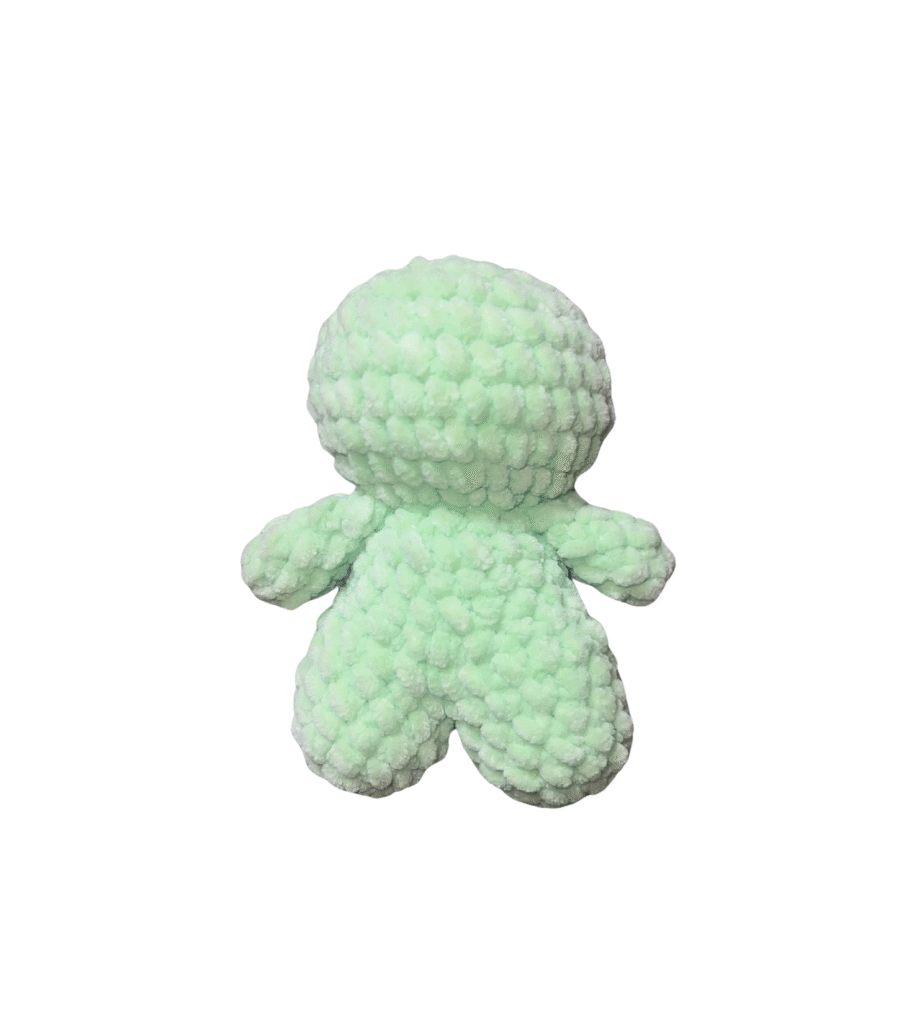
HEAD
Round 14. *inc* x12 (24)
Round 15. *3 sc, inc* x6 (30)
Rounds 16-19. 4 rounds of 30 sc
Round 20. *3 sc, dec* x6 (24)
start stuffing & shaping the head now and continue to stuff and shape after every round going forward
Round 21. *2 sc, dec* x6 (18)
Round 22. *1 sc, dec* x6 (12)
Round 23. * dec* x6 (6)
sew the hole closed on the top of the head.
Fasten off and hide your yarn tail
ASSEMBLY
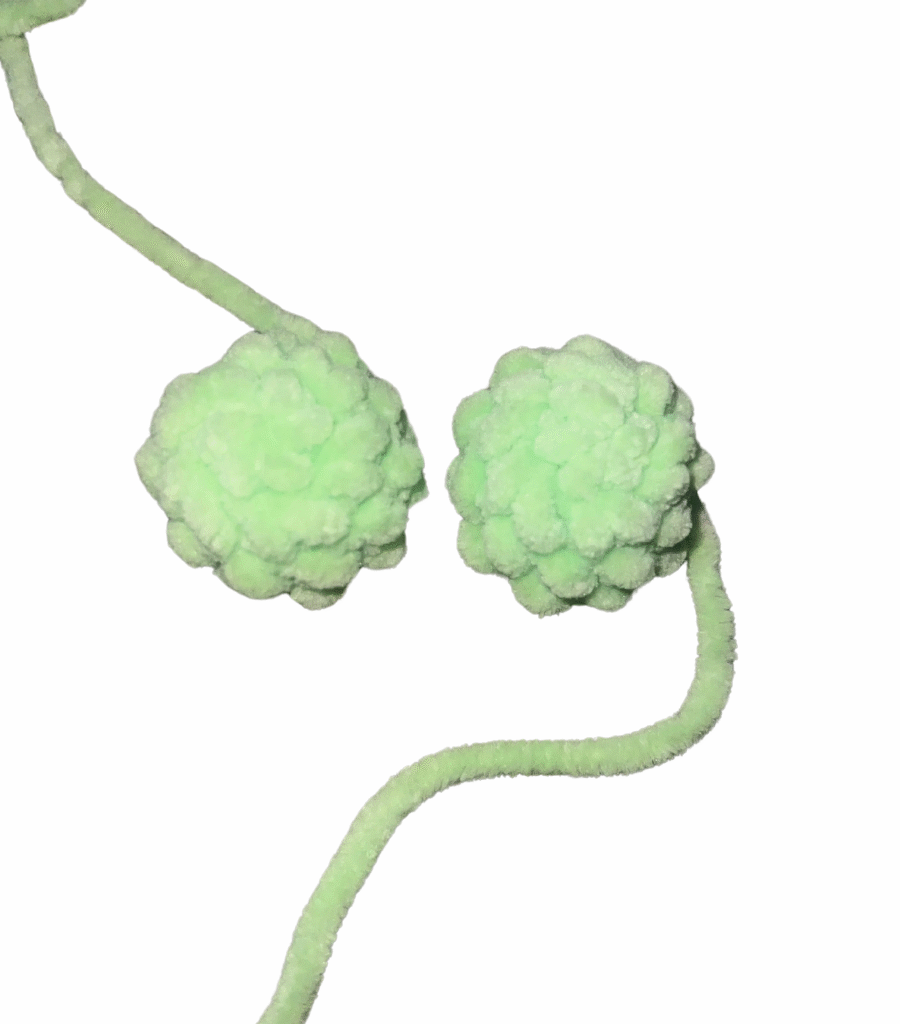
Place the safety eyes into the eye pieces now, between rounds 2 & 3
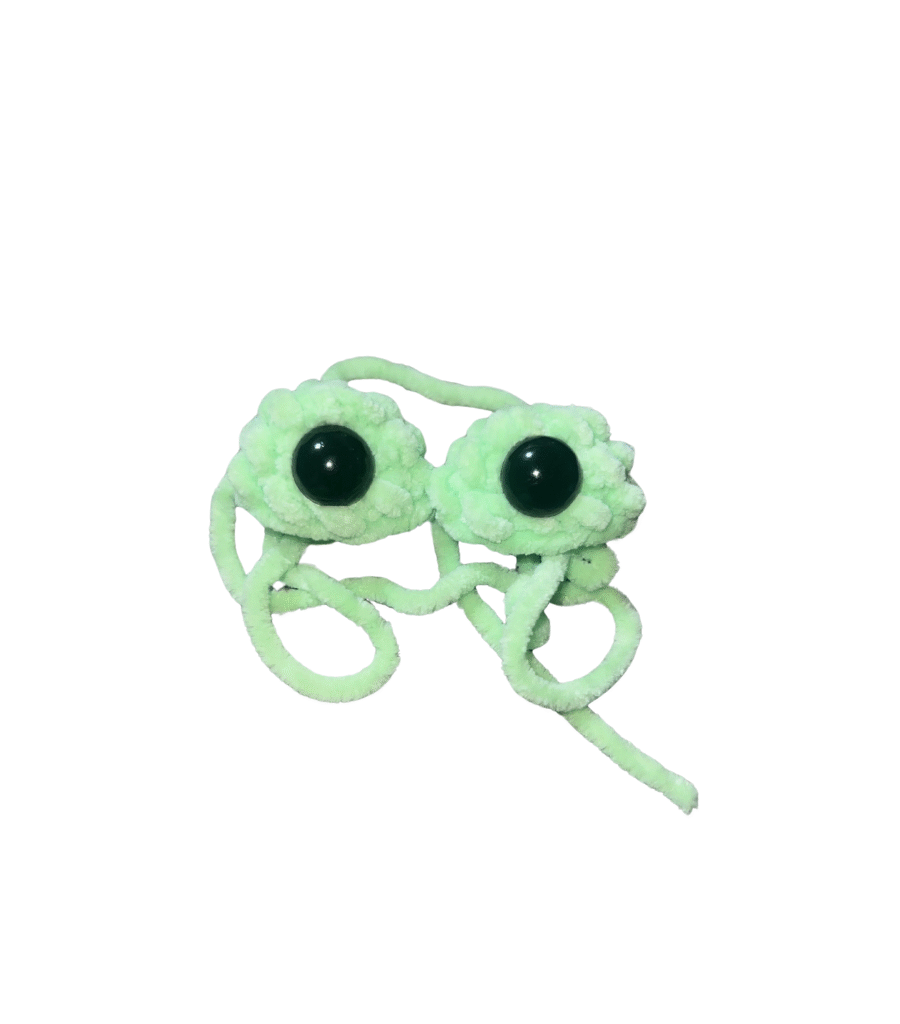
Sew the eye pieces onto the head, approximately 2 rounds away from the center of the head. Make sure your eyes are placed correctly so that they’re not lopsided or uneven. STUFF them while sewing them on, I wait until I have about 4 stitches left to do this.
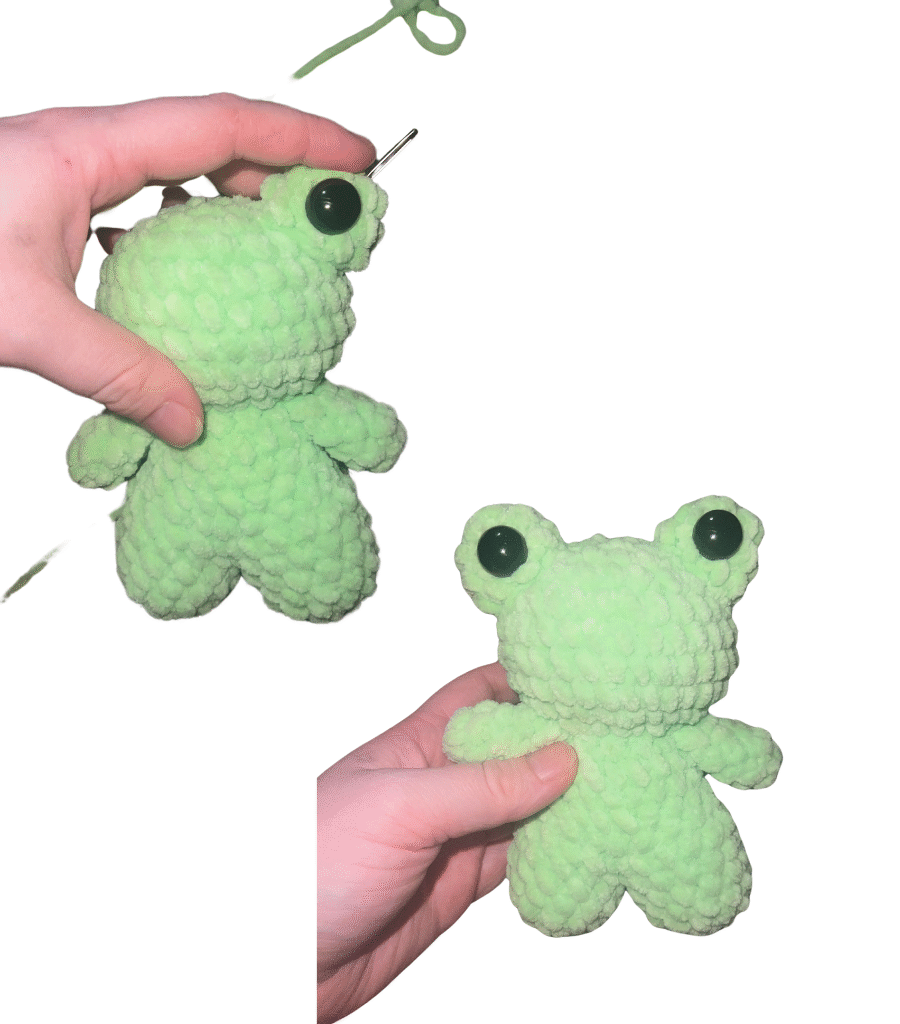
Patience is key here. I use a sewing needle to hold the eye in the correct place so that it doesn’t move too much while sewing, you can also use knitting needles to help with this step too. You can add a mouth if you’d like. After this, your baby frog is complete! 🐸

I hope you really enjoyed this pattern and found the instructions easy to follow. I look forward to sharing more patterns with you, hope to see you back soon!