
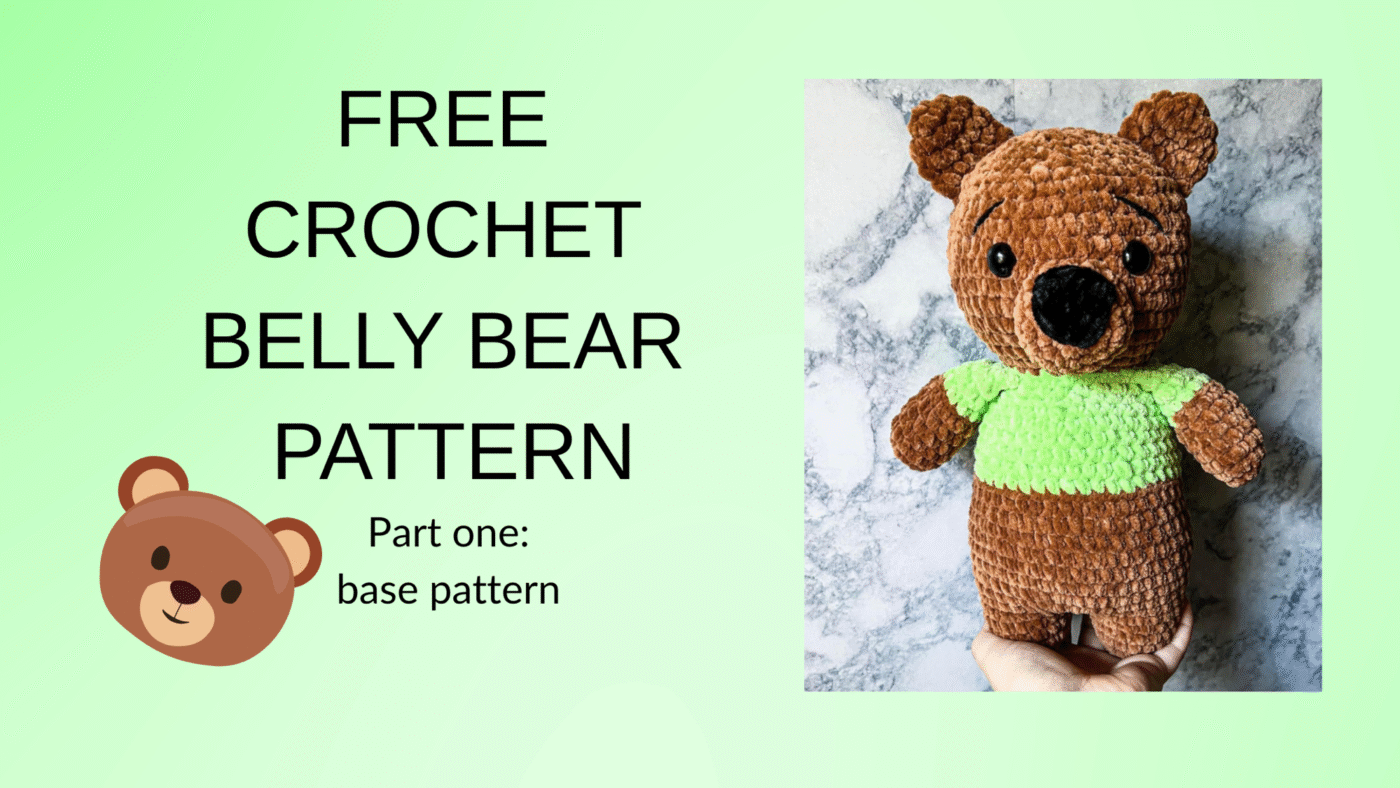
I can’t believe this is really happening!!! My own blog, and my very first blog post!!! 🥹 To start this blog off, I felt it was fitting to post the very first pattern that really “started it all” for me- 7-in-1 belly bear 🐻
If you enjoy this pattern, please give me a follow on social media and let me know what other free patterns you would love to see! Also, don’t forget to tag me in your creations on instagram. Happy crocheting!! 🧶
You can also purchase the formatted instant download PDF version of this pattern and all the mods together in one pdf on my archive etsy for $1.50. Now- let’s get to it!
MATERIALS & TOOLS
premier yarns parfait chunky in the colors:
Teddy, key lime & black
-3.5 mm crochet hook
-Polyfil
-16, 18 or 20 mm safety eyes/felt eyes
-darning needle
-scissors
-4 weight yarn for embroidering eyebrows
ABBREVIATIONS
- CH – chain
- SC – single crochet
- INC – single crochet increase (2 SC in each stitch)
- DEC – decrease (I use the invisible decrease in all of my creations)
- SLST – slip stitch
- MC- Magic circle
- BLO- back loops only
This pattern is worked in continuous rounds. Do not slip stitch unless stated to do so. The pattern is written is US terminology. I am right handed and used the yarn under technique.
- DO NOT publish or sell this pattern in any form, if you’re sharing a pattern with a friend please share my blog with them
- You may sell creations made from this pattern
- I love seeing my patterns created by others! Please tag me in your creations 🫶🏻
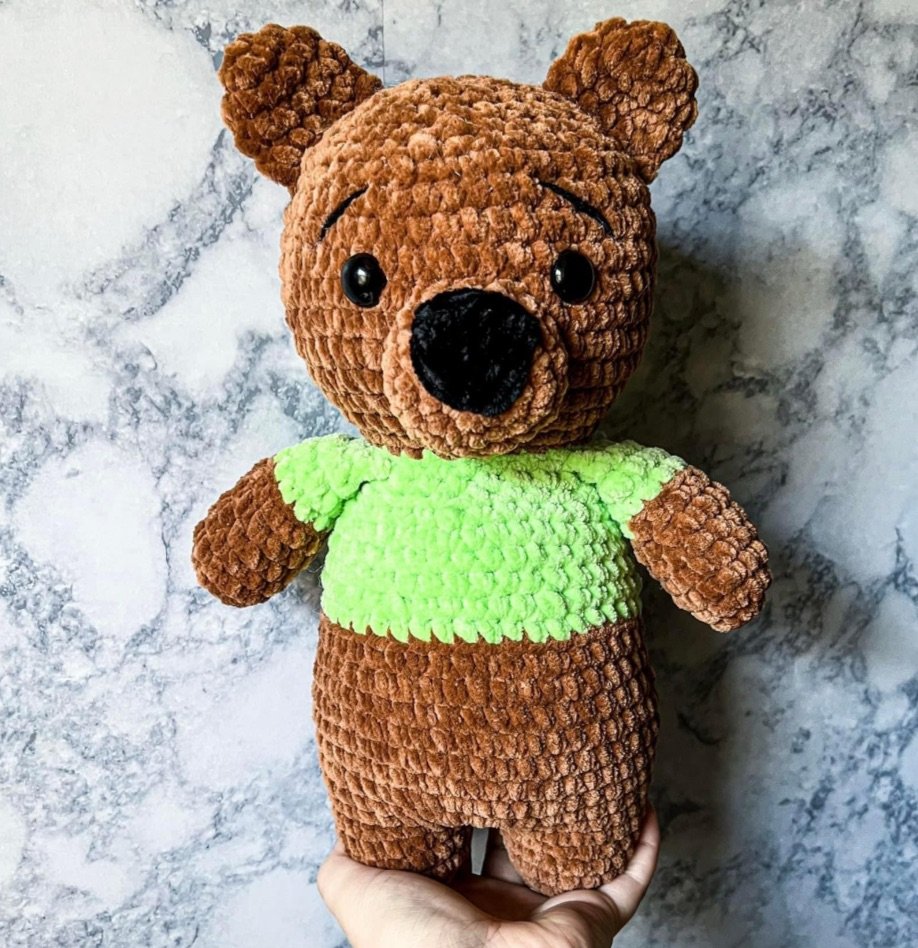
- My finished bear measures around 12” tall
BELLY BEAR BASE PATTERN
please follow the pattern instructions IN ORDER
Arms (make two)
in main color
1. 6 sc into mc (6)
2. inc x6 (12)
3-7. 12 sc around- 5 rounds
8. Color change to shirt color: BLO 12 sc (12)
9-11. 12 sc around- 3 rounds
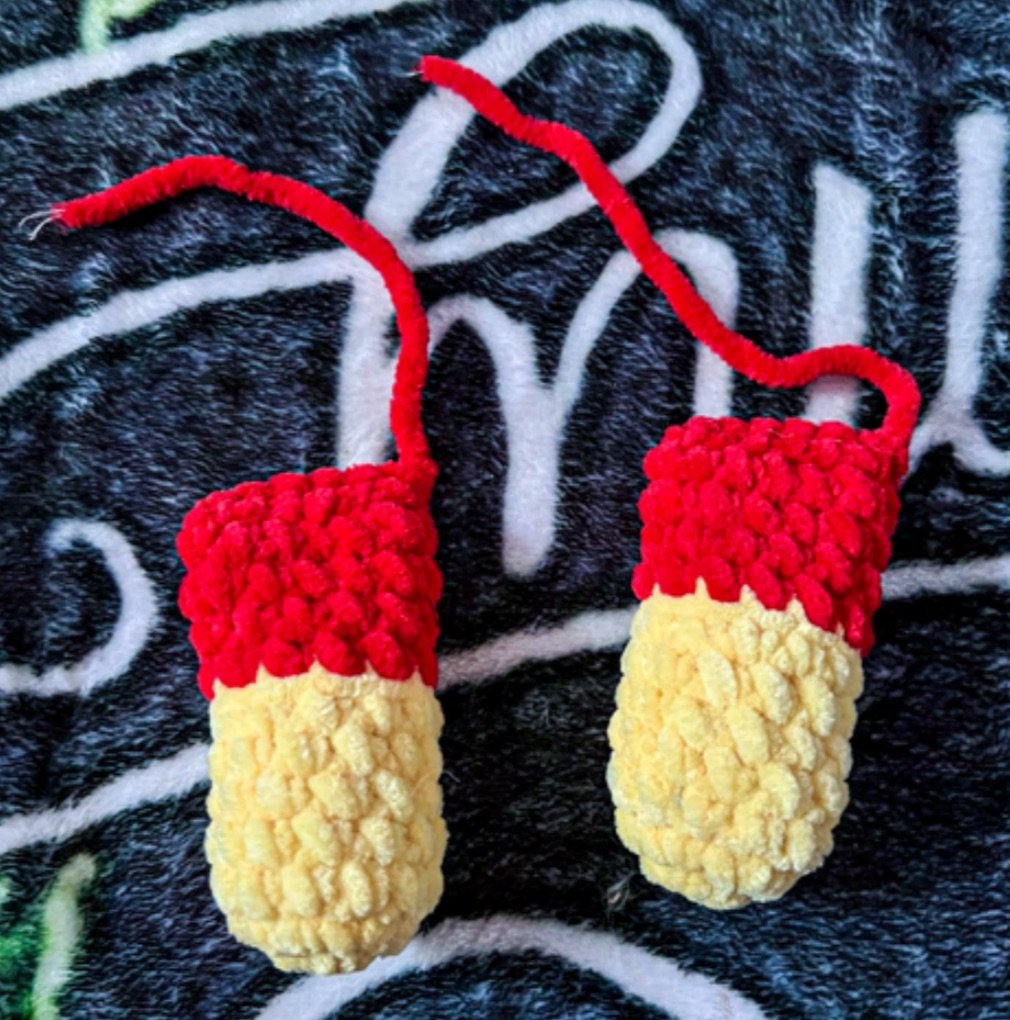
Laste step. Lightly stuff the arms. Fold in half sc closed with 6 sc.
Fasten off and leave a short yarn tail. You don’t need to leave a long yarn tail because you’ll be crocheting on the arms later in the pattern.
Ears (make two)
in main color
1. 6 sc into mc (6)
2. inc x 6 (12)
3-4. 12 sc around- 2 rounds
Last step. Fold the ear in half and sc closed with 6 sc.
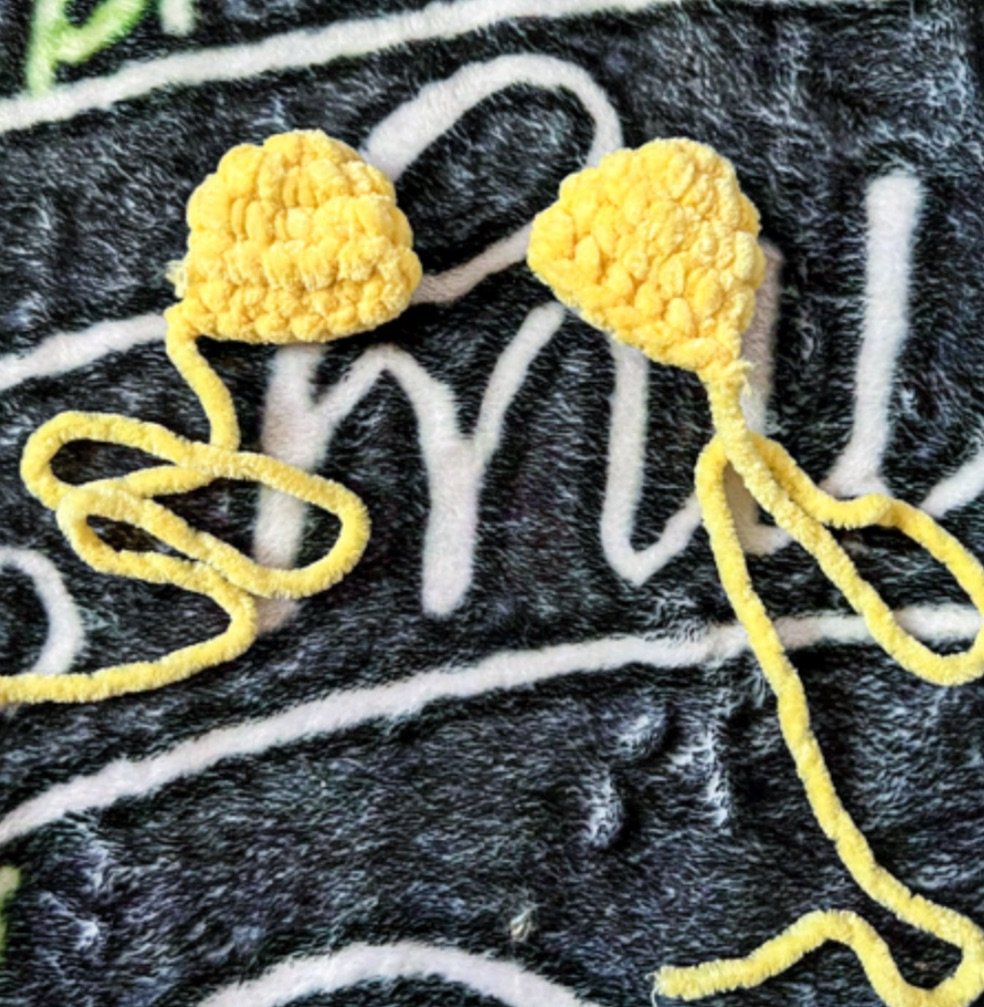
Fasten off and leave a long yarn tail for sewing onto the head. Do not stuff the ears.
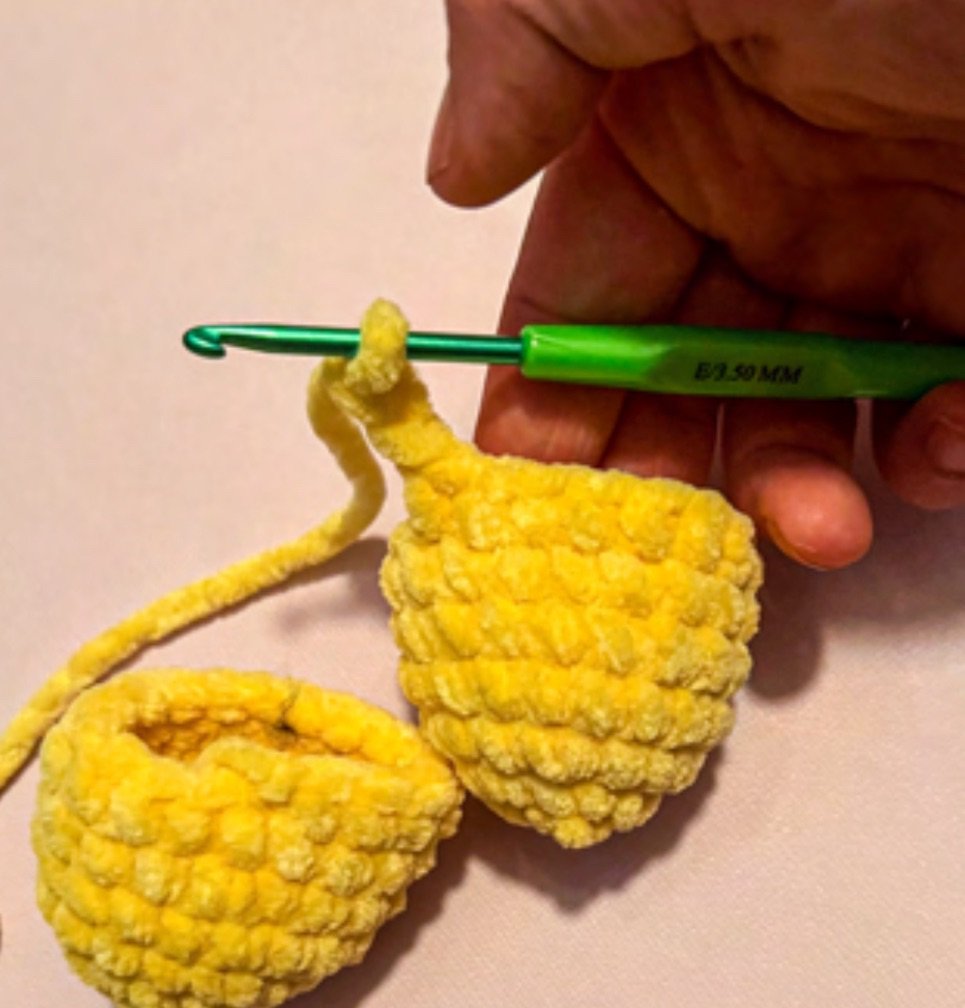
Muzzle (make one)
in main color
1. 6 sc into mc (6)
2. inc x6 (12)
3. 1 sc, inc x6 (18)
4-5. 18 sc around- 2 rounds

fasten off & leave a long yarn tail for sewing. The muzzle does get stuffed!
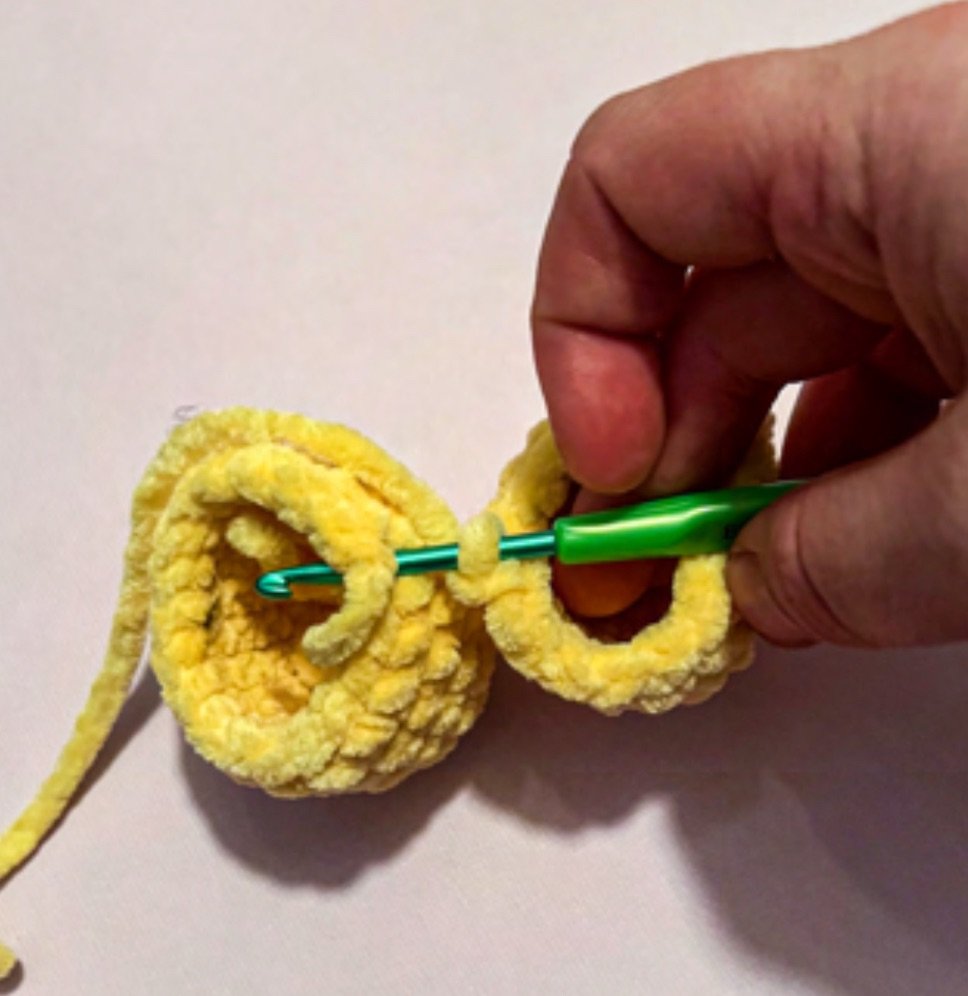
Legs (make two)
note: Fasten off the first leg but NOT the 2nd leg. You will be connecting the 2nd leg to the 1st leg.
1. 6 sc into mc (6)
2. inc x6 (12)
3. 1 sc, inc x6 (18)
4-7. 18 sc around- 4 rounds
Continuing onto the body
1. with the first leg still on your hook ch 2 and connect to leg 1 with a sc
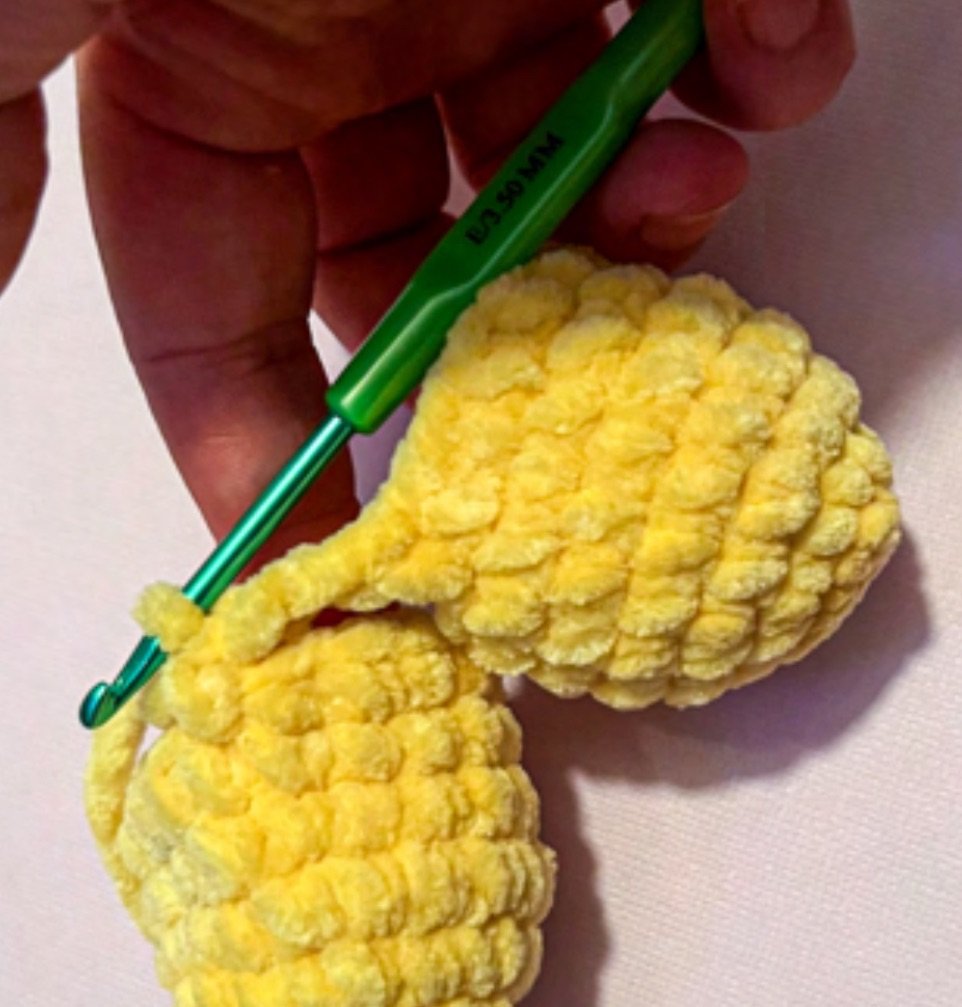
2. 17 sc, place 1 sc in each chain, 18 sc + 1 sc in each chain again (40)
3. 40 sc around (40)
4. 19 sc, inc x2, 19 sc (42)
5. 19 sc, inc x4, 19 sc (46)
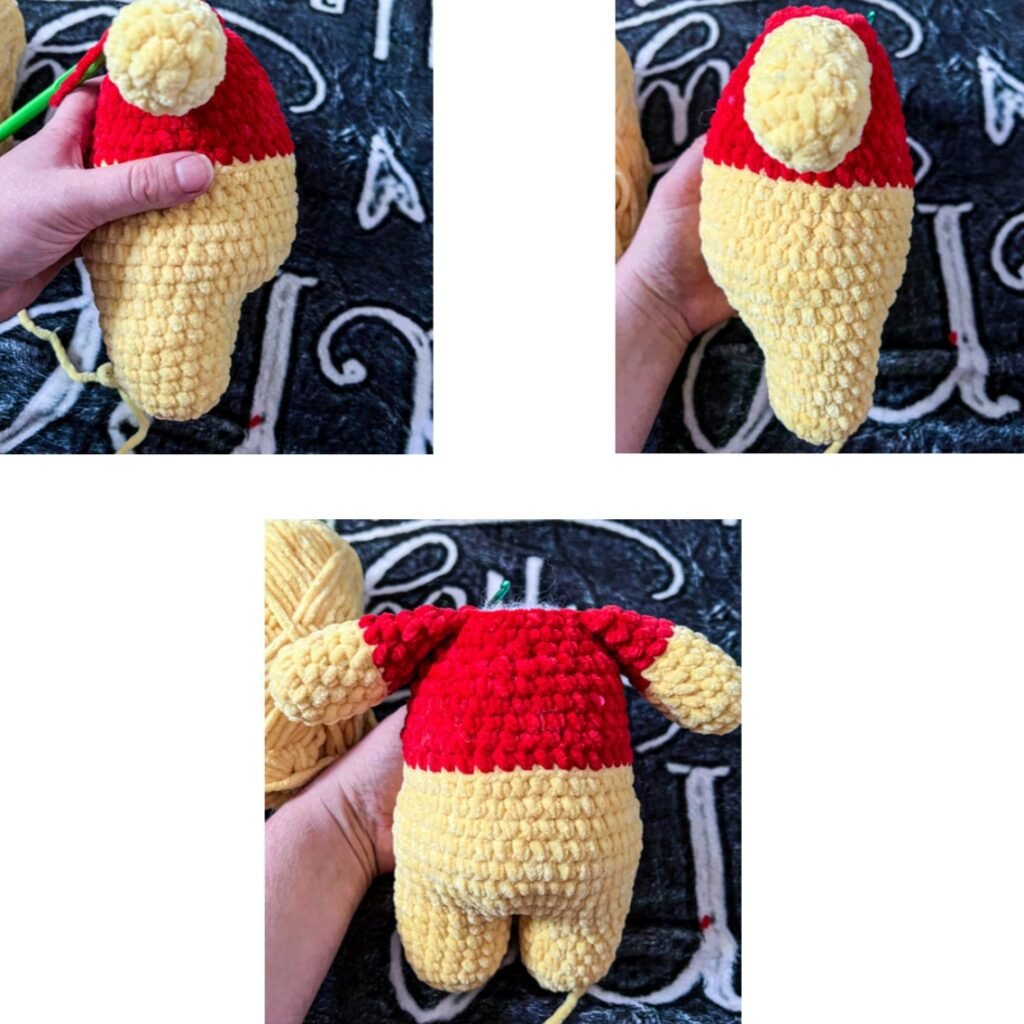
6-9. 46 sc around (46) – 4 rounds start stuffing and shaping his belly and continue to stuff and shape as you go
10. 11 sc, dec x2, 19 sc, dec x2, 8 sc (42)
11-12. 42 sc around (42) – 2 rounds don’t forget to keep stuffing and shaping!
13. color change to shirt color– BLO 42 sc (42)
14. 5 sc, dec x6 (36)
15-17. 36 sc around (36) – 3 rounds keep on stuffing & shaping!
18. 4 sc, dec x6 (30)
19. 3 sc, dec x6 (24)
20. 24 sc around (24) keep stuffing if you haven’t been
21. 8 sc, crochet in an arm with 6 sc, 5 sc, crochet in an arm with 5 sc (24)
if you need to adjust where your arms are at you can totally do so!
+3 sc in shirt color; then color change to main color.
22. BLO 24 sc. there is a shift in this round. Your new rounds starts where the color change started! (24) add some more stuffing!
Continuing onto head
23. 3 sc, inc x6 (30)
24. 4 sc, inc x6 (36)
25. 5 sc, inc x6 (42)
26. 6 sc, inc x6 (48)
27-32. 48 sc around (48) – 6 rounds
– eyes are 6 sts apart between rounds 30 & 29.
33. 6 sc, dec x6 (42)
34. 5 sc, dec x6 (36) I start stuffing & shaping at this round. You want his head to be a very round circle! Keep stuffing & shaping as you go!!
35. 4 sc, dec x6 (30)
36. 30 sc around (30) keep stuffing & shaping!!
37. 3 sc, dec x6 (24)
38. 2 sc, dec x6 (18) keep on stuffing & shaping his head. Remember nice and round!
39. 1 sc, dec x6 (12)
40. Dec x6 (6) close the circle.
Assembly video link here
-nose is sewn on between the eyes. Covering 5-6 rounds down.
-Ears are sewn on about 4-5 rounds from the top of the head
-nose is embroidered on with black yarn
-add eye brows. Starting 3- 4 rounds above the eyes and going down at an angle across 2-3 rounds.
CONGRATULATIONS! YOU FINISHED BELLY BEAR BASE PATTERN 🐻
I hope you enjoyed this pattern and found it easy to follow. I will be posting the other modifications to this pattern to my blog as well!

[…] part three of the 7-in-1 belly bear crochet pattern: Scarecrow bear 🐻 THIS IS JUST A MOD TO MY EXISTING 7-in-1 BEAR PATTERN THAT YOU’LL FIND HERE. […]
[…] part five of the 7-in-1 belly bear crochet pattern: Patriotic bear 🐻 THIS IS JUST A MOD TO MY EXISTING 7-in-1 BEAR PATTERN THAT YOU’LL FIND HERE. […]
[…] part seven of the 7-in-1 belly bear crochet pattern: Hoodie bear 🐻 THIS IS JUST A MOD TO MY EXISTING 7-in-1 BEAR PATTERN THAT YOU’LL FIND HERE. […]
[…] part four of the 7-in-1 belly bear crochet pattern: Postman bear 🐻 THIS IS JUST A MOD TO MY EXISTING 7-in-1 BEAR PATTERN THAT YOU’LL FIND HERE. […]