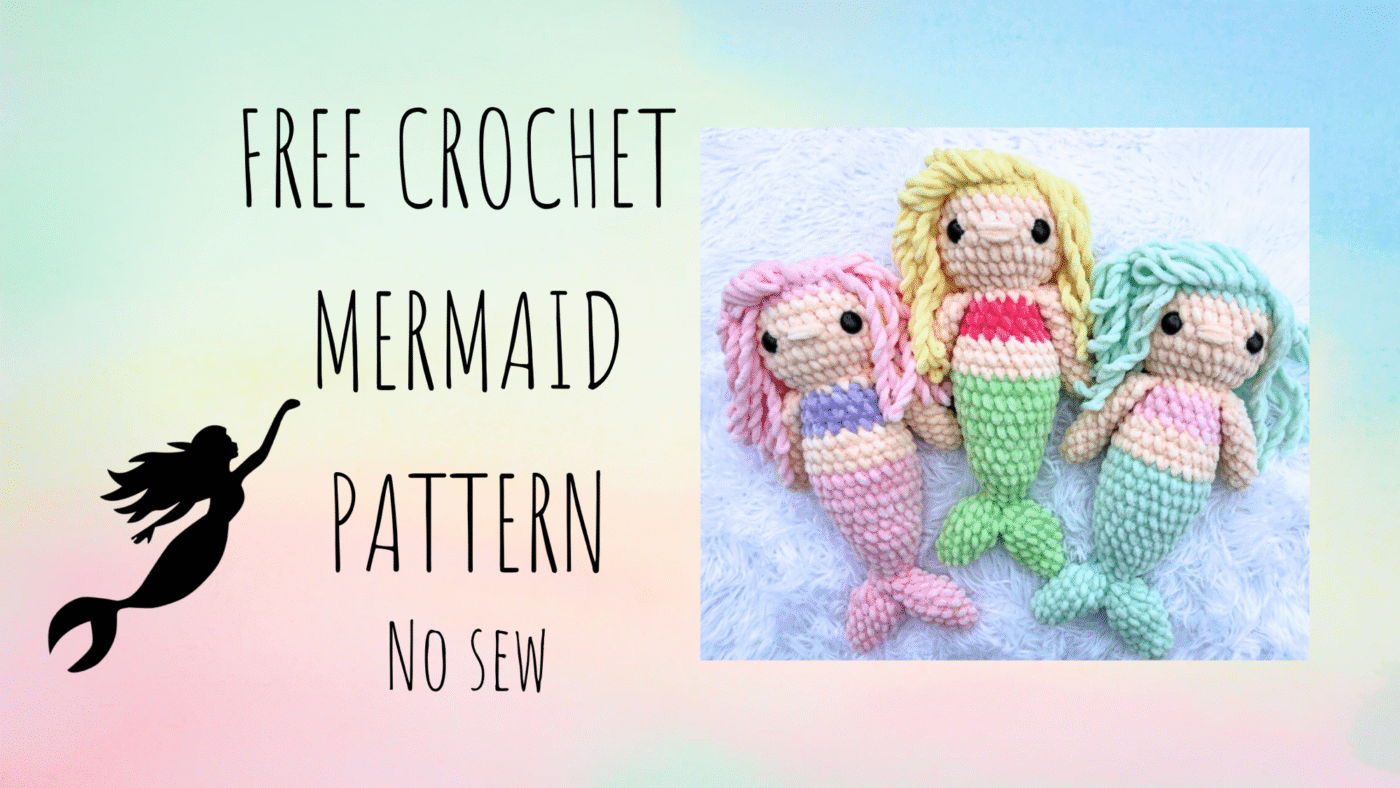
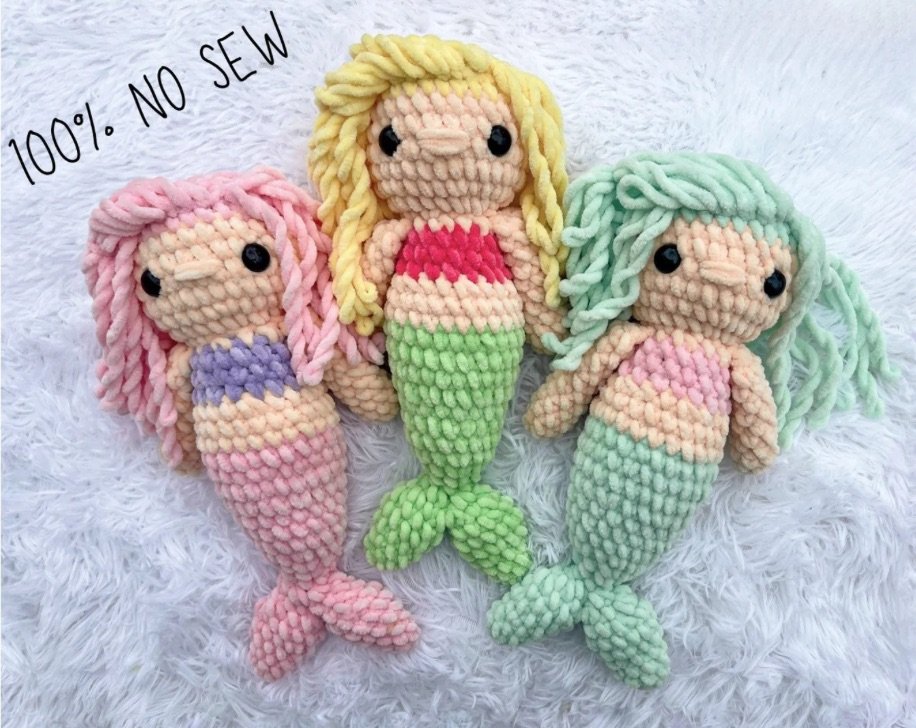
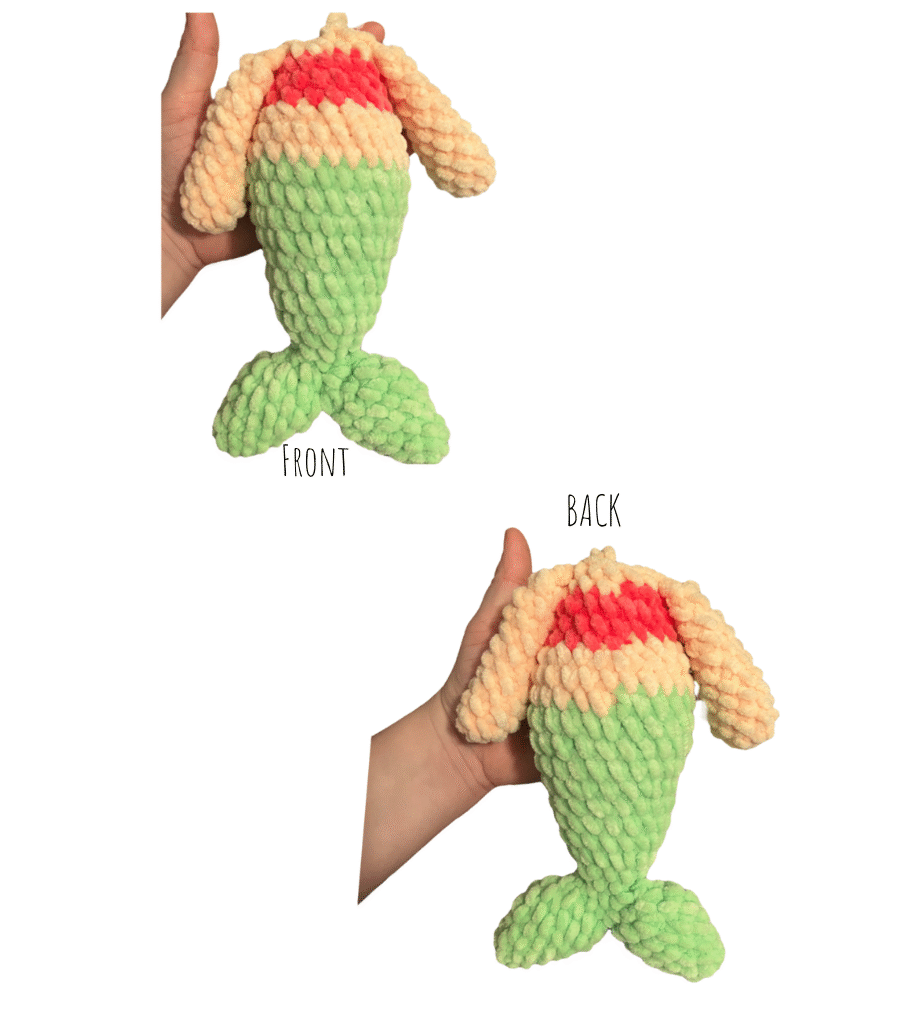
Summer is creeping around the corner! And I wanted to share my mermaid crochet pattern! Bonus: it’s no sew 😉 🧜🏻♀️
If you enjoy this pattern, please give me a follow on social media and let me know what other free patterns you would love to see! Also, don’t forget to tag me in your creations. Happy crocheting!! 🧶
You can also purchase the instant download PDF version of this pattern on my etsy. I also have a baby mermaid pattern too- that has YouTube tutorials- it’s a smaller pattern than this one! Alright, let’s get to it!!
MATERIALS & TOOLS
-Premier yarns parfait chunky in the colors:
•skin color- skin color options in parfait chunky could be: shell, teddy bear, toffee, chocolate, mushroom, cream
•tail color & hair color
•top color
-Safety Eyes: 16mm
-Darning needle
-Scissors
-Polyfil
-3.5mm/4mm hook
ABBREVIATIONS
sc- single crochet
dec- decrease
inc- increase
mc- magic circle
sl st- slip stitch
F/O- finish off
BLO- back loops ONLY
How to read instructions:
The instructions written between * * and followed by x# will be repeated that many times. For example *inc* x12. You will increase 12 times.
!! PLEASE NOTE THAT IN ORDER FOR THE HAIR TO CURL YOU MUST USE A CHENILLE TYPE YARN. THE HAIR WILL NOT CURL BY ITSELF IN OTHER TYPES OF YARNS!!
This pattern is worked in continuous rounds. Do not slip stitch unless stated to do so. The pattern is written is US terminology. I am right handed and used the yarn under technique.
- DO NOT publish or sell this pattern in any form, if you’re sharing a pattern with a friend please share my blog with them
- You may sell creations made from this pattern
- I love seeing my patterns created by others! Please tag me in your creations 🫶🏻
FREE NO SEW MERMAID CROCHET PATTERN
Arms
MAKE TWO
Shell:
1. 4 sc into mc (4)
2. *inc* x4 (8)
3-12. 10 rounds of 8 sc
—Do not stuff, fold in half
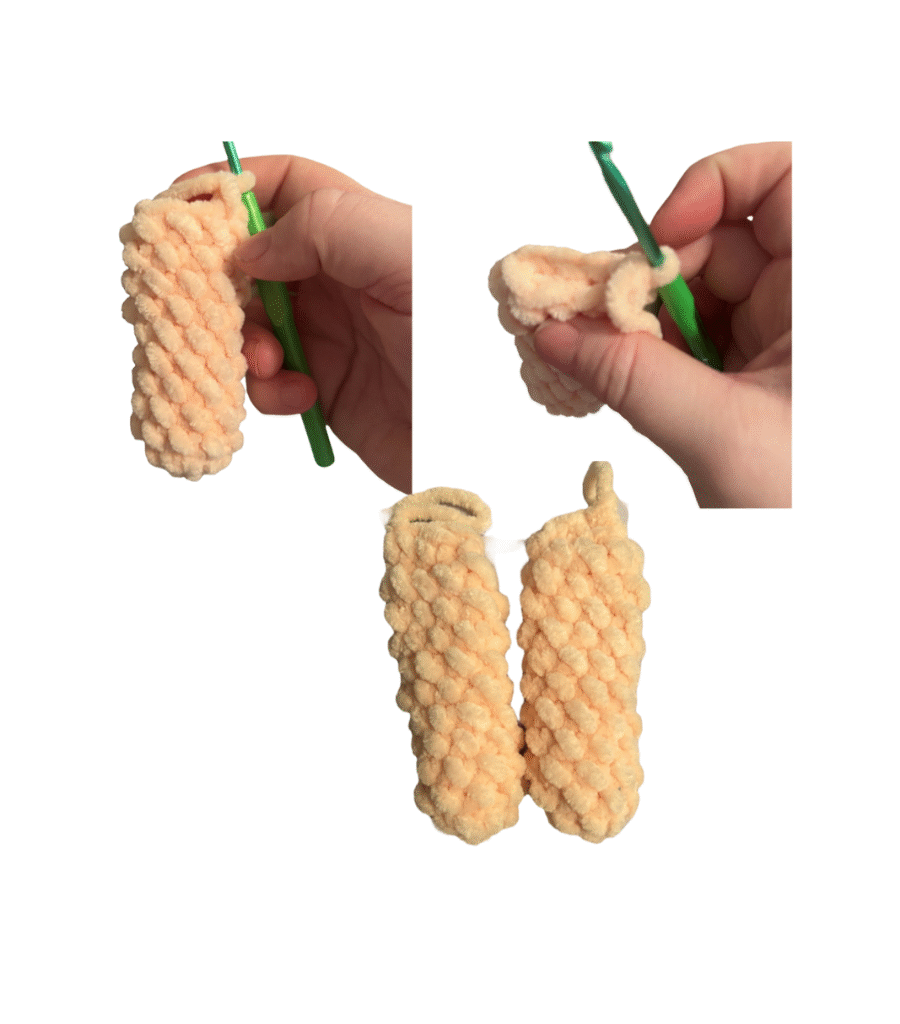
13. *dec* x2 to close by going through both sets of stitches (2)
—F/O and leave a short yarn tail
Fins
MAKE TWO.
Tail color:
1. 5 sc into mc (5)
2. inc, 2 sc, inc, 1 sc (7)
3. 7 sc
4. inc, 3 sc, inc, 2 sc (9)
5. *2 sc, inc* x3 (12)
6. 12 sc
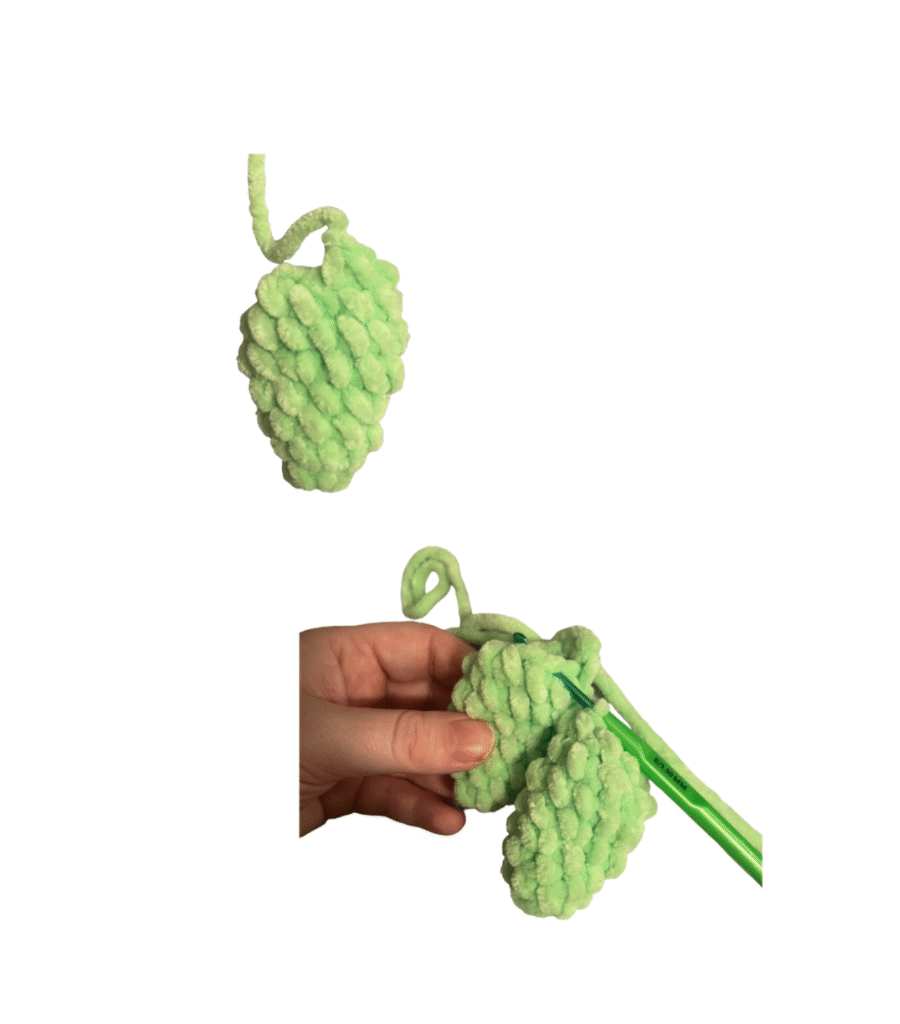
7.*2 sc, dec* x3 (9)
8. *1 sc, dec* x3 (6)
—fasten off the first fin, not thesecond fin
9. Connect the second fin to the first fin with a sc, continue to sc around both fins (12)
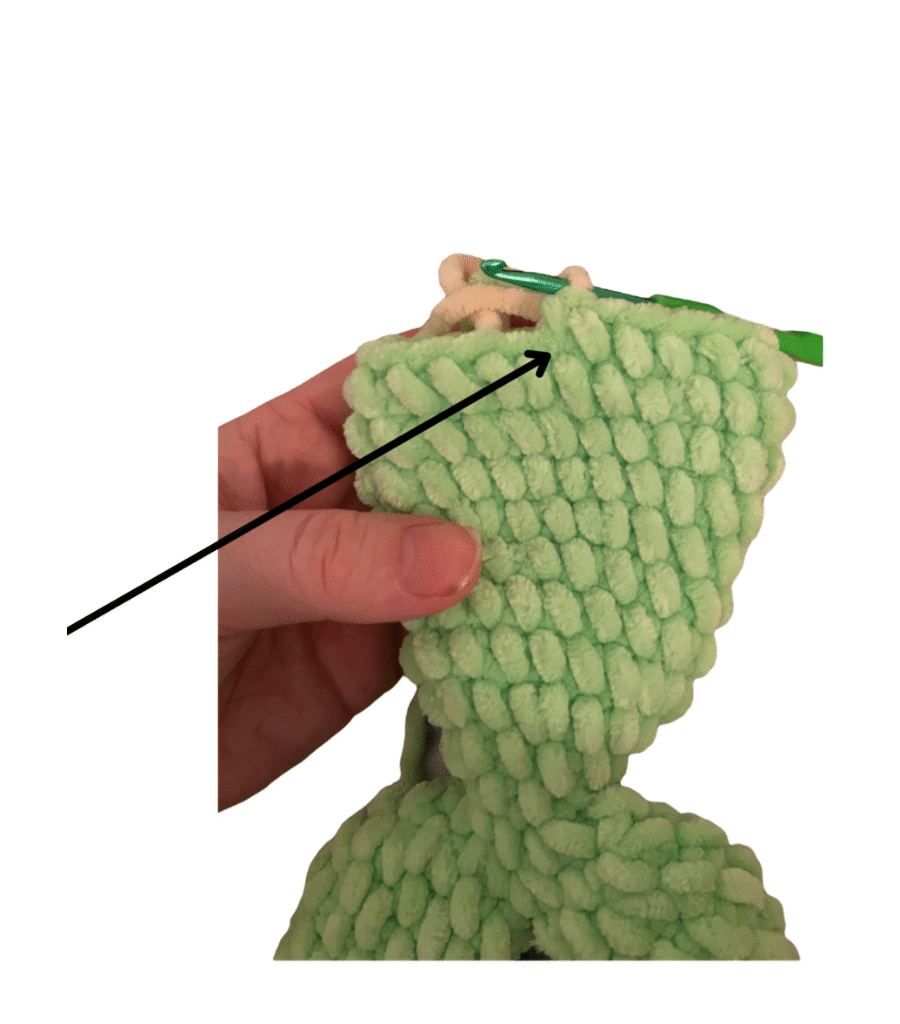
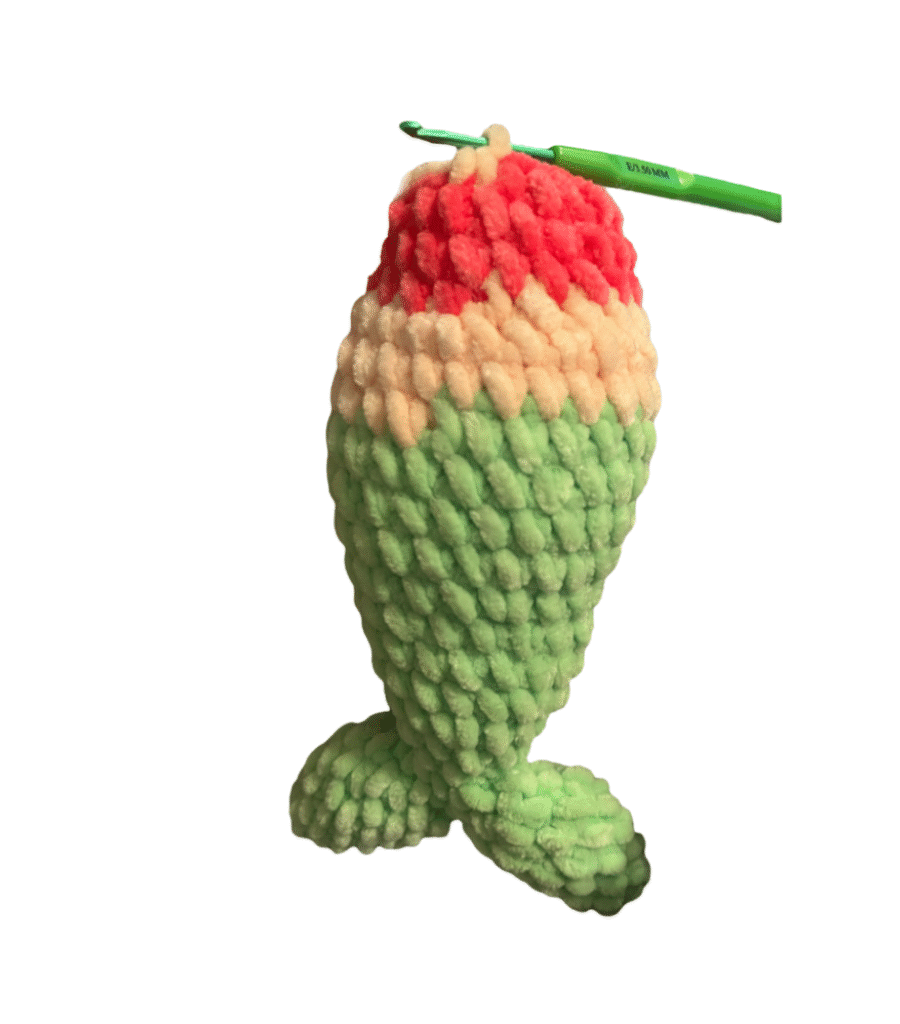
Tail & Body
Continue in tail color:
10. *dec* x6 (6)
— close up the hole between the fins
11. 6 sc
12. *1 sc, inc* x3 (9)
13. *2 sc, inc* x3 (12)
14. *1 sc, inc* x6 (18)
15-17. 3 rounds of 18 sc
18. *2 sc, inc* x6 (24)
19-21. 3 rounds of 24 sc
—start stuffing and shaping the tail
—before color changing to skin color you will sc as many stitches as needed IN TAIL COLOR to get your color change to the back of the doll, the number needed will vary depending on how your work spirals. For my case, this was 4 sc.
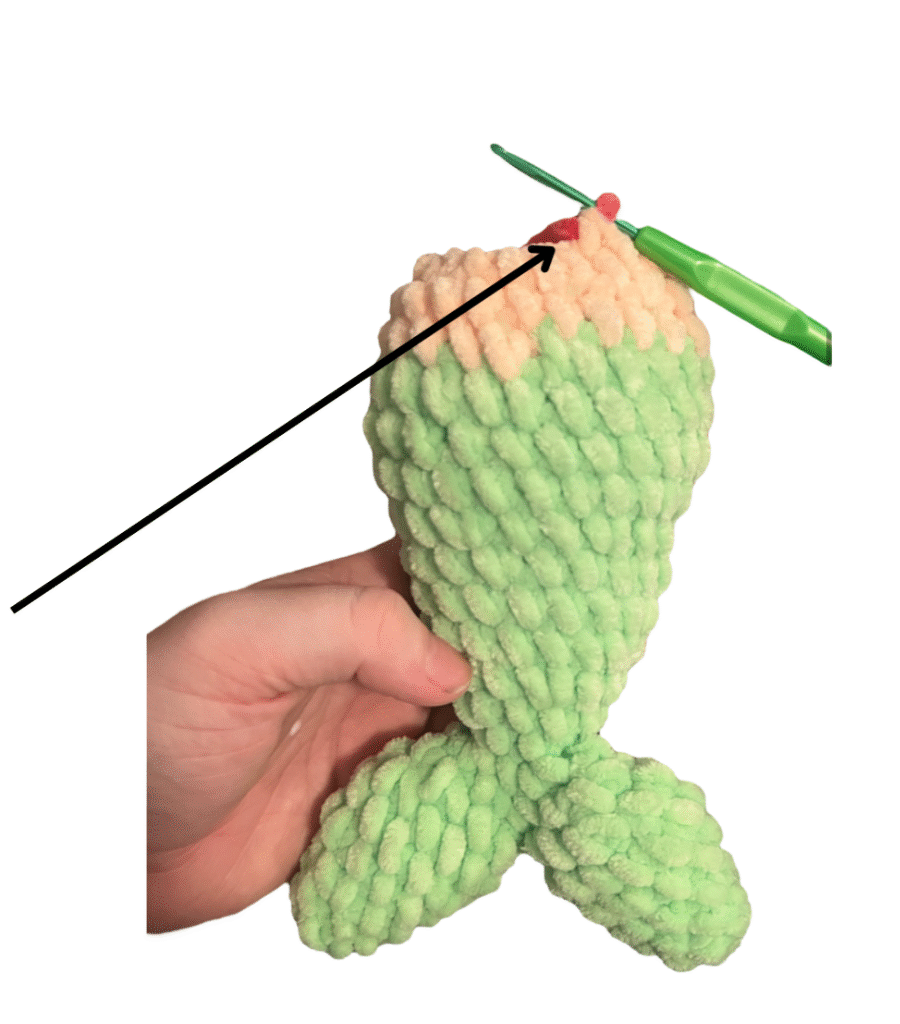
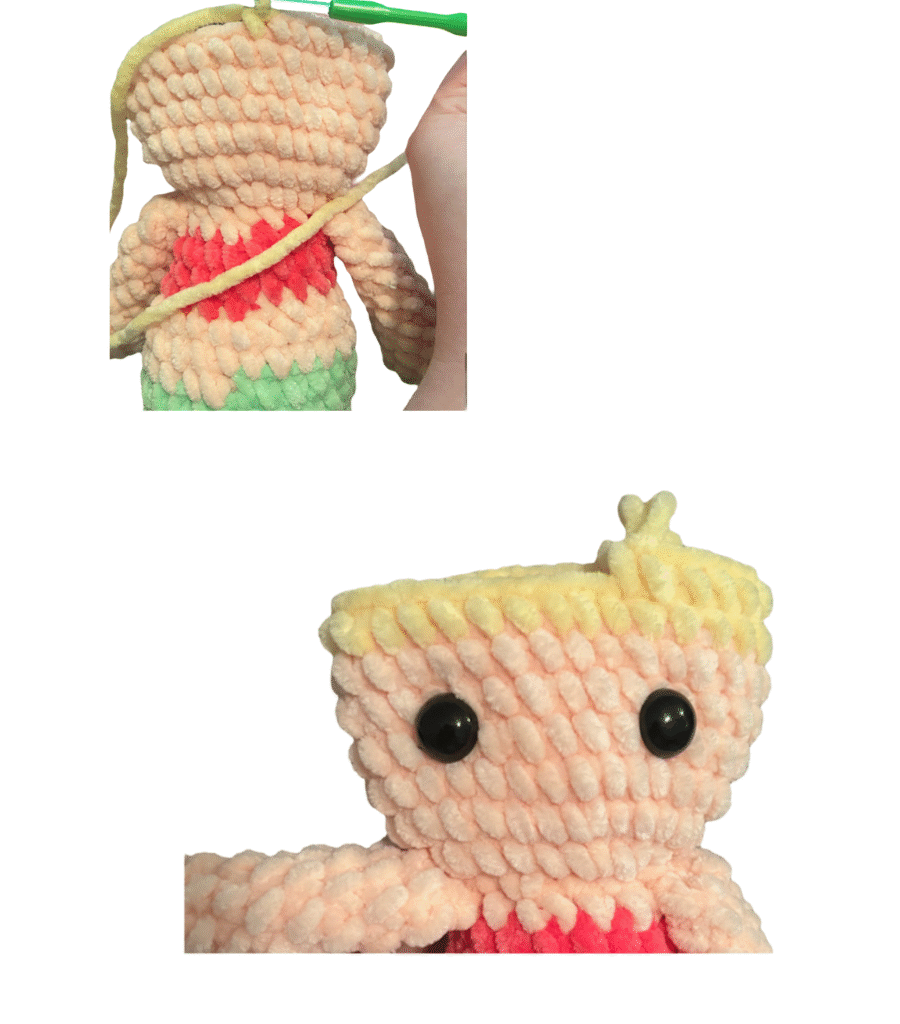
Color change to skin color:
22. 20 sc (24) —remember, I previously used 4 sc to get the color change to the back of my mermaid. 4+20= 24. AGAIN: this number will VARY
23. 24 sc
—stuff and shape
24. *2 sc, dec* x6 (18)
—before color changing to top color you will sc as many stitches as needed IN SKIN COLOR to get your color change to the back of the doll, the number needed will vary depending on how your work spirals. For my case, this was 6 sc.
Body continued:
Color change to top color:
25. 12 sc —remember, I previously used 6 sc to get the color change to the back of my mermaid. 6+12=18. AGAIN: this number will VARY
26-27. 2 rounds of 18 sc
—stuff and shape
—before color changing to skin color you will continue the next step for as many stitches as needed IN TOP COLOR to get your color change to the back of the mermaid, the number needed will vary depending on how your work spirals. You will be doing: *1 sc, dec* x6 (12) For my case, to get the color change in the back I had to do: 1 sc, dec, 1 sc, dec, 1 sc (5)
Color change to skin color:
28. dec, 1 sc, dec, 1 sc, dec, 1 sc, dec (12) —remember, I previously used (1 sc, dec, 1 sc, dec, 1 sc) to get the color change to the back of my mermaid. 5+7=12. AGAIN: this number will VARY
29. 1 sc, connect arm with 2 sc, 5 sc, connect arm with 2 sc, 2 sc (12)
—STUFF
—you may have to adjust arm placement
Head
30. *inc* x12 (24)
31. *3 sc, inc* x6 (30)
32-35. 4 rounds of 30 sc
—for the next round before color changing to hair color you will continue the next step for as many stitches as needed IN SKIN COLOR to get your color change to the back of the mermaid, the number needed will vary depending on how your work spirals. For my case, to get the color change in the back I had to do: 11 sc
Color change to hair color:
36. 19 sc (30) —remember, I previously used 11 sc to get the color change to the back of my mermaid. 11+19=30. AGAIN: this number will VARY
37. 30 sc
38. In the BLO *3 sc, dec* x6 (24)
–eyes between rounds 34 & 35- FIVE visible stitches apart
39. *2 sc, dec*x6 (18)
—start stuffing and CONTINUE to stuff and shape
40.*1 sc, dec* x6 (12)
41. *dec* x6 (6)
—close the hole shut
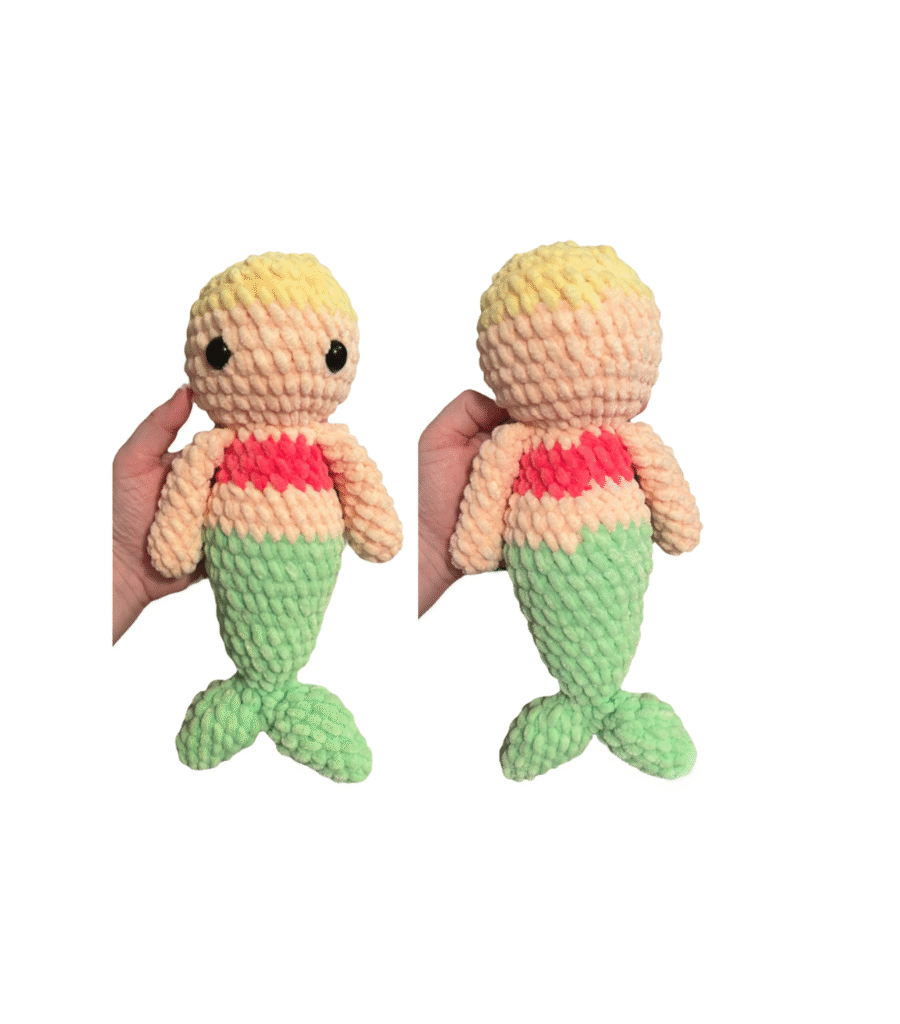
Connecting the hair
In hair color:
1. Slip Stitch into the FRONT LOOPS of the round we previously were crocheting into the BLO in. RIGHT ABOVE THE LEFT EYE
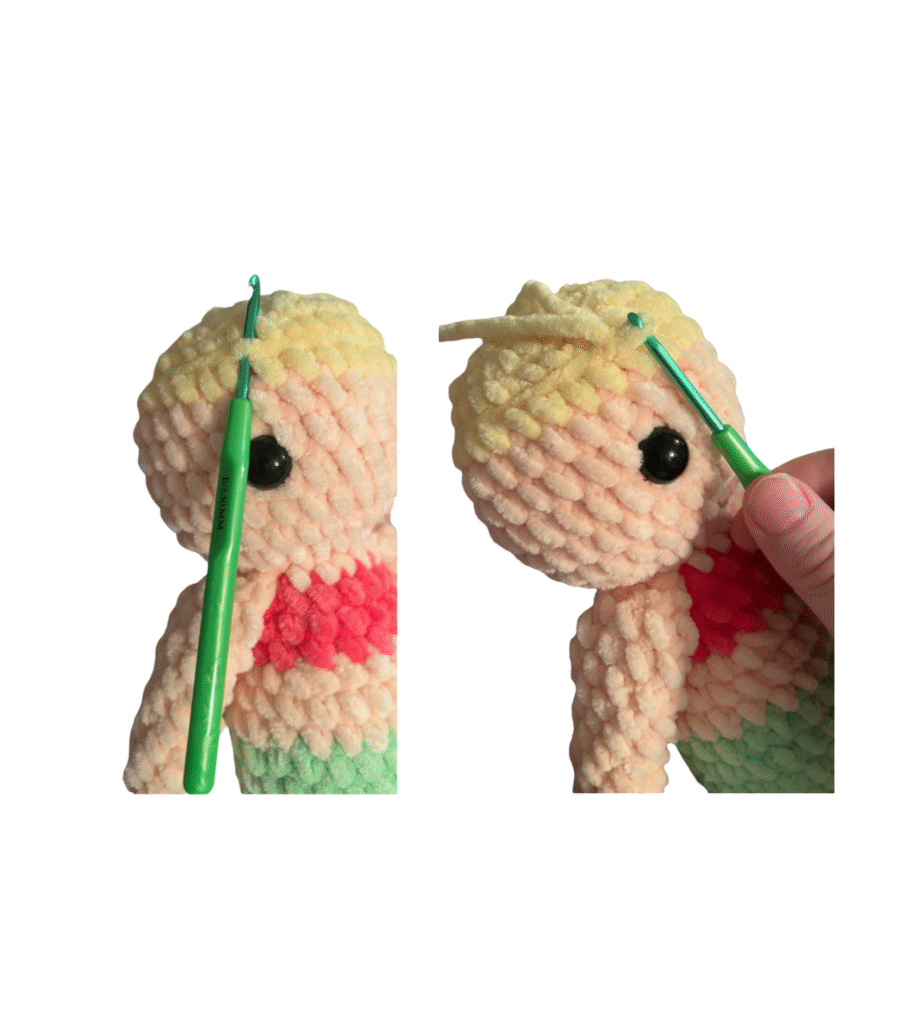
2. After slip stitching, pull up a long loop, the hair will “curl” naturally IF using chenille yarn
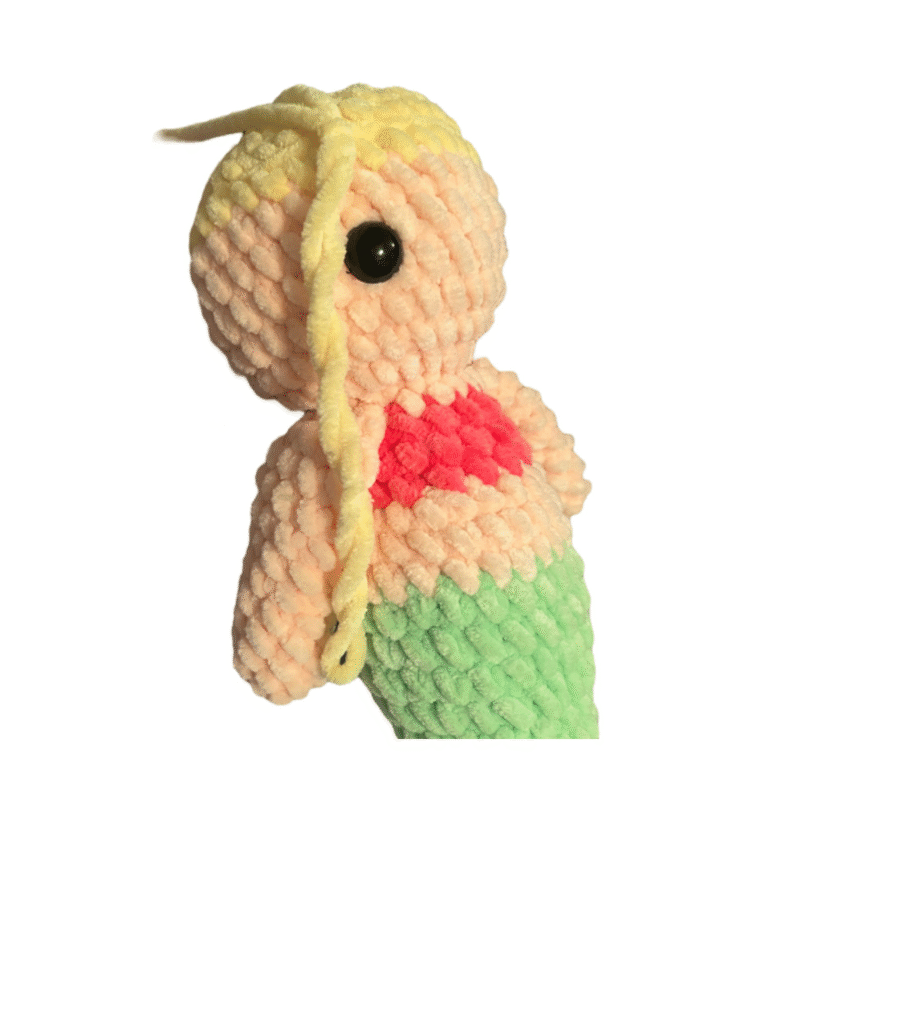
3. Slip stitch into the very next stitch and pull up a long loop again. REPEAT this around the head: slip stitch & pulling up long loops. At the BACK of the head: do 2 hair strands per front loop
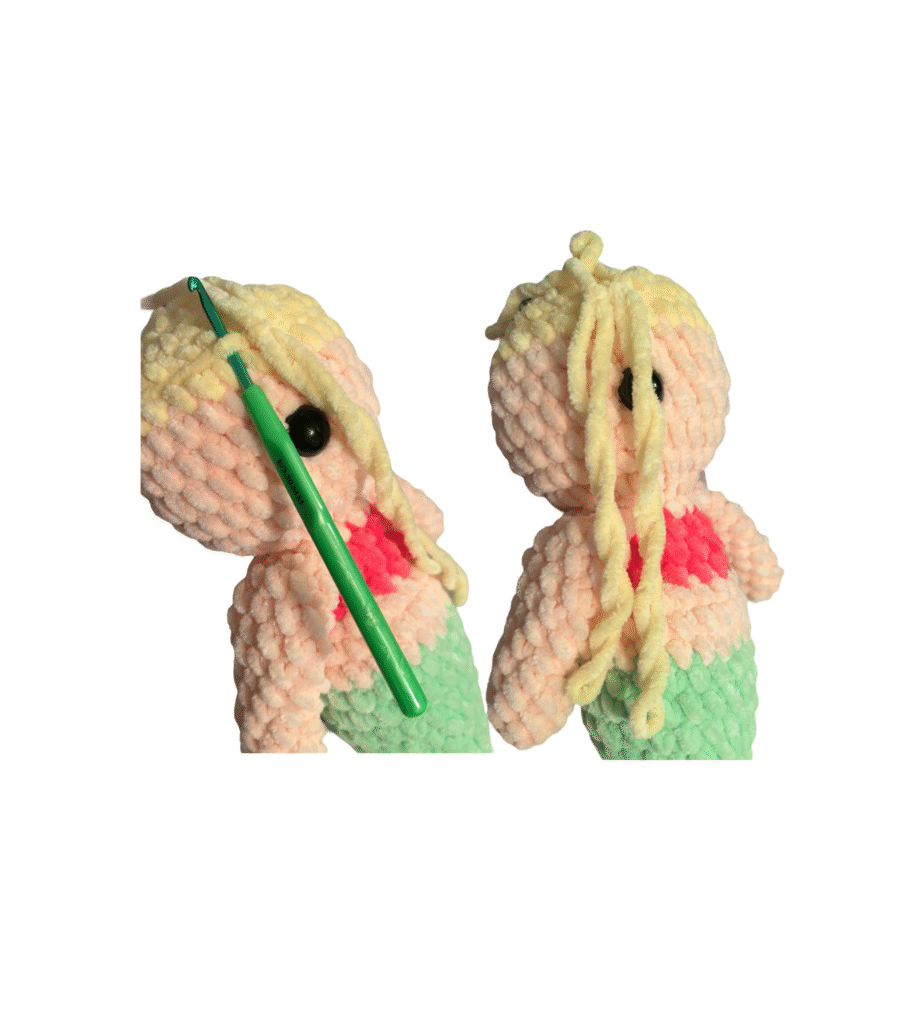
Hair continued & nose
4. Fill in the back of the head completely. Then when you get back to the front of the mermaid: pull very LONG loops to create bangs
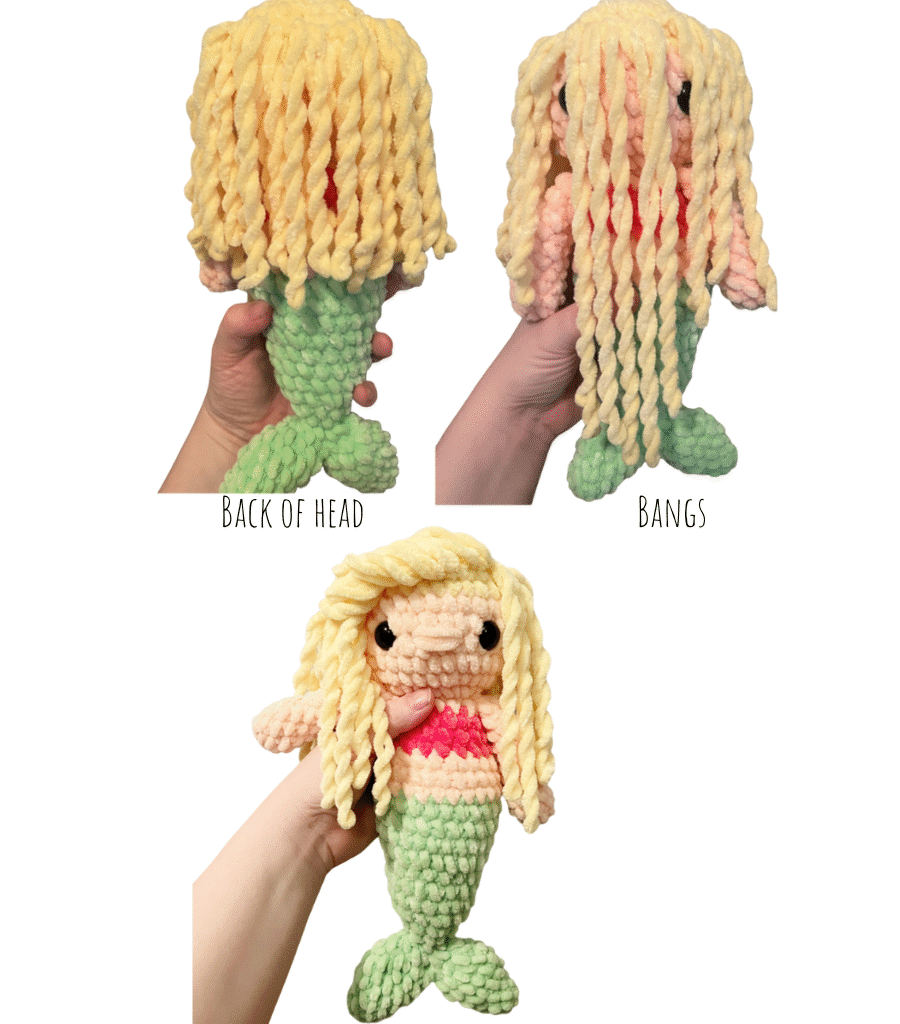
5. Secure the bangs to the side of the head with the hair strands that are already on the side and then stitch on a nose in between the eyes. Covering 3 stitches.
CONGRATULATIONS! YOU FINISHED YOUR MERMAID!
I hope you enjoyed this pattern and found it easy to follow. I look forward to sharing more patterns with you, hope to see you soon!