
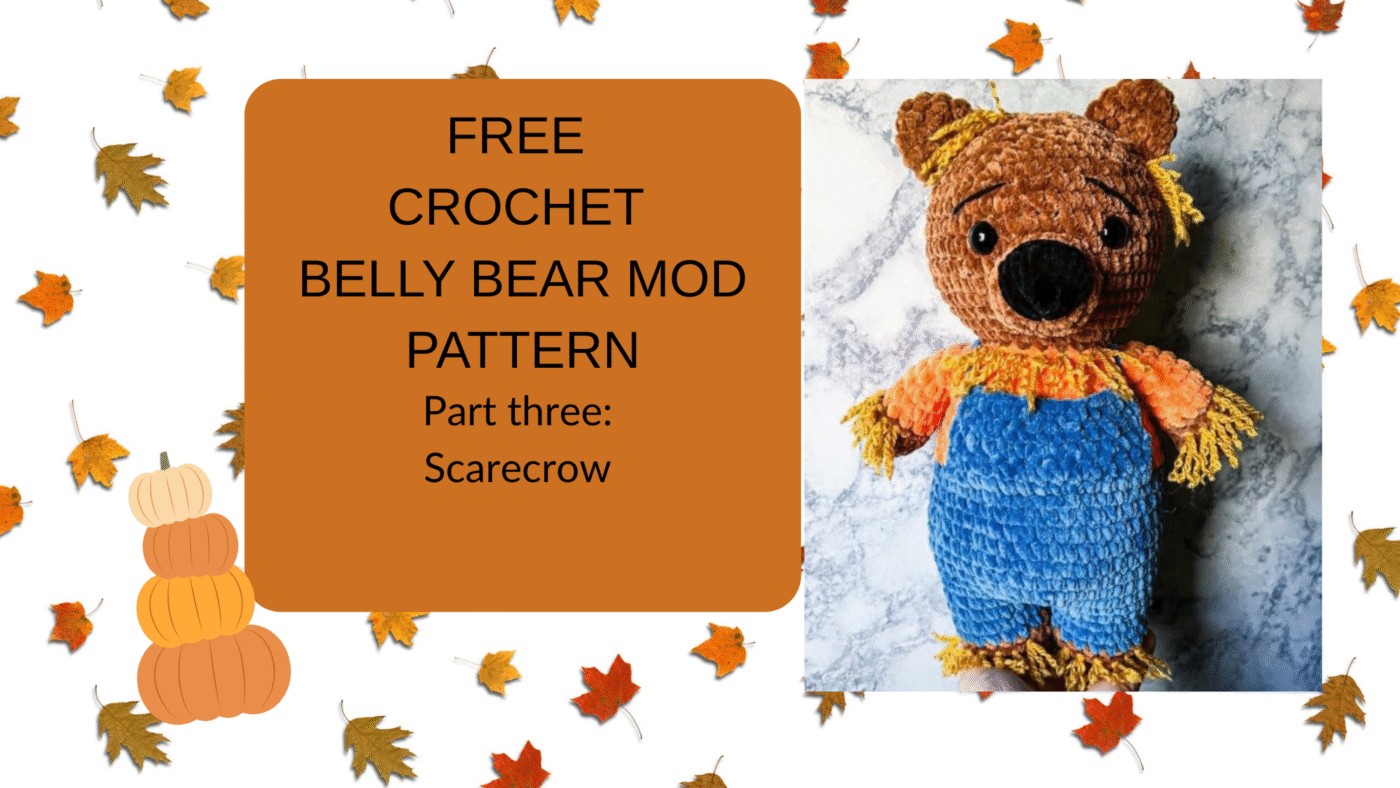
part three of the 7-in-1 belly bear crochet pattern: Scarecrow bear 🐻 THIS IS JUST A MOD TO MY EXISTING 7-in-1 BEAR PATTERN THAT YOU’LL FIND HERE.
You will be following the base pattern as normal for the most part BUT I have included what needs to be changed to create the scarecrow bear.
If you enjoy this pattern, please give me a follow on social media and let me know what other free patterns you would love to see! Also, don’t forget to tag me in your creations on instagram. Happy crocheting!! 🧶
You can also purchase the formatted instant download PDF version of this pattern and all the mods together in one pdf on my archive etsy for $1.50. Now- let’s get to it!
MATERIALS & TOOLS
premier yarns parfait chunky in the colors:
Teddy, tangerine, cornflower & black.
-3.5 mm crochet hook
-Polyfil
-16, 18 or 20 mm safety/felt eyes (for parfait chunky)
-darning needle
-scissors
-4 weight yarn for embroidering eyebrows and the straw look
ABBREVIATIONS
- CH – chain
- SC – single crochet
- INC – single crochet increase (2 SC in each stitch)
- DEC – decrease (I use the invisible decrease in all of my creations)
- SLST – slip stitch
- MC- Magic circle
- BLO- back loops only
This pattern is worked in continuous rounds. Do not slip stitch unless stated to do so. The pattern is written is US terminology. I am right handed and used the yarn under technique.
- DO NOT publish or sell this pattern in any form, if you’re sharing a pattern with a friend please share my blog with them
- You may sell creations made from this pattern
- I love seeing my patterns created by others! Please tag me in your creations 🫶🏻
- My finished bear measures around 12” tall
BELLY BEAR SCARECROW MOD PATTERN

Again this is a MOD, please follow the base pattern and change only what is stated below:
Arms (make two)
in teddy color
1. 6 sc into mc (6)
2. Inc x6 (12)
3-4. 12 sc around- 2 rounds
color change to tangerine color:
5. BLO 12 sc (12)
6-11. 12 sc around -6 rounds
Lightly stuff the arms. Fold in half sc closed with 6 sc. Knot off and cut the yarn. You don’t need to leave a long yarn tail.
Legs & Pants
fasten off the first leg but not the second
in teddy color
1. 6 sc into mc (6)
2. Inc x6 (12)
3. 1 sc, inc x6 (18)
4-5. 18 sc around- 2 rounds
-color change to cornflower color-
6. BLO 18 sc
7. 18 sc around- 1 round
-CONTINUE THE BASE PATTERN AS NORMAL BUT CROCHETING IN THE CORNFLOWER COLOR YOU USED FOR THE PANTS. WHEN YOU GET TO STEP 13 IN THE BASE PATTERN, COLOR CHANGE TO THE TANGERINE SHIRT COLOR AND CONTINUE THE PATTERN AS NORMAL-
Adding straw
with a 4 weight yellow yarn; add straw in the front loops of the sections we crocheted into the back loops of- his legs, arms, neck, and add a few pieces of yarn to his head as well near his ears if you’d like.
instructions continued
this one may be a little more difficult to understand in writing so I also included a video from start to finish if that extra help is needed.
top part of overalls
(ch 1 does not count as a stitch)
1. Turn the bear over and find your color change. Count over 18 sc and attach your yarn into that 18th stitch with a slip stitch. Ch 1 and make 1 sc into that same stitch.
2. place 1 sc into each of the next 12 front loop stitches. Ch 1 and turn.
3-6. 13 sc across, ch 1 and turn -4 rows
7. on the last row you will knot off your yarn and leave a long yarn tail for creating the straps. You will take your yarn and go to the back of the bear and attach it by going through one of the front loops in the middle of the bear. Pull the yarn tail back up towards the overalls And attach it into the corner of the overalls.
Knot it off and then weave in your yarn tail.
The video helps better explain this part if you need extra help:

CONGRATULATIONS! YOU FINISHED BELLY BEAR SCARECROW MOD PATTERN 🐻
I hope you enjoyed this pattern and found it easy to follow. I will be posting the other modifications to this pattern to my blog as well!