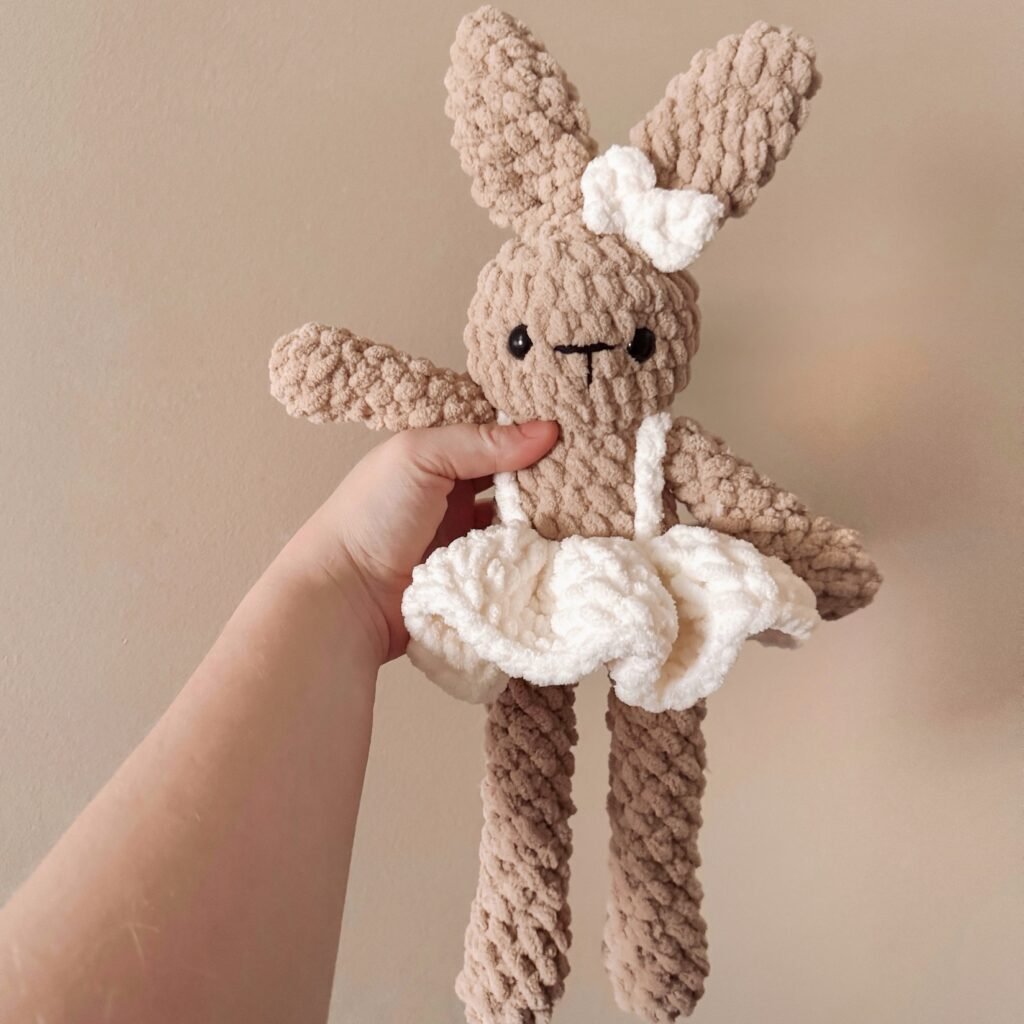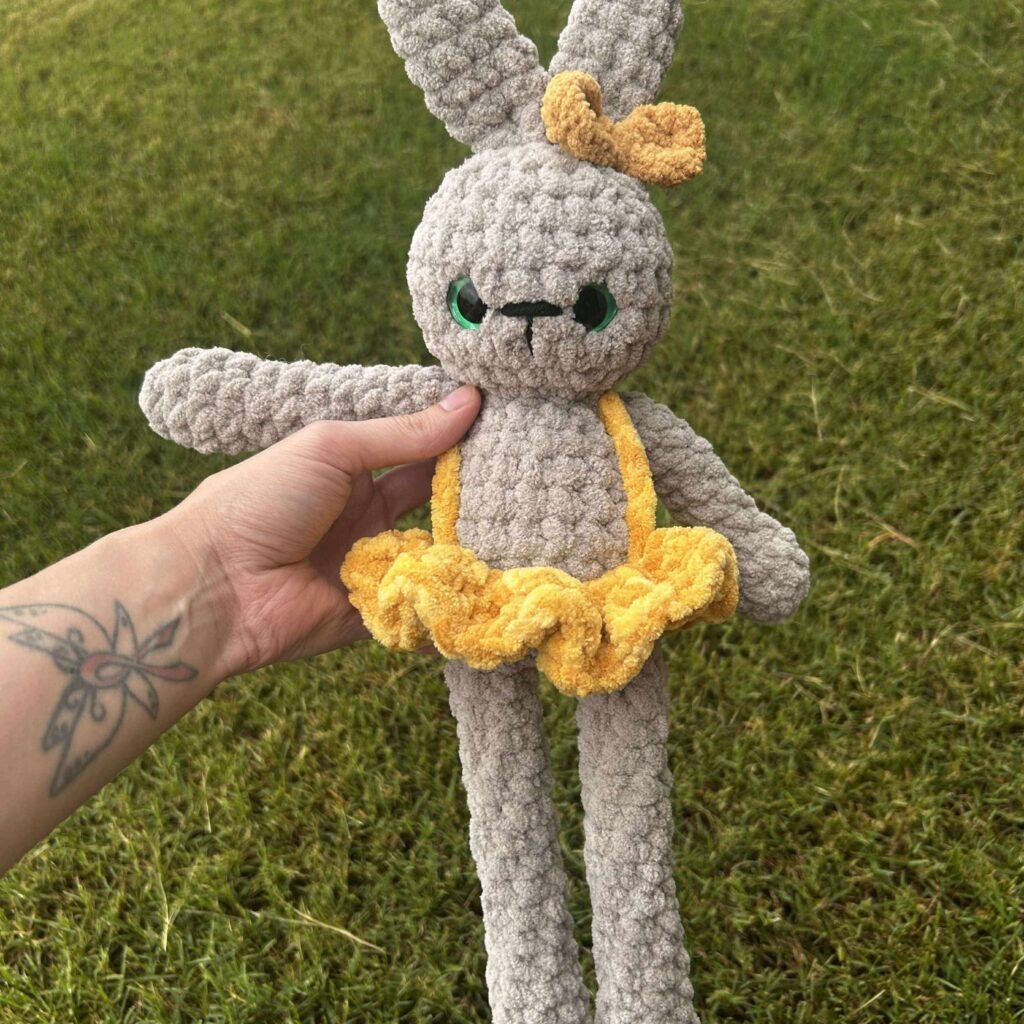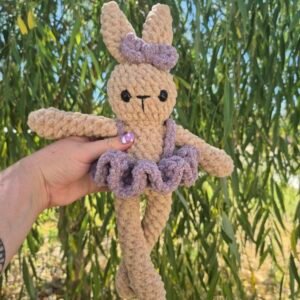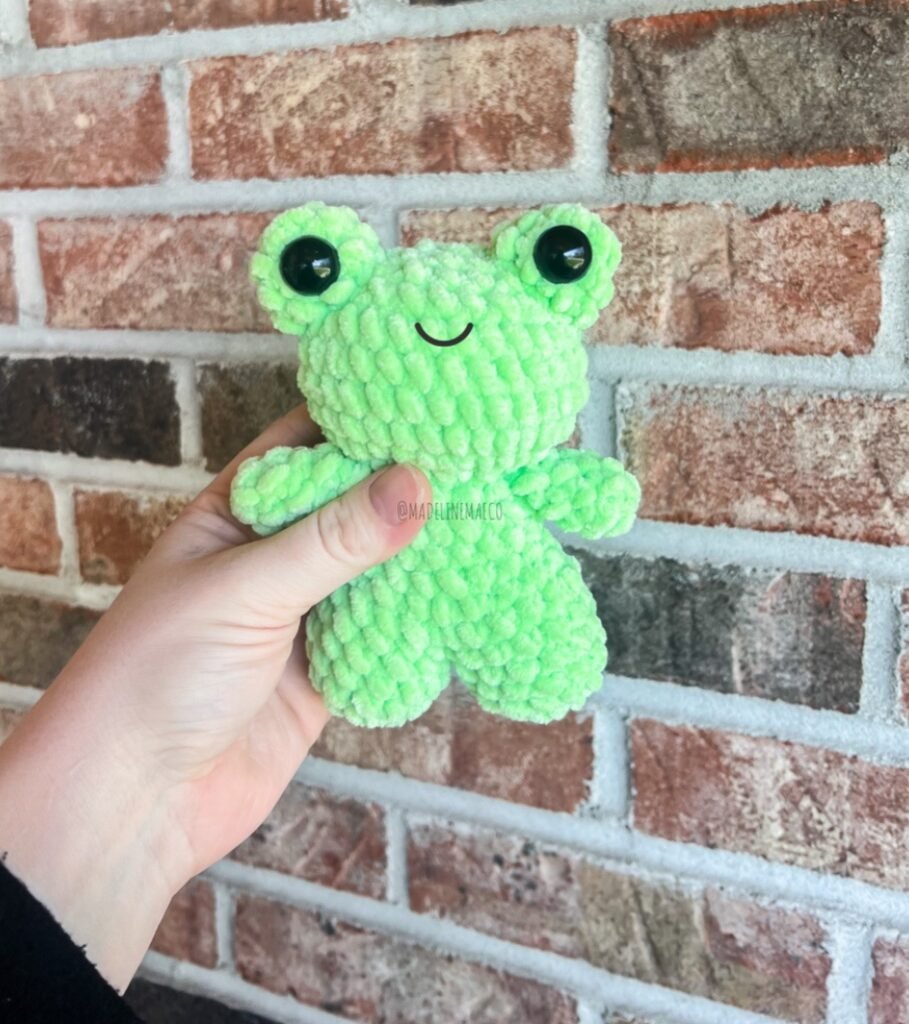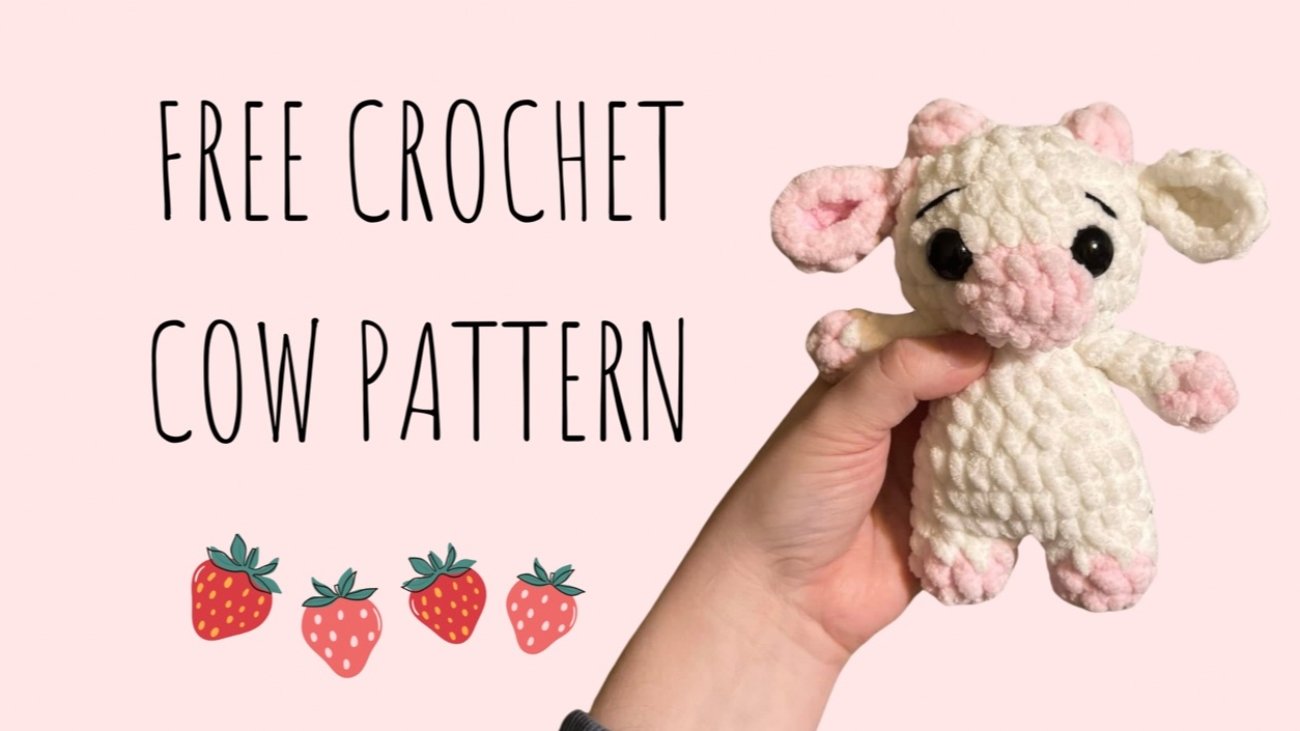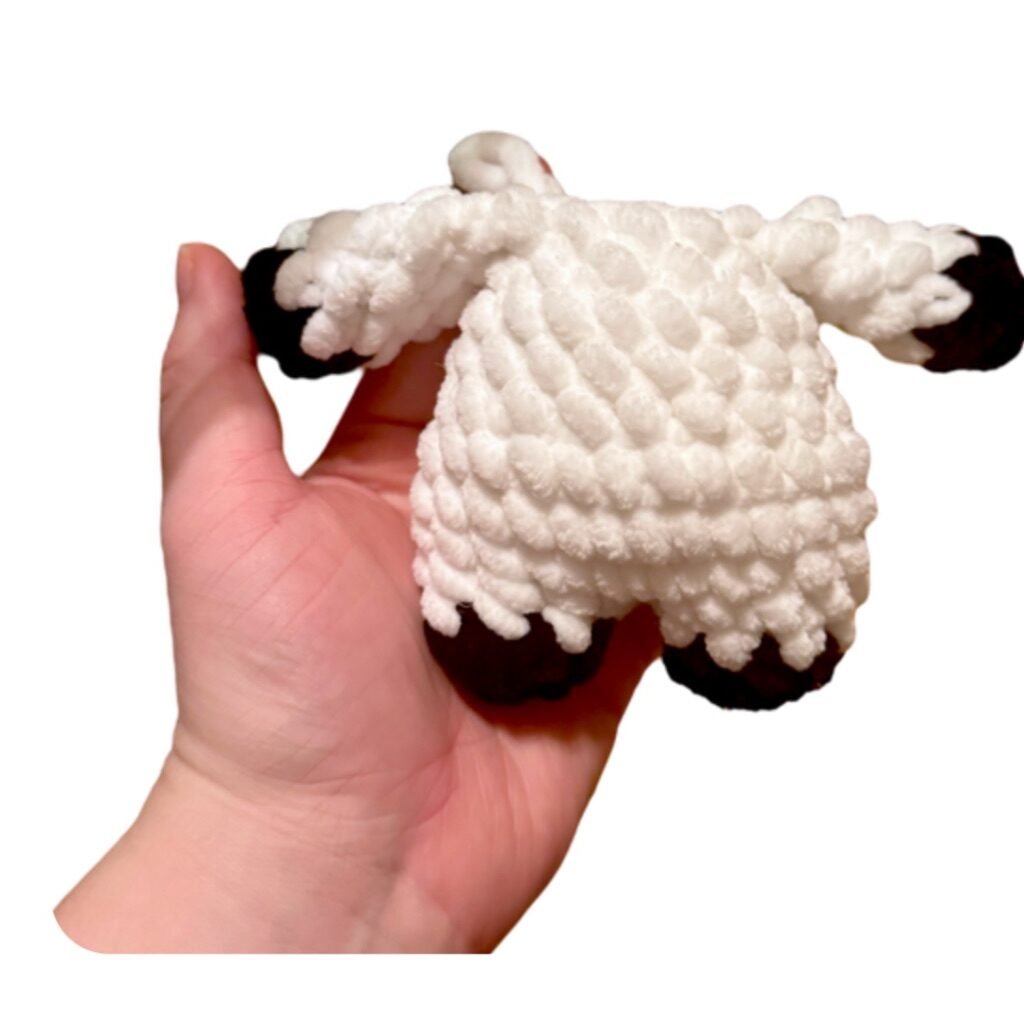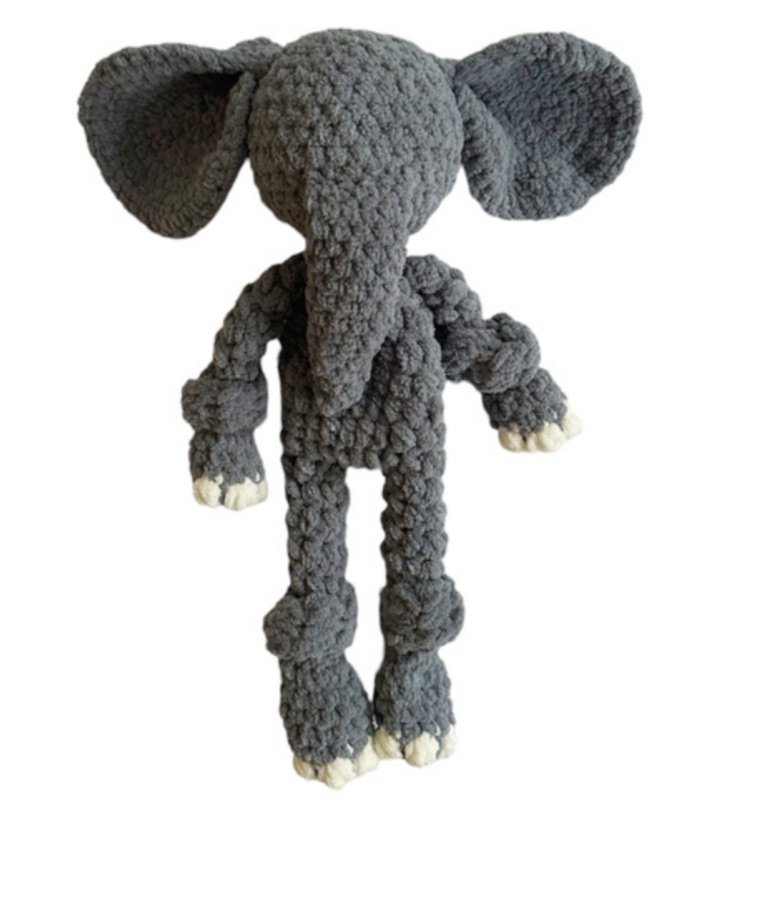
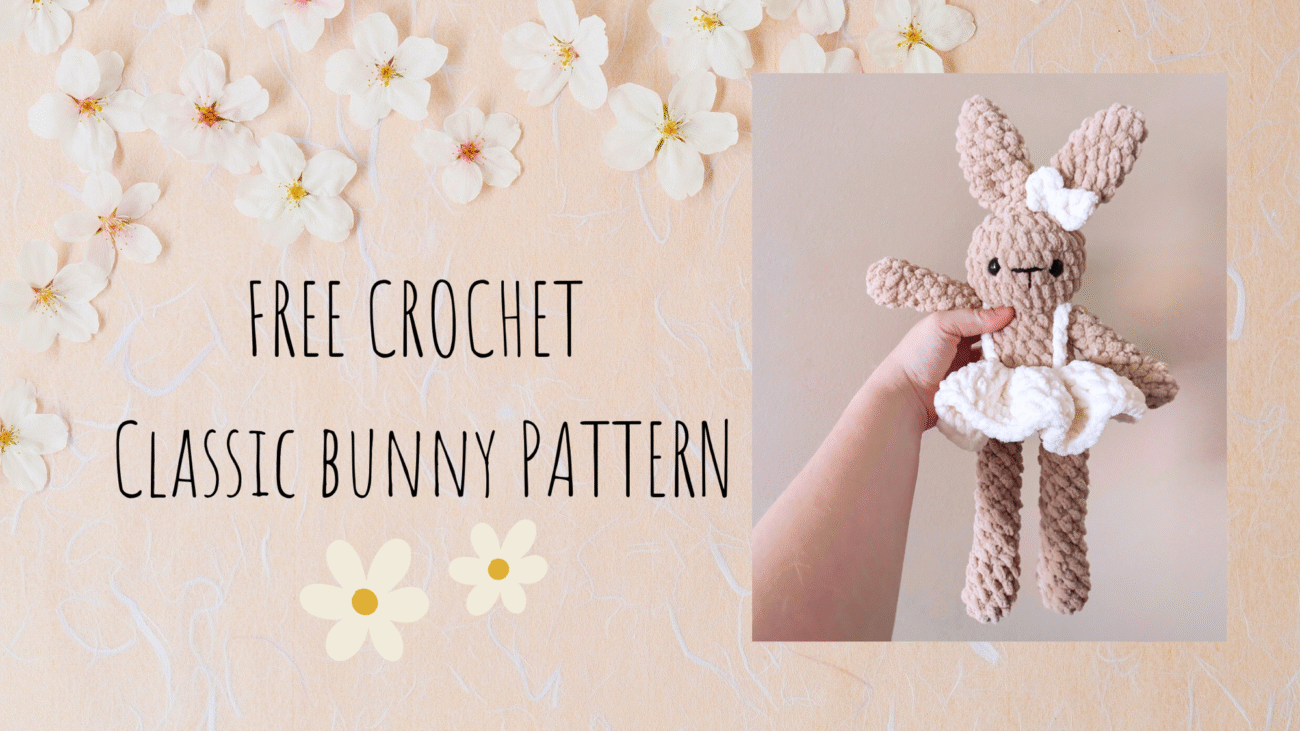

I’ve wanted to start a blog specific free body style pattern, and decided that’ll be my Classic Collection. Up first, is this sweet classic bunny! Featuring long legs, arms & a removable dress 🫶🏻 This collection has been in the works for sometime now so I hope you enjoy the first pattern!!
If you enjoy this pattern, please give me a follow on social media and let me know what other free patterns you would love to see! Also, don’t forget to tag me in your creations! 🧶
You can also find this pattern on my etsy if you prefer to purchase it! It’s formatted and free of watermarks 😊
NOTES
Pattern is written in US terms.
Follow the pattern as written.
This pattern is worked in continuous rounds, do not slip stitch after each round.
Use a stitch marker to indicate the beginning of your round if desired.
The designer is right handed and uses the yarn under technique.
ABBREVIATIONS
mc- magic circle
ch- chain
dec- decrease (I use the invisible decrease method)
inc- increase
( ) x#- repeat
sc- single crochet
slst- slip stitch
( )- stitch count
F/O- fasten off
hdc- half double crochet
MATERIALS
HOOK: 4mm
YARN: Premier Yarns Basix Chenille in the colors Caramel & Anemone. Also black cotton yarn for embroidering the nose & mouth
NOTIONS: scissors, stitch marker, darning needle
OTHER: polyfil, 14mm safety eyes
Now let’s go to the fun part- the pattern!!!!
PATTERN
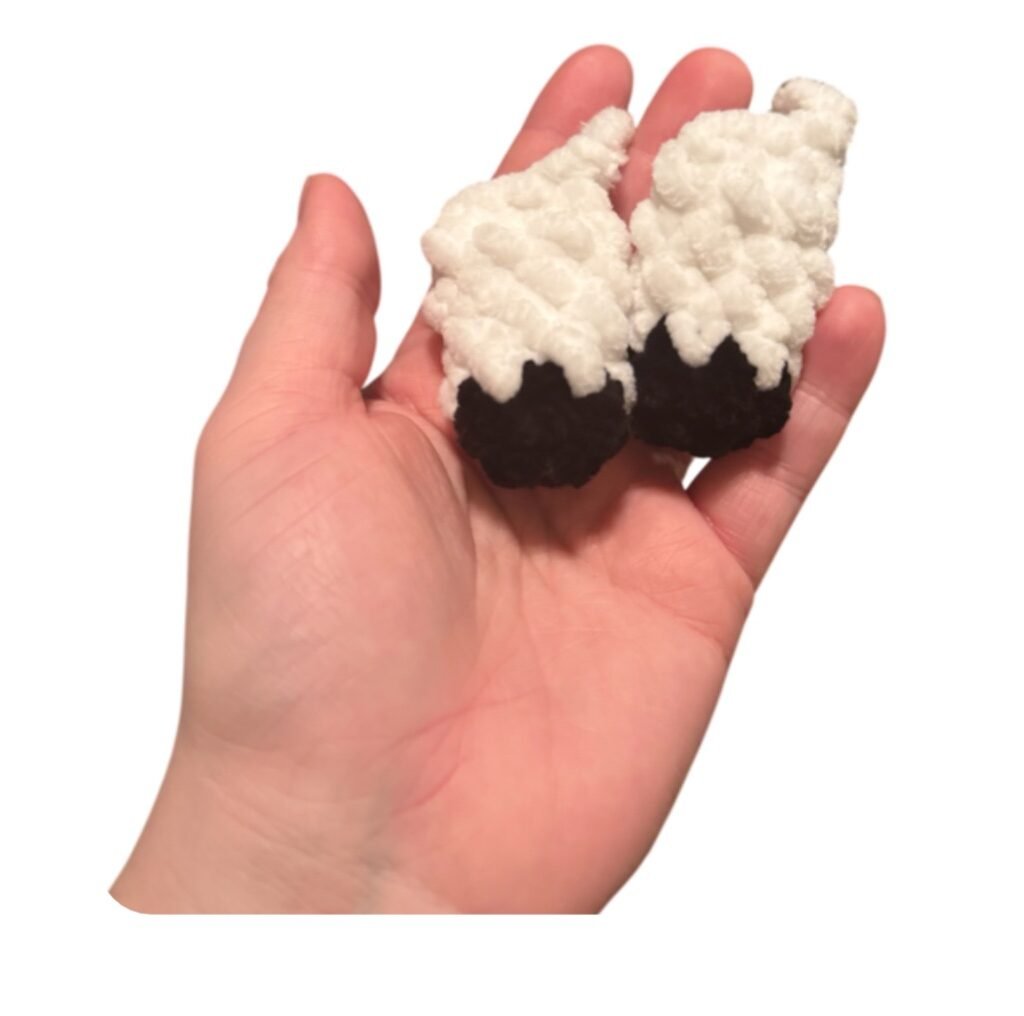
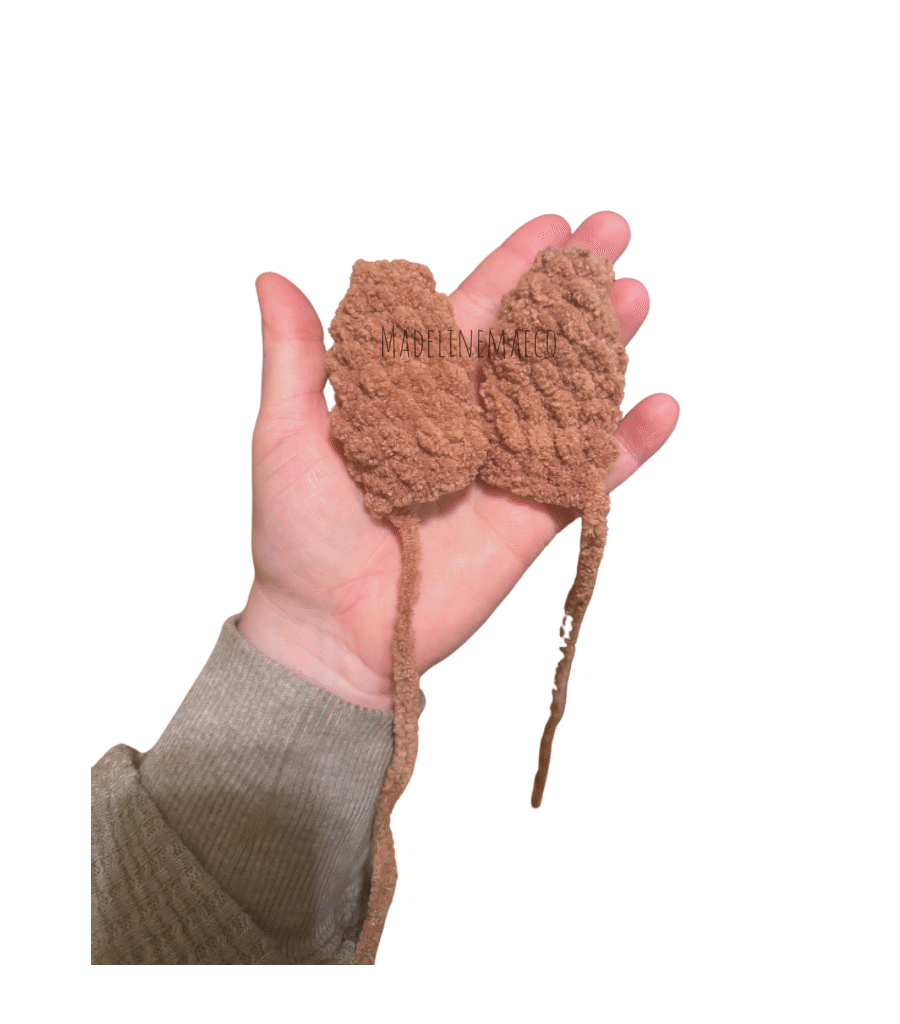
EARS
Make two
in caramel
Round 1. 4 sc into mc (4)
Round 2. (1 sc, inc) x2 (6)
Round 3. (2 sc, inc) x2 (8)
Rounds 4-8. 5 rounds of 8 sc
do not stuff
Last step. fold the ear in half, like a sandwich, and close with: 4 sc (4)
F/O. Leave a long yarn tail. You’ll sew onto the head later on.
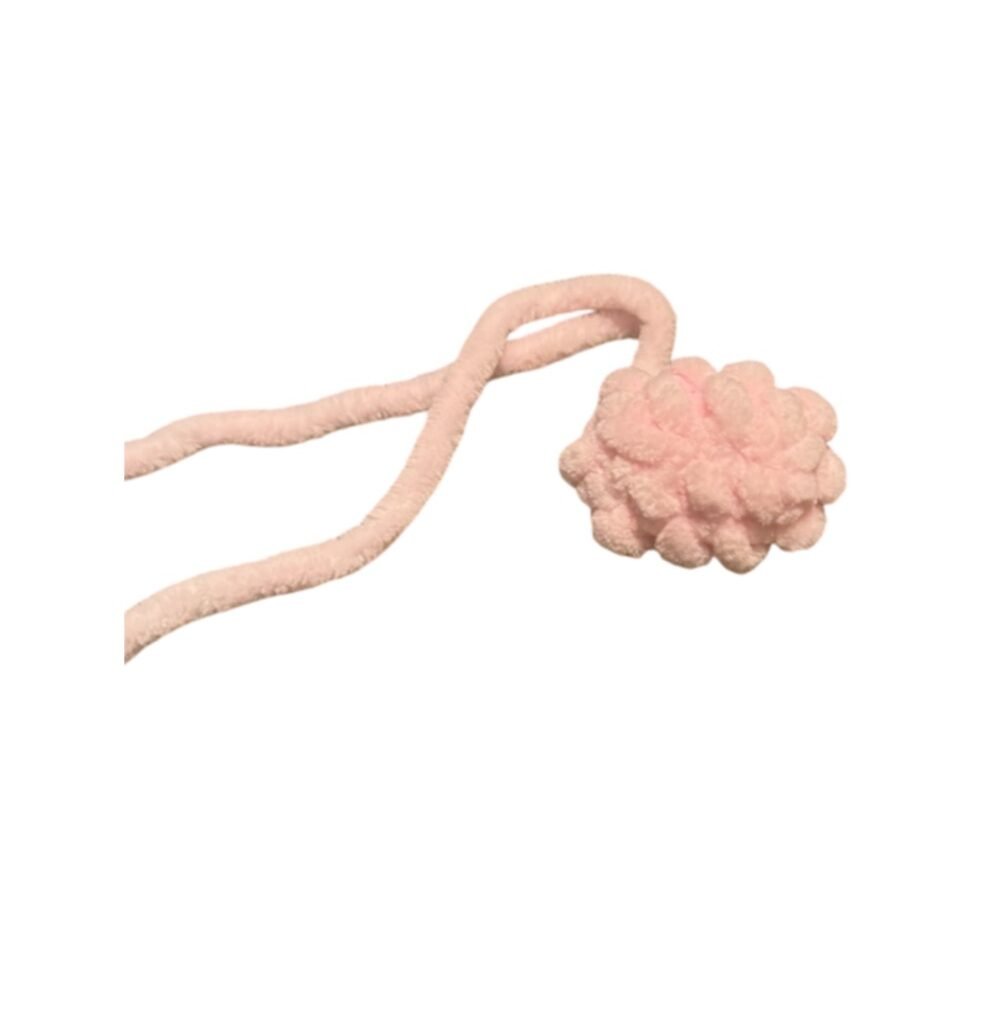
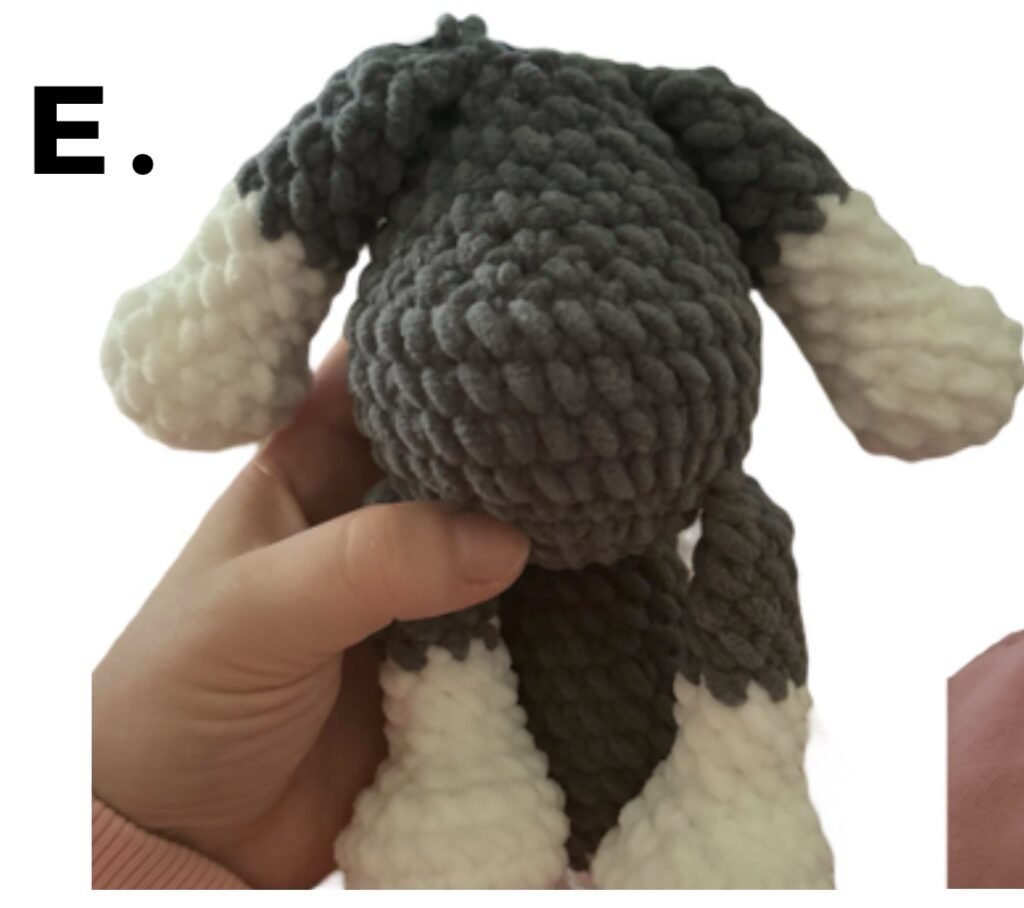
ARMS
Make two.
in caramel
Round 1. 4 sc into mc (4)
Round 2. (inc) x4 (8)
Rounds 3-4. 2 rounds of 8 sc
Round 5. (2 sc, dec) x2 (6)
Lightly stuff the arm, don’t stuff anymore going forward
Rounds 6-12. 7 rounds of 6 sc
Last step. Fold the arm in half, like a sandwich, and sc the arm closed with: dec, 1 sc (2)
F/O. Leave a short yarn tail. You’ll crochet onto the body later on.
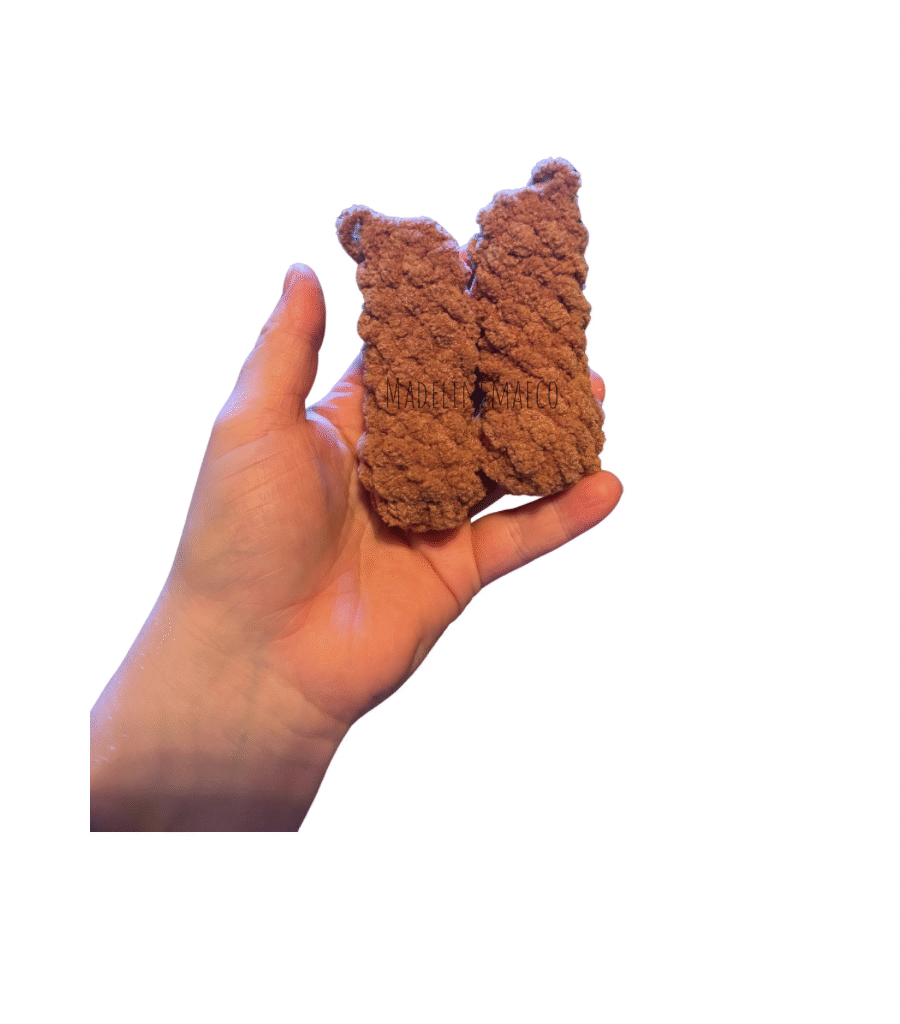
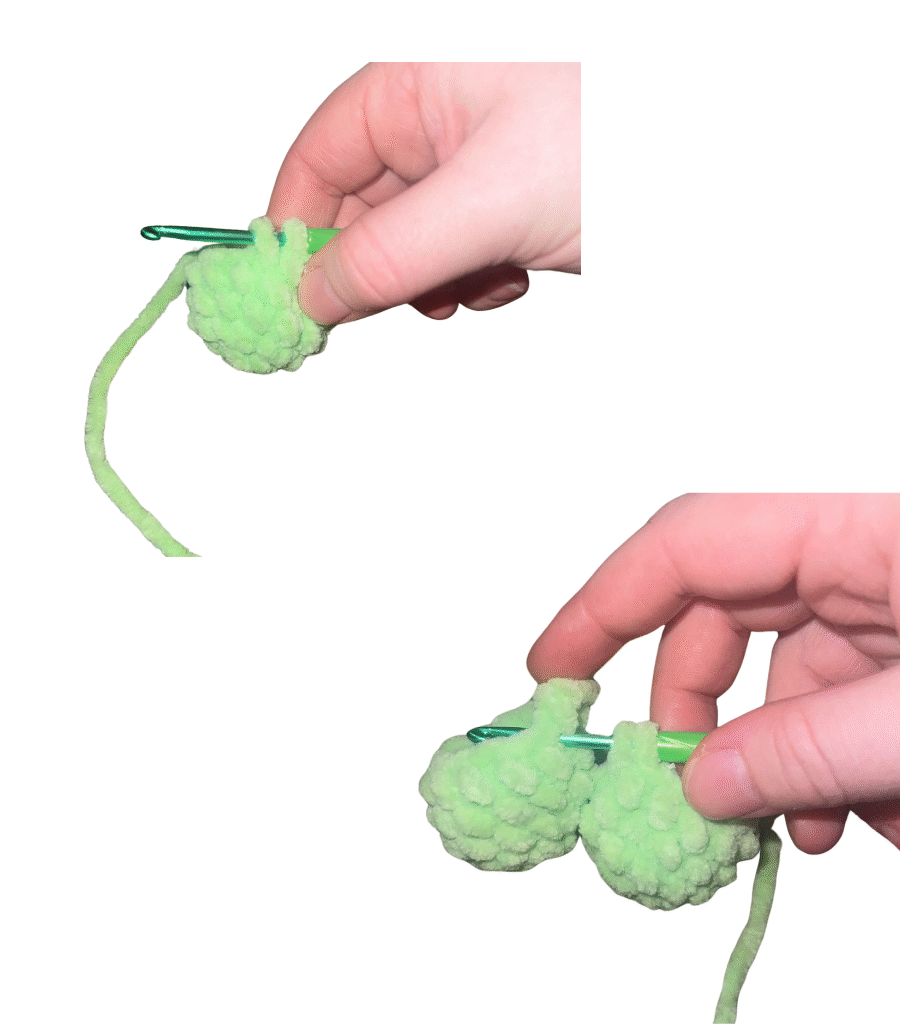
LEGS
Make two.
in caramel
Round 1. 4 sc into mc (4)
Round 2. (inc) x4 (8)
Rounds 3-6. 4 rounds of 8 sc
Round 7. (2 sc, dec) x2 (6)
Lightly stuff the foot, continue to stuff every 2 rounds going forward
Rounds 8-19. 12 rounds of 6 sc
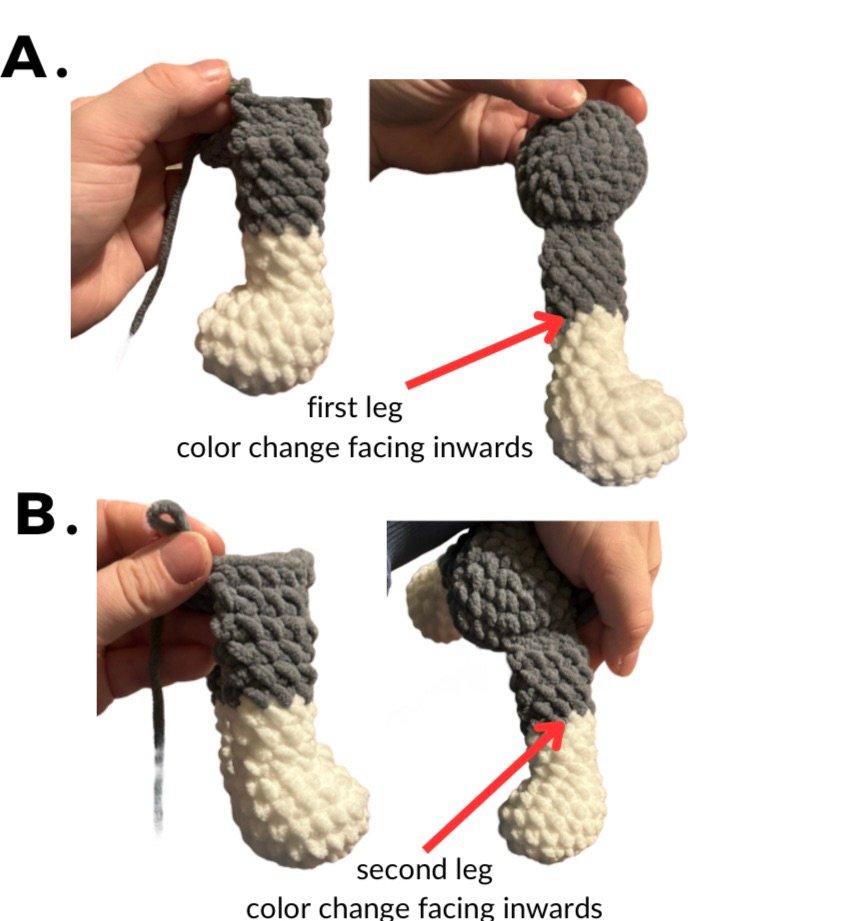
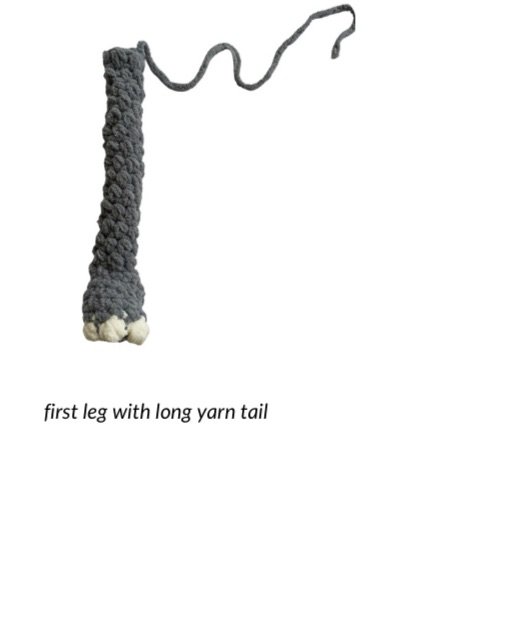
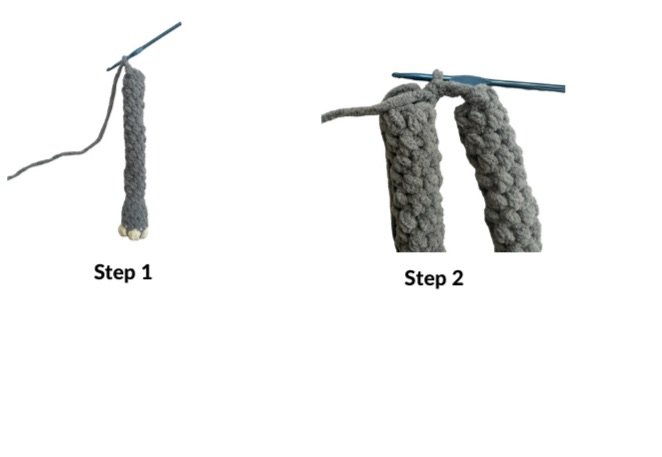
F/O the first leg only, do not fasten off the second.
Leave a long yarn tail. You’ll use it to sew up the hole in between the legs later on
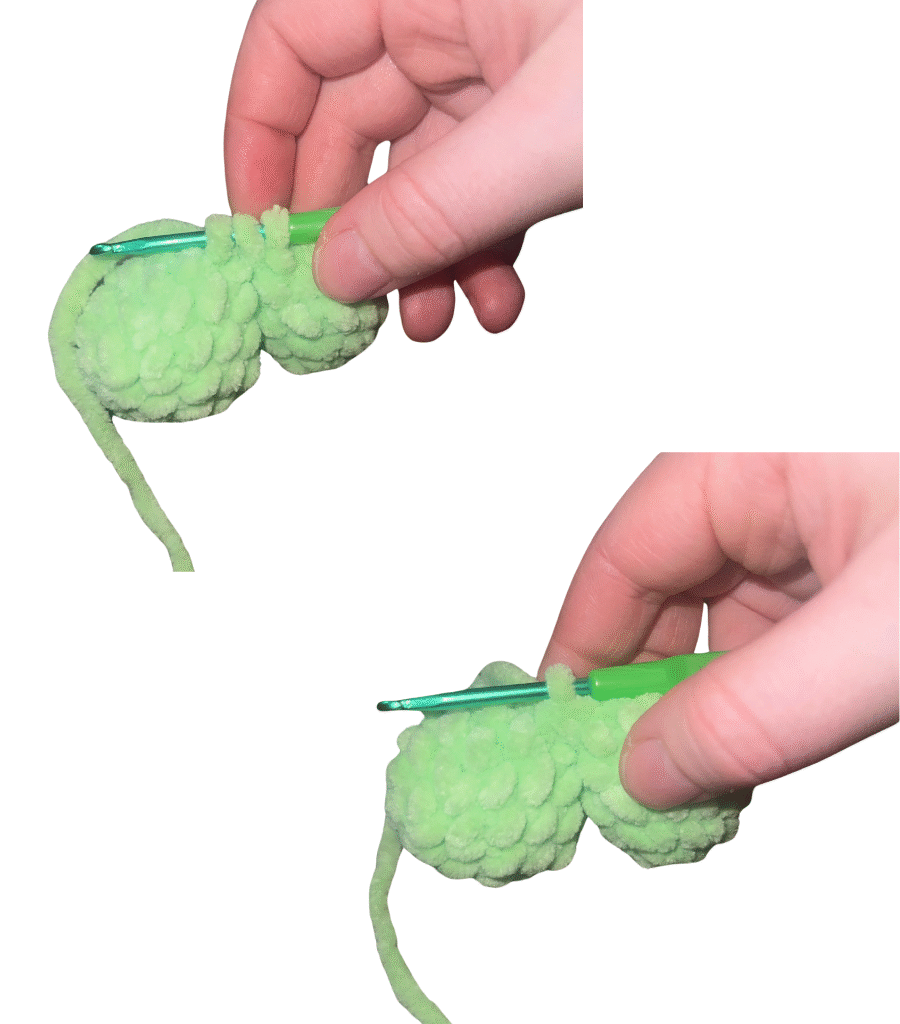
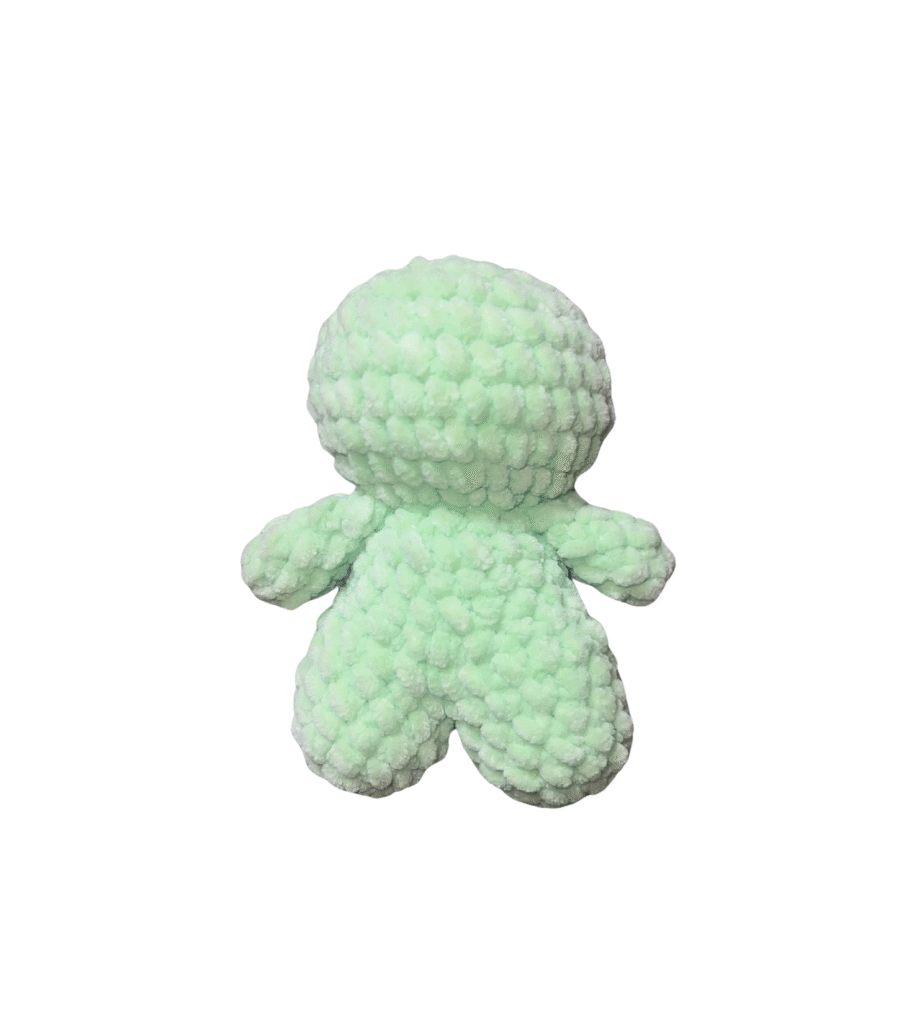
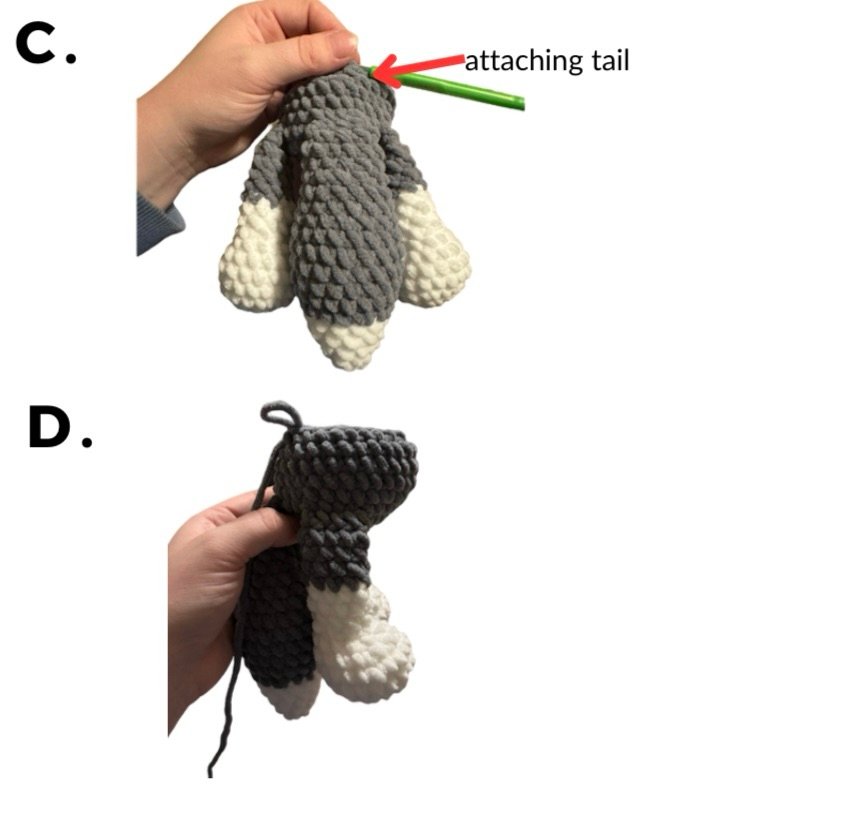
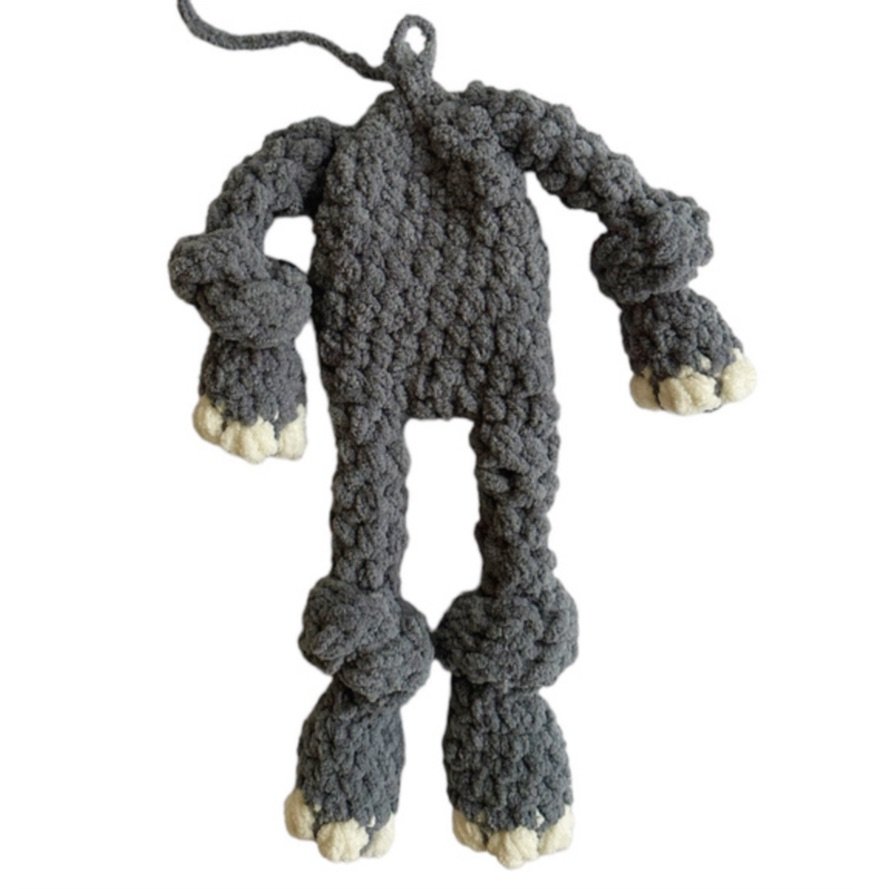
BODY
in caramel
Round 1. ch 3, connect the first leg to the second leg with: 1 sc, 5 more sc around the second leg, 3 sc into the ch, 6 sc around first leg, 3 sc into the ch (18)
Rounds 2-5. 4 rounds of 18 sc
stuff + shape
sew hole closed between legs now
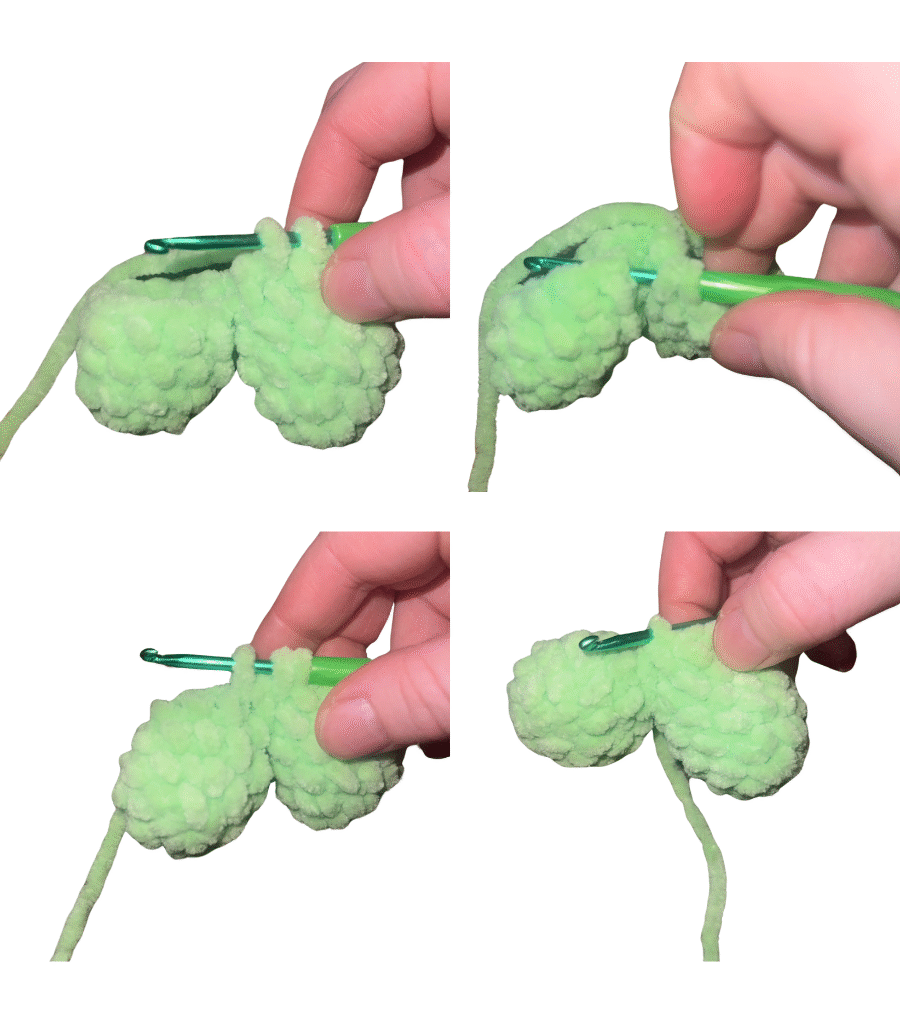
Round 6. 3 sc, dec, 7 sc, dec, 4 sc (16)
stuff + shape, continue to stuff + shape after every round
Round 7. 16 sc
Round 8. 3 sc, dec, 6 sc, dec, 3 sc (14)
Round 9. 3 sc, dec, 5 sc, dec, 2 sc (12)
In the next round you may have to adjust arm placement depending on how your work spirals- this is ok!
Round 10. 3 sc, crochet arm in with: 1 sc, dec, 3 sc, crochet arm in with: 1 sc, dec (10)
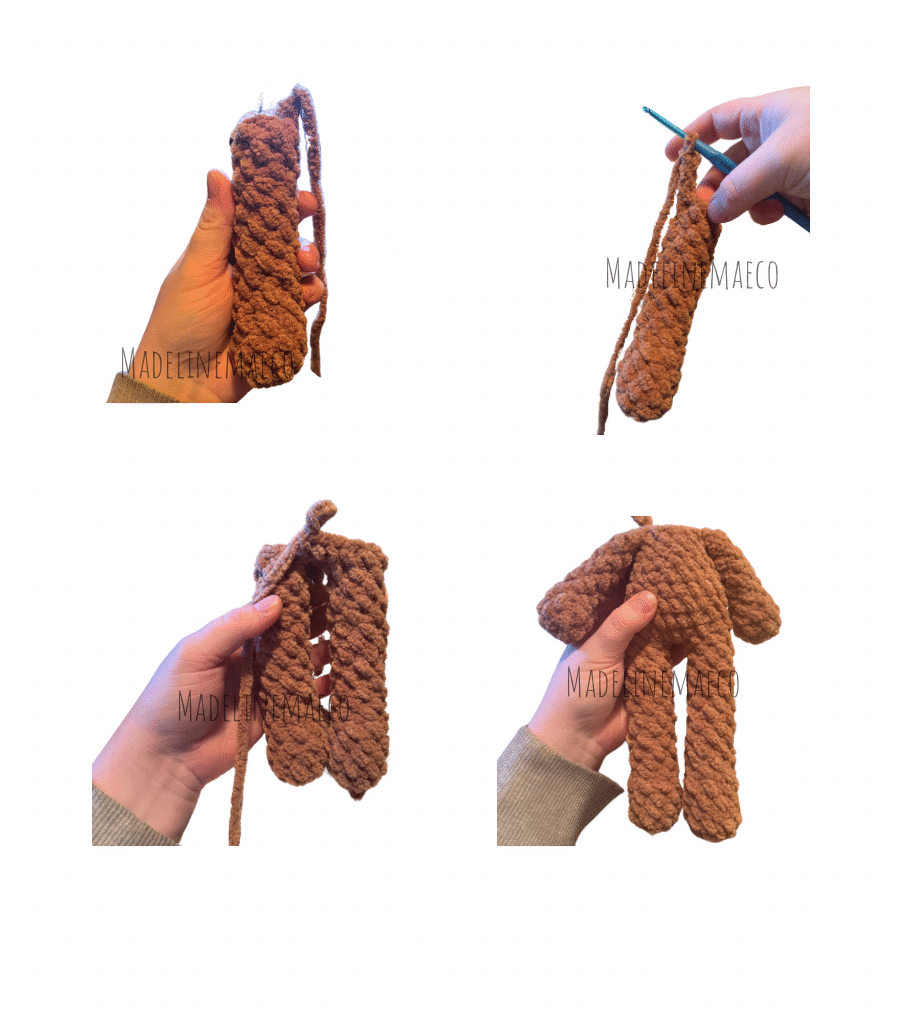
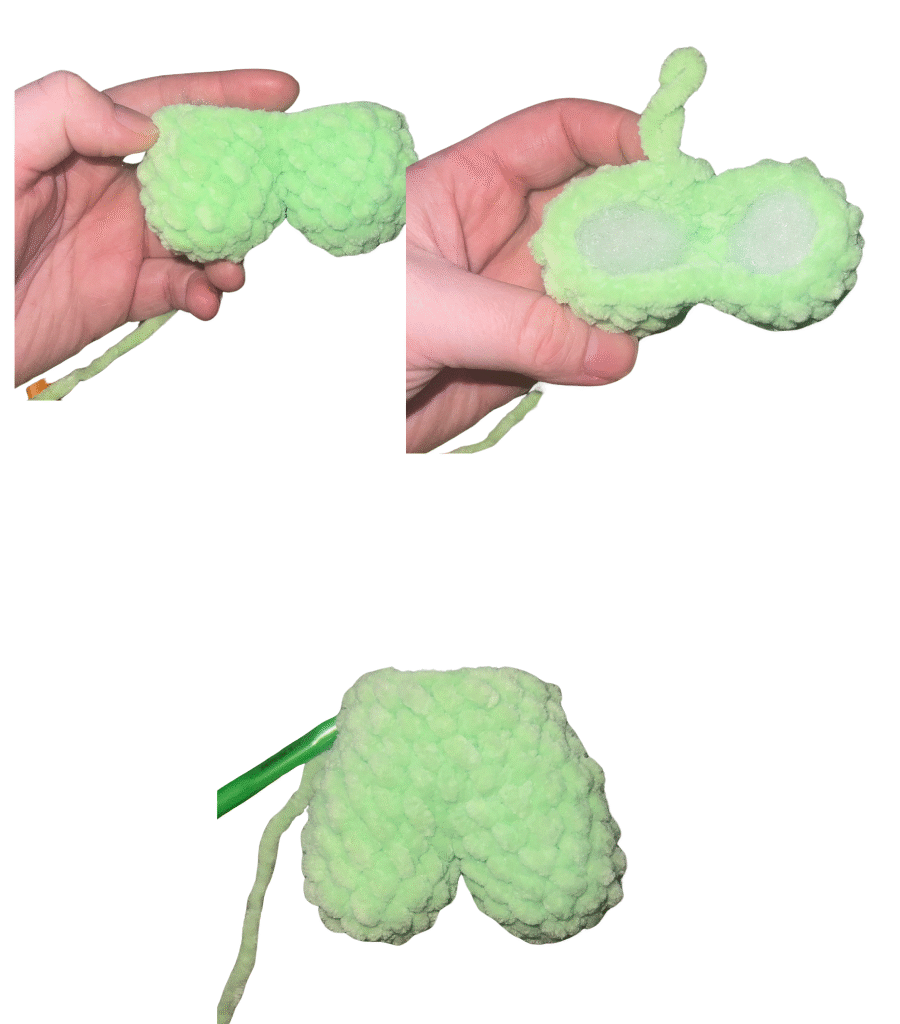
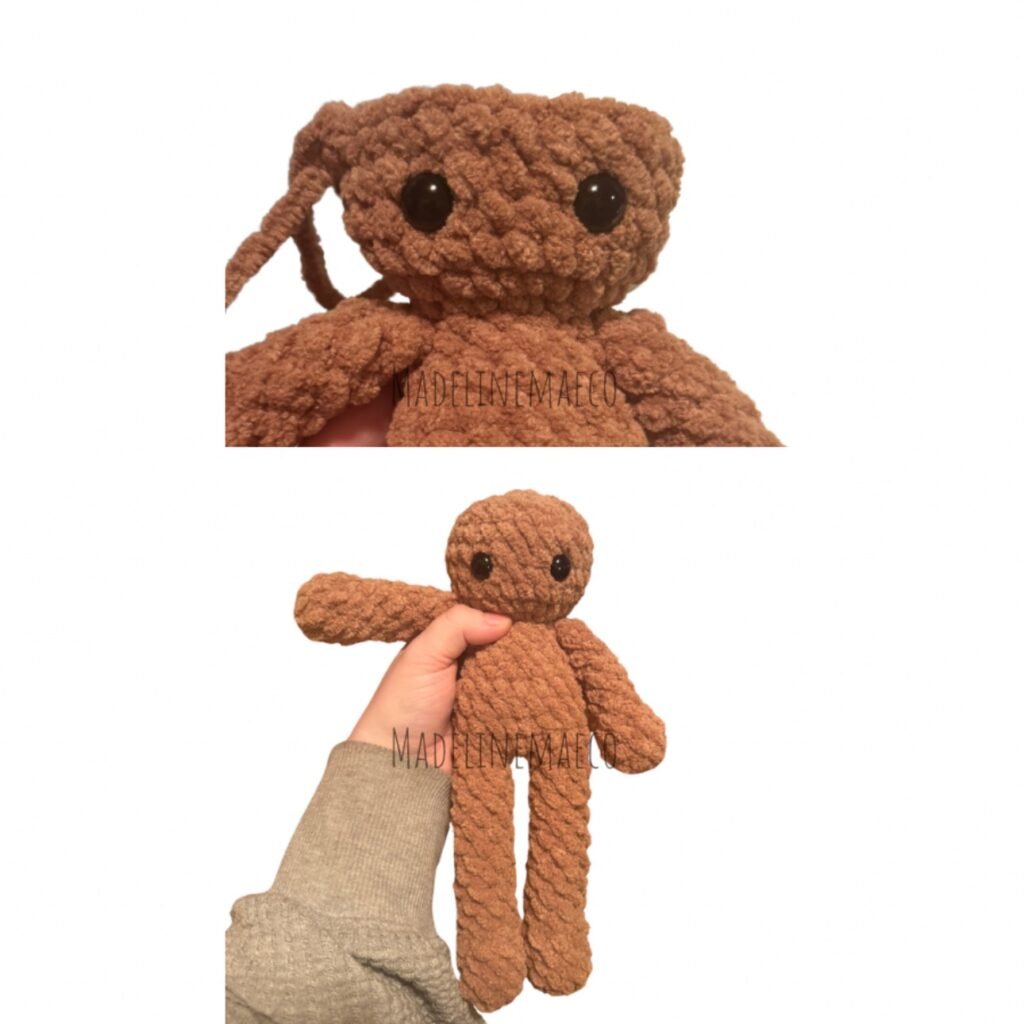
HEAD
Round 11. (inc) x10 (20)
Round 12. 3 sc, inc, 3 sc, inc, 5 sc, inc, 3 sc, inc, 2 sc (24)
Rounds 13-16. 4 rounds of 24 sc
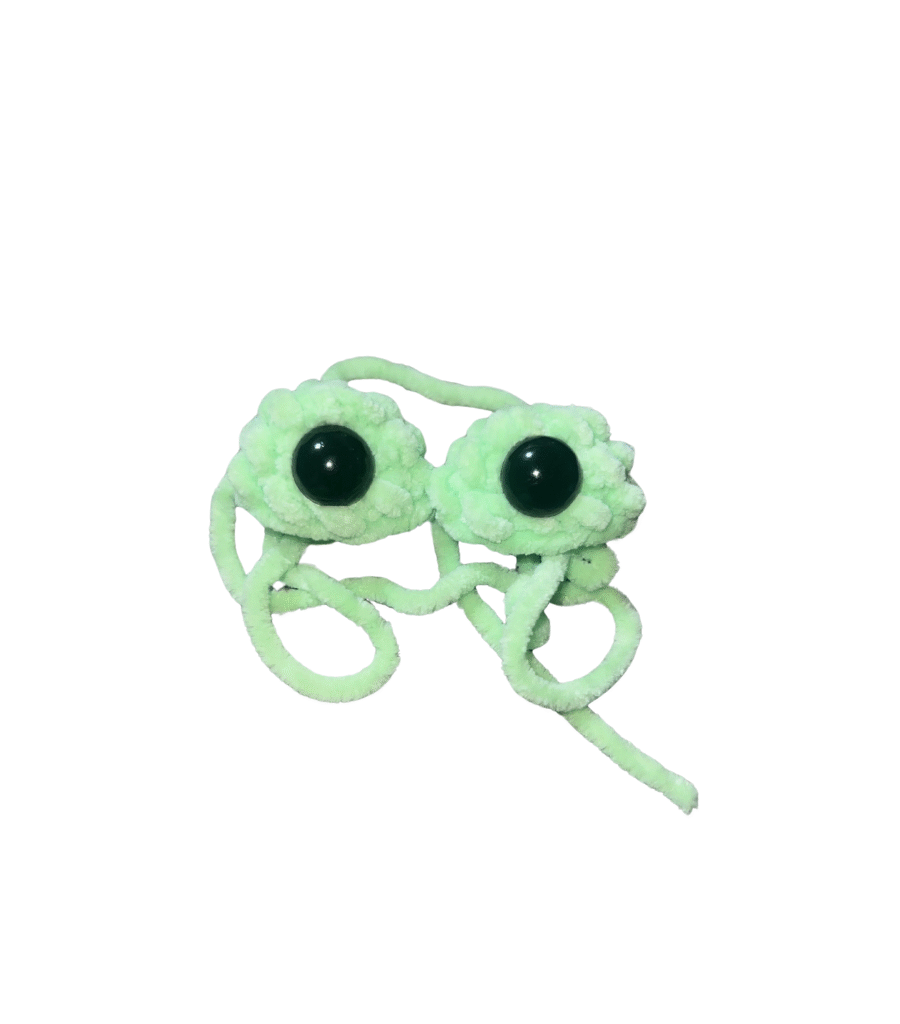
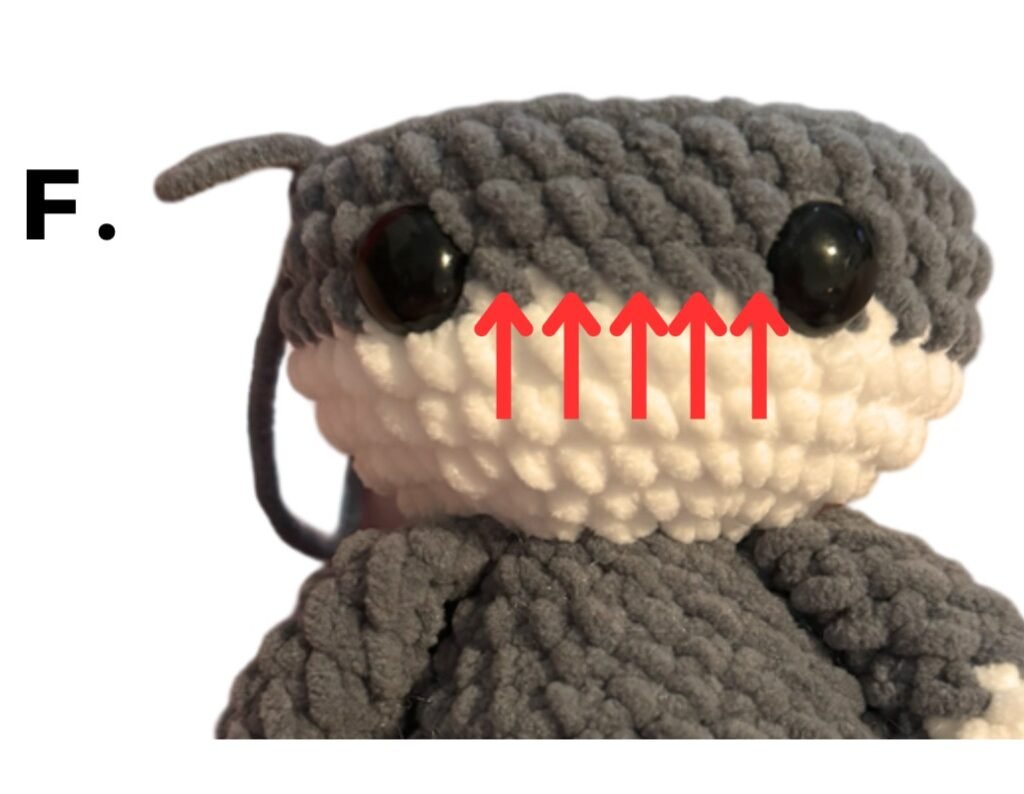
Insert safety eyes between rounds 14 + 15, about 3-4 visible stitches apart
Round 17. 3 sc, dec, 3 sc, dec, 5 sc, dec, 3 sc, dec, 2 sc (20)
Stuff and shape, continue to stuff and shape after every round
Round 18. (8 sc, dec) x2 (18)
Round 19. (1 sc, dec) x6 (12)
Round 20. (dec) x6 (6)
F/O, close. Weave in ends.
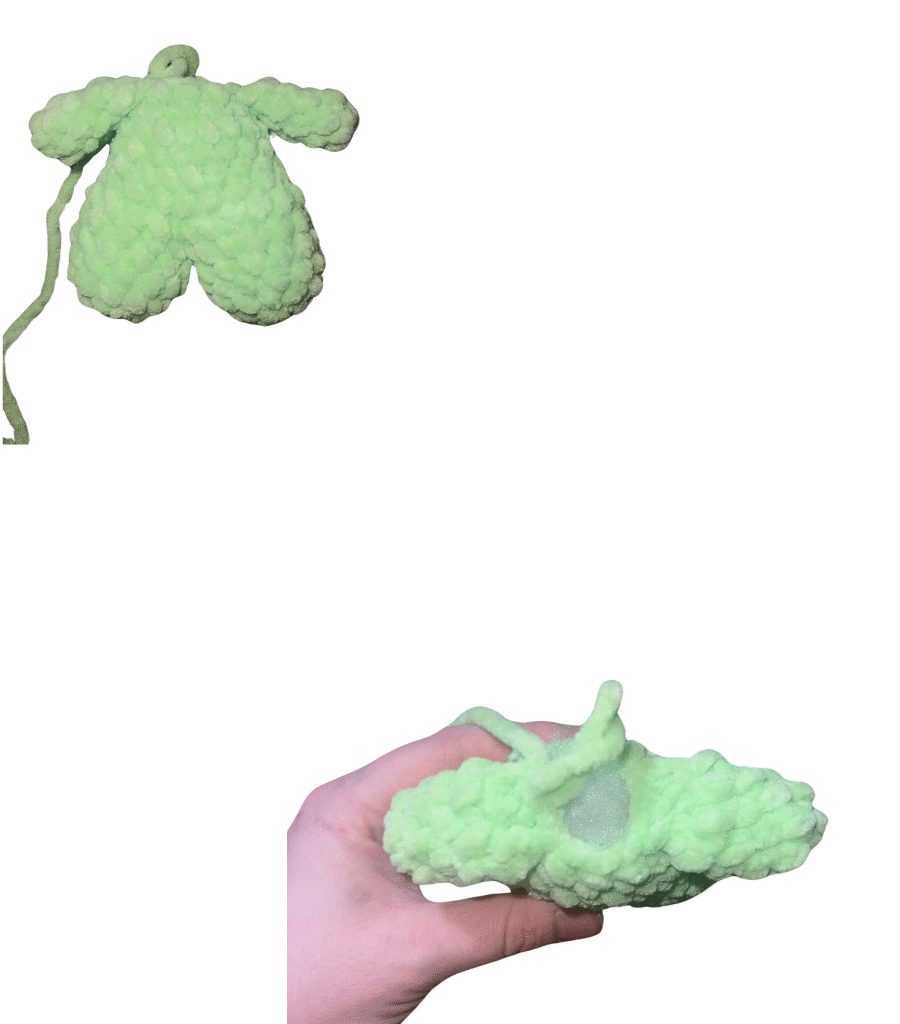
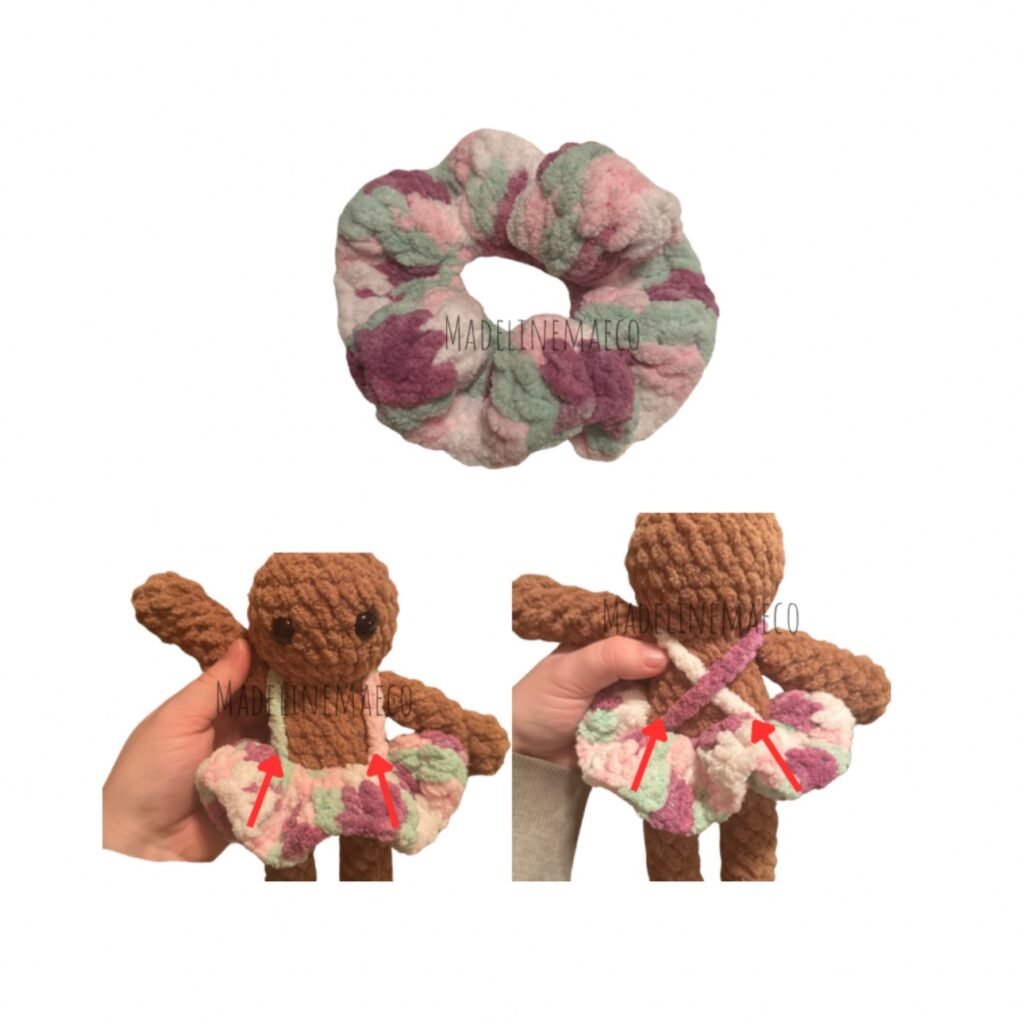
DRESS
in anemone
Round 1. ch 24, before joining: check to make sure your chain will fit around the bunnies waist- if not change your tension OR go down a hook size. If you need to chain more or less this is ok- just follow the construction of the pattern – slst to 1 st ch to join into the round, make sure the chain isn’t twisted when joining.
Round 2. ch 2, 2 hdc in same stitch as ch 2, 3 hdc in each ch around
Round 3. slst to join, ch 2, hdc around
F/O. Weave in ends.
ADDING STRAPS
Place the skirt portion around the bunnies waist, slst into the front of the skirt, close to where the arm lays and ch however many needed to get to the back of the dress, slst into the back of the dress, you will be crisscrossing the straps in the back. F/O first strap and weave in your ends. Repeat once more for second strap.
BOW
in anemone
Row 1. ch 7, starting in the 2nd ch from the hook: 6 hdc down the ch, ch 1
Row 2. turn your work, 6 hdc
F/O. Weave in ends.
Cut off a long piece of the yarn you used to make the bow and tie it around the middle of the bow.

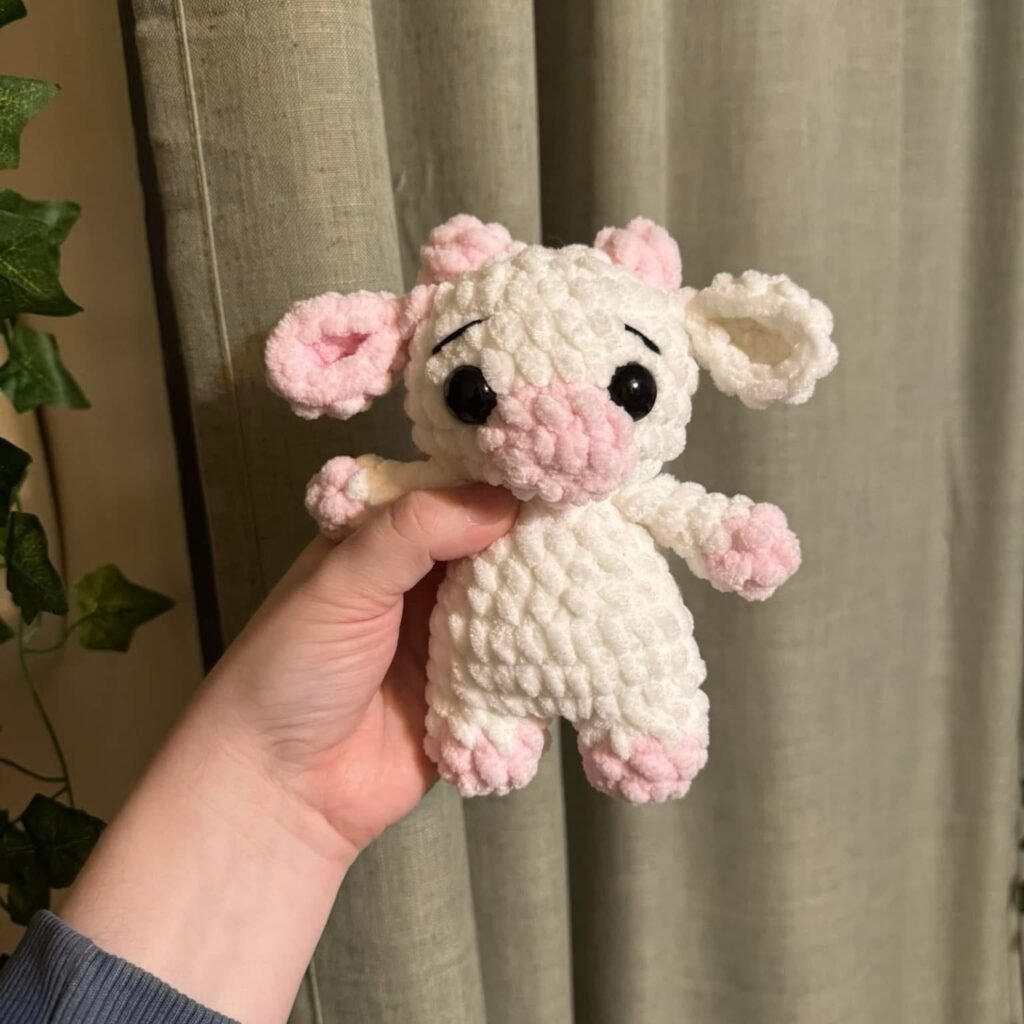
ASSEMBLY
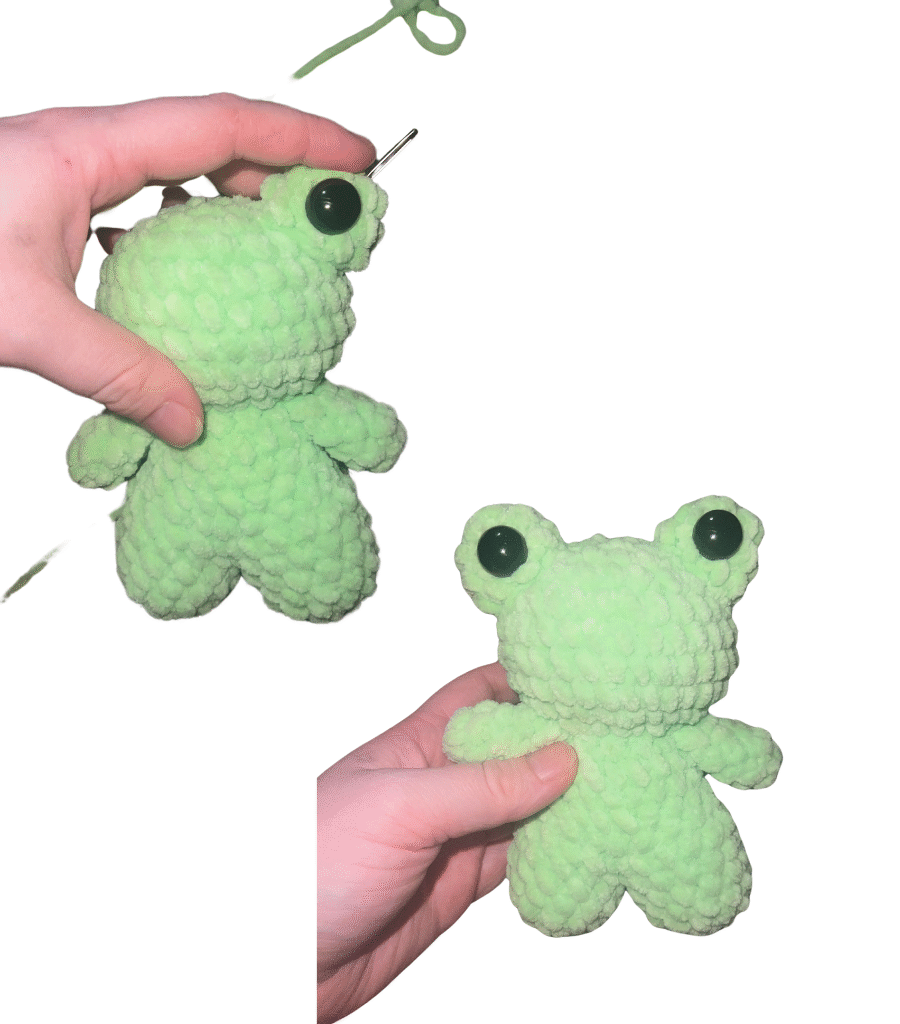
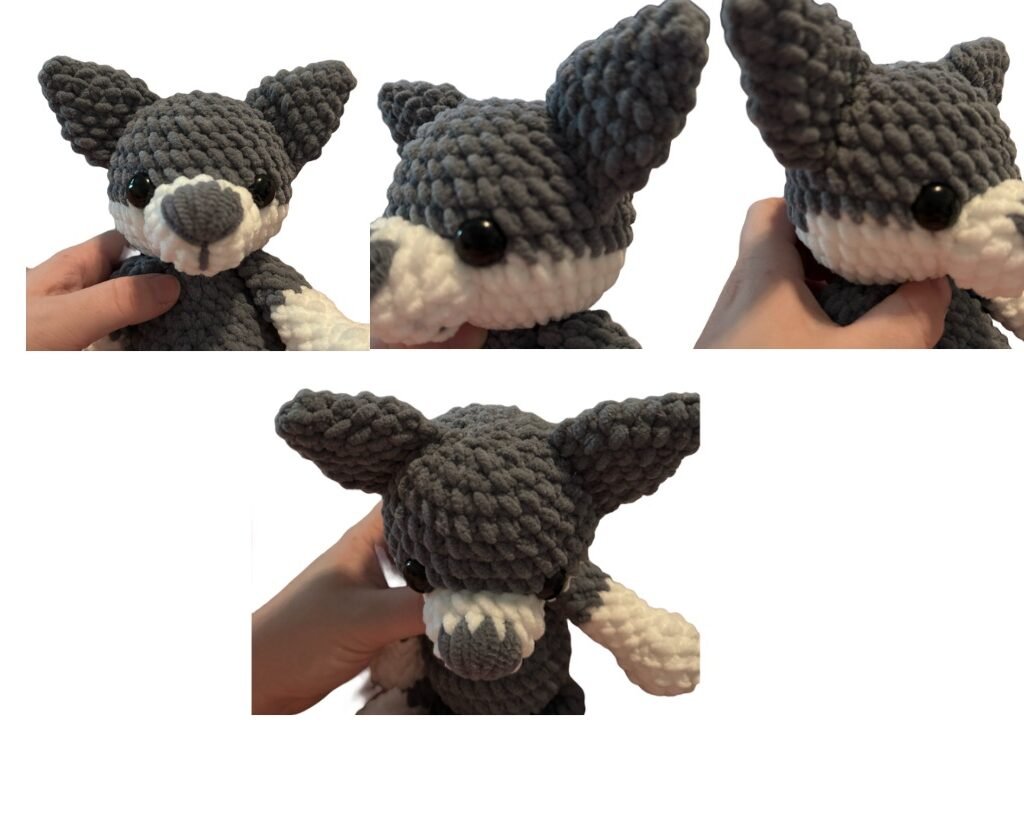
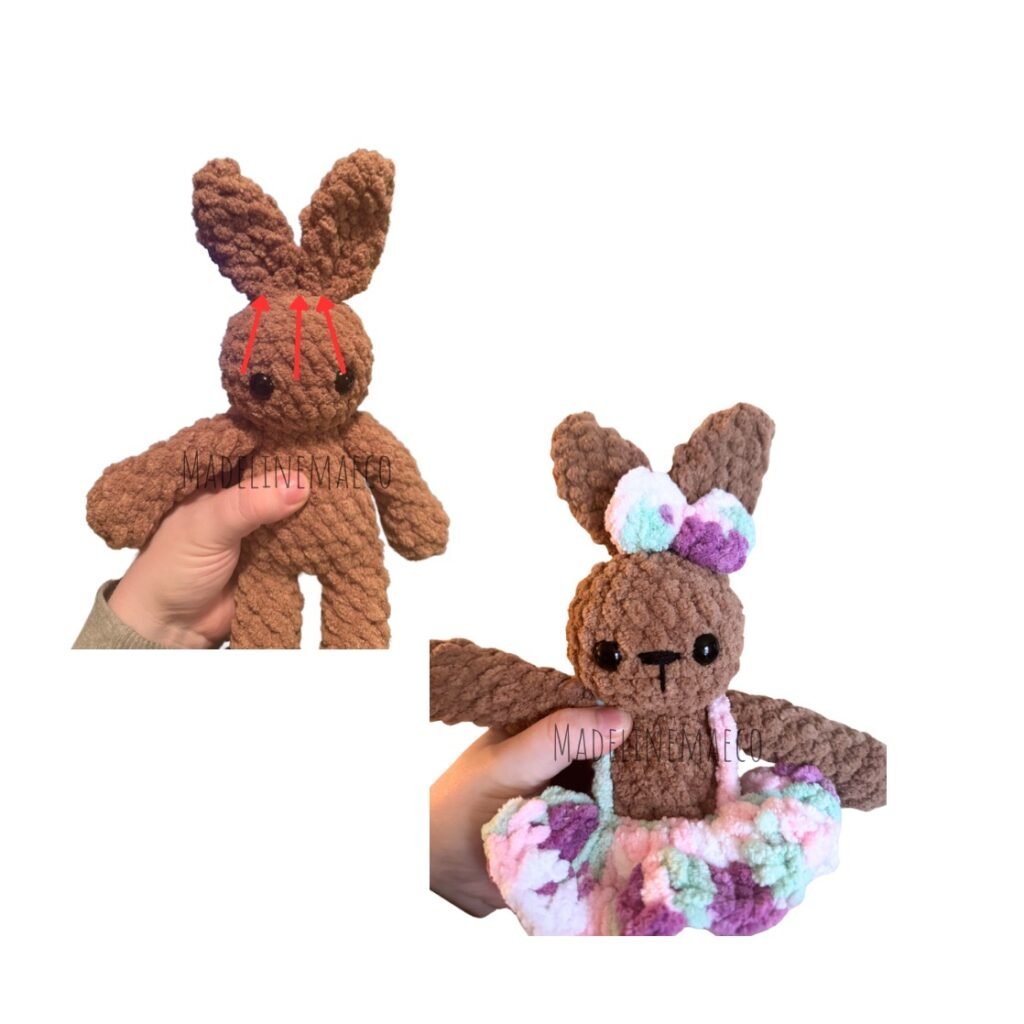
SEW each ear closed together at the bottom, you had 4 sc to close the ear and you will now be using those 4 sc to “fold” the ear closed at the bottom. you will then sew each ear to the middle of the top of the head onto round 19-20. Make sure each ear is close to touching each other.
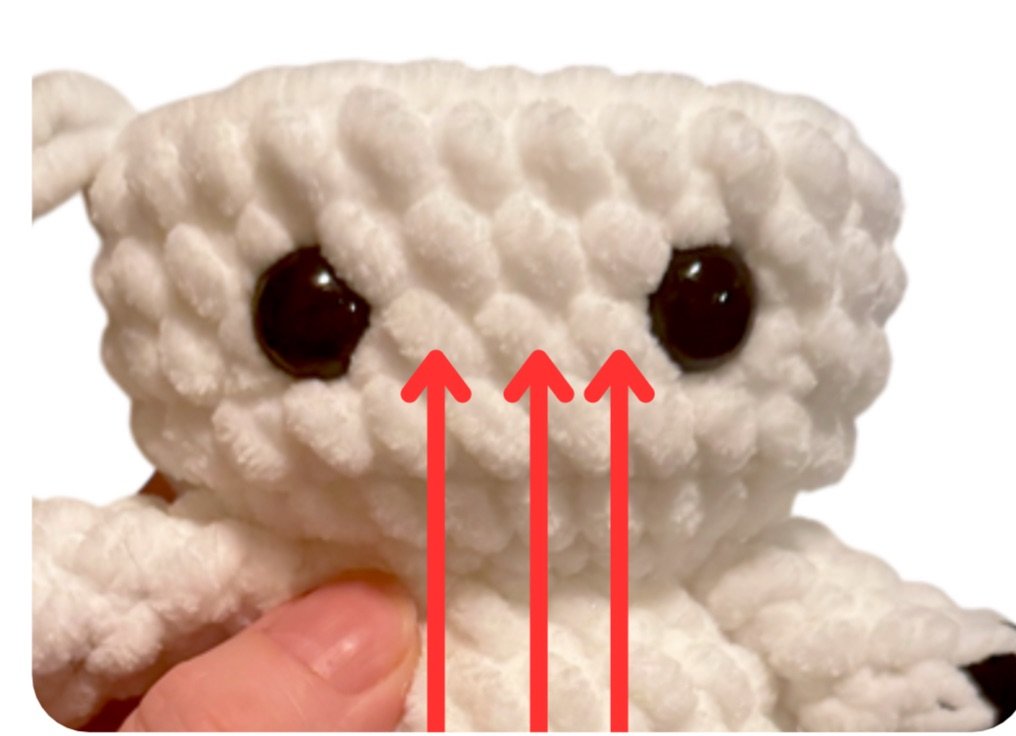
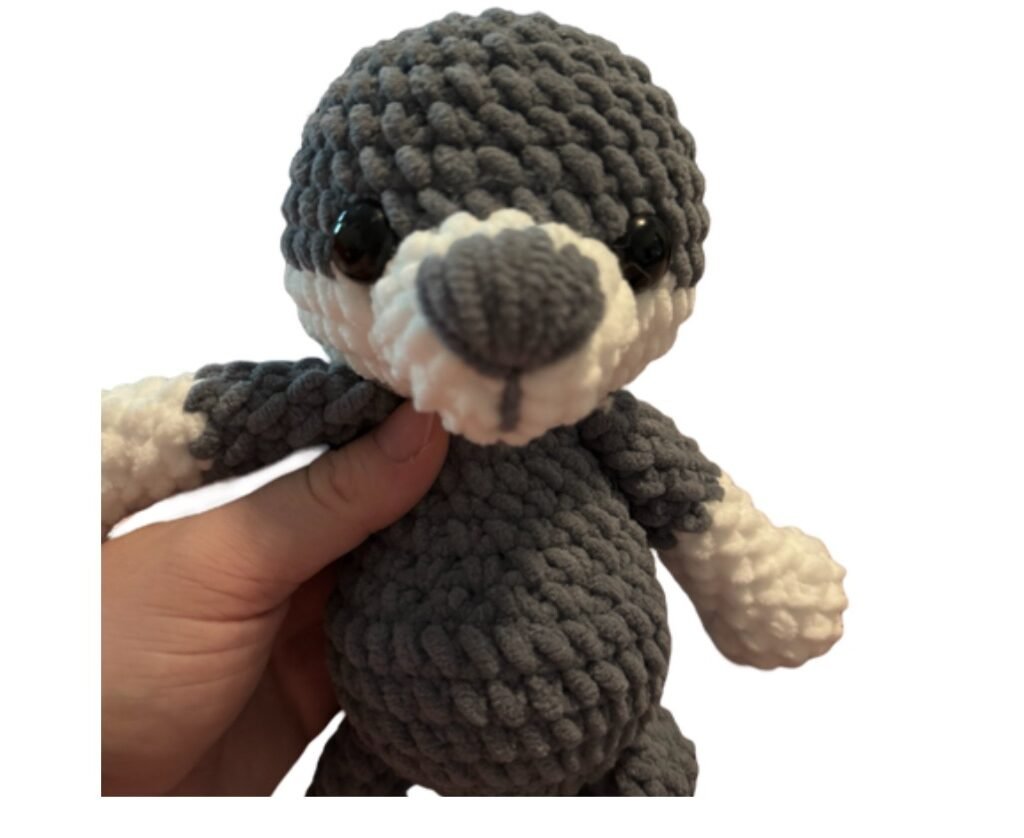
EMBROIDER on a nose and mouth with black cotton yarn, as pictured.
SEW the bow onto the head, very close to an ear.
I hope you enjoyed this pattern and found it easy to follow. I look forward to sharing more patterns with you, hope to see you soon!